Setting up a new category list template
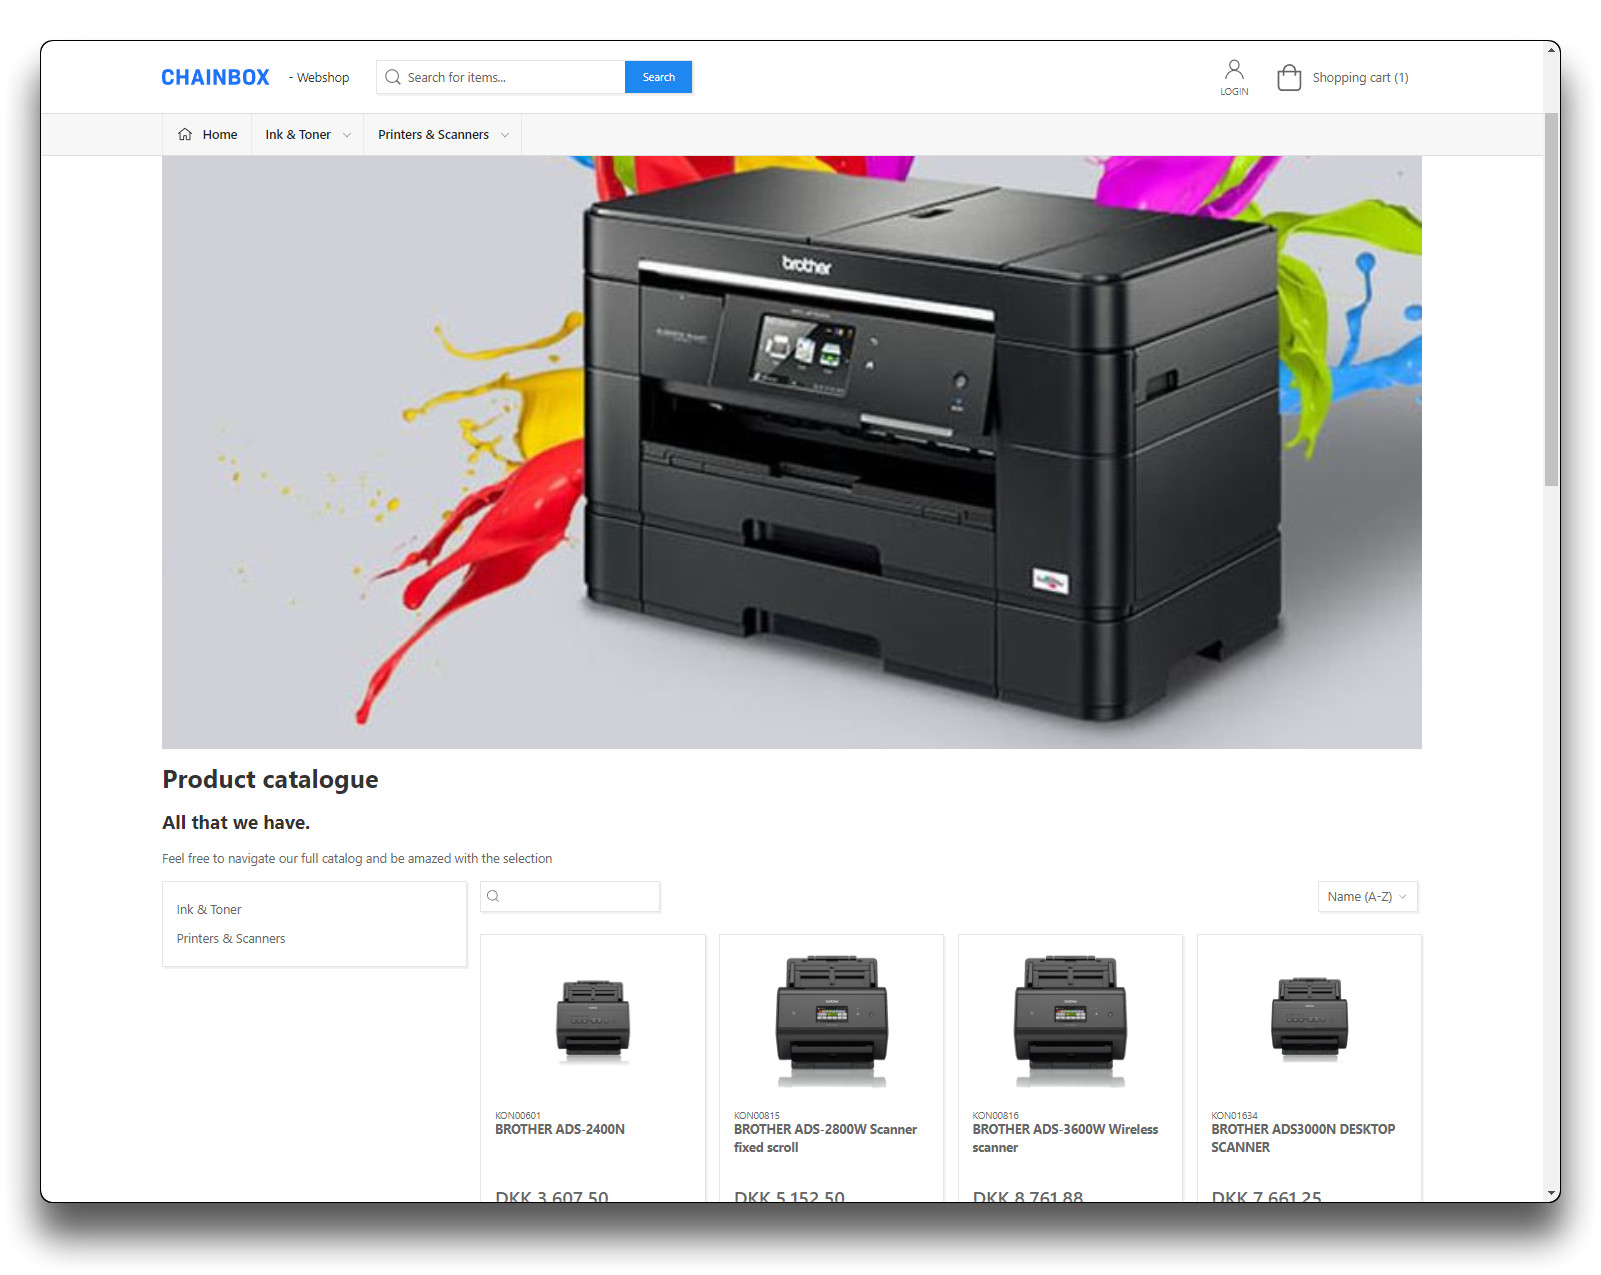
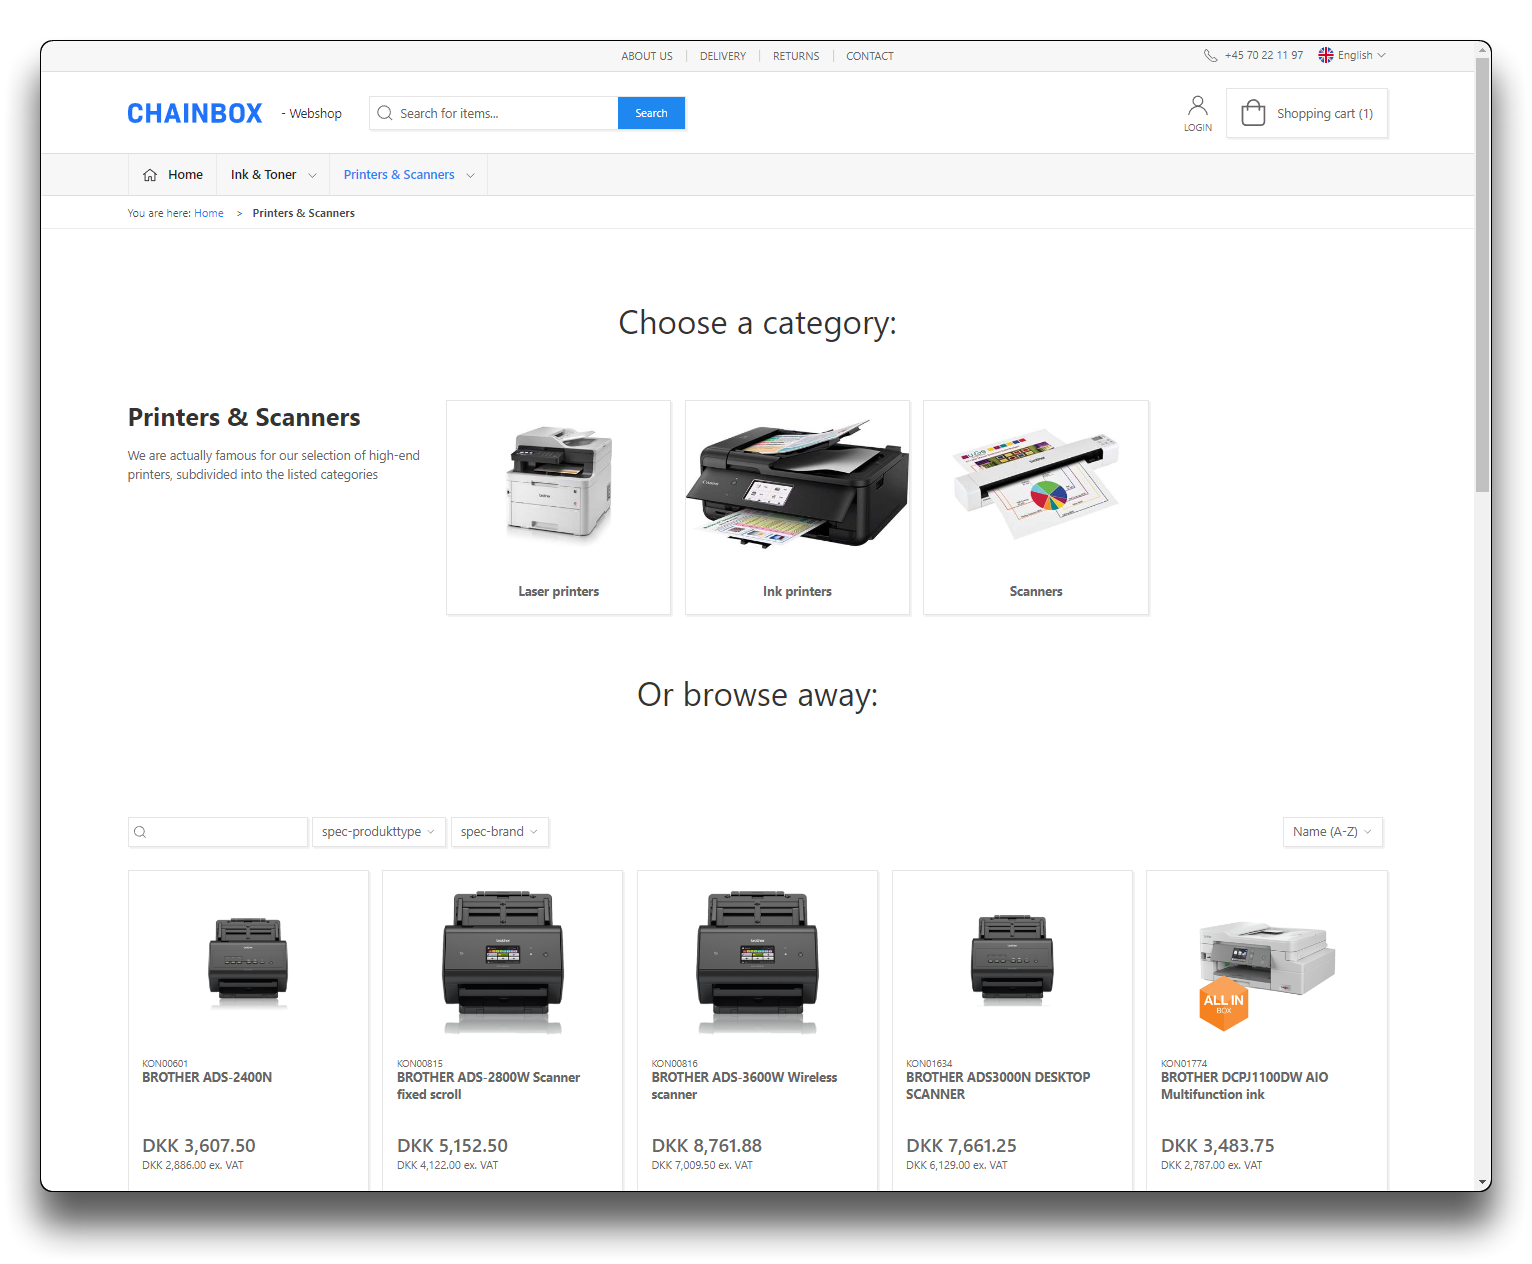
The Category list in the standard webshop is defined by a systemdefault template that is not visible and therefore cannot be altered
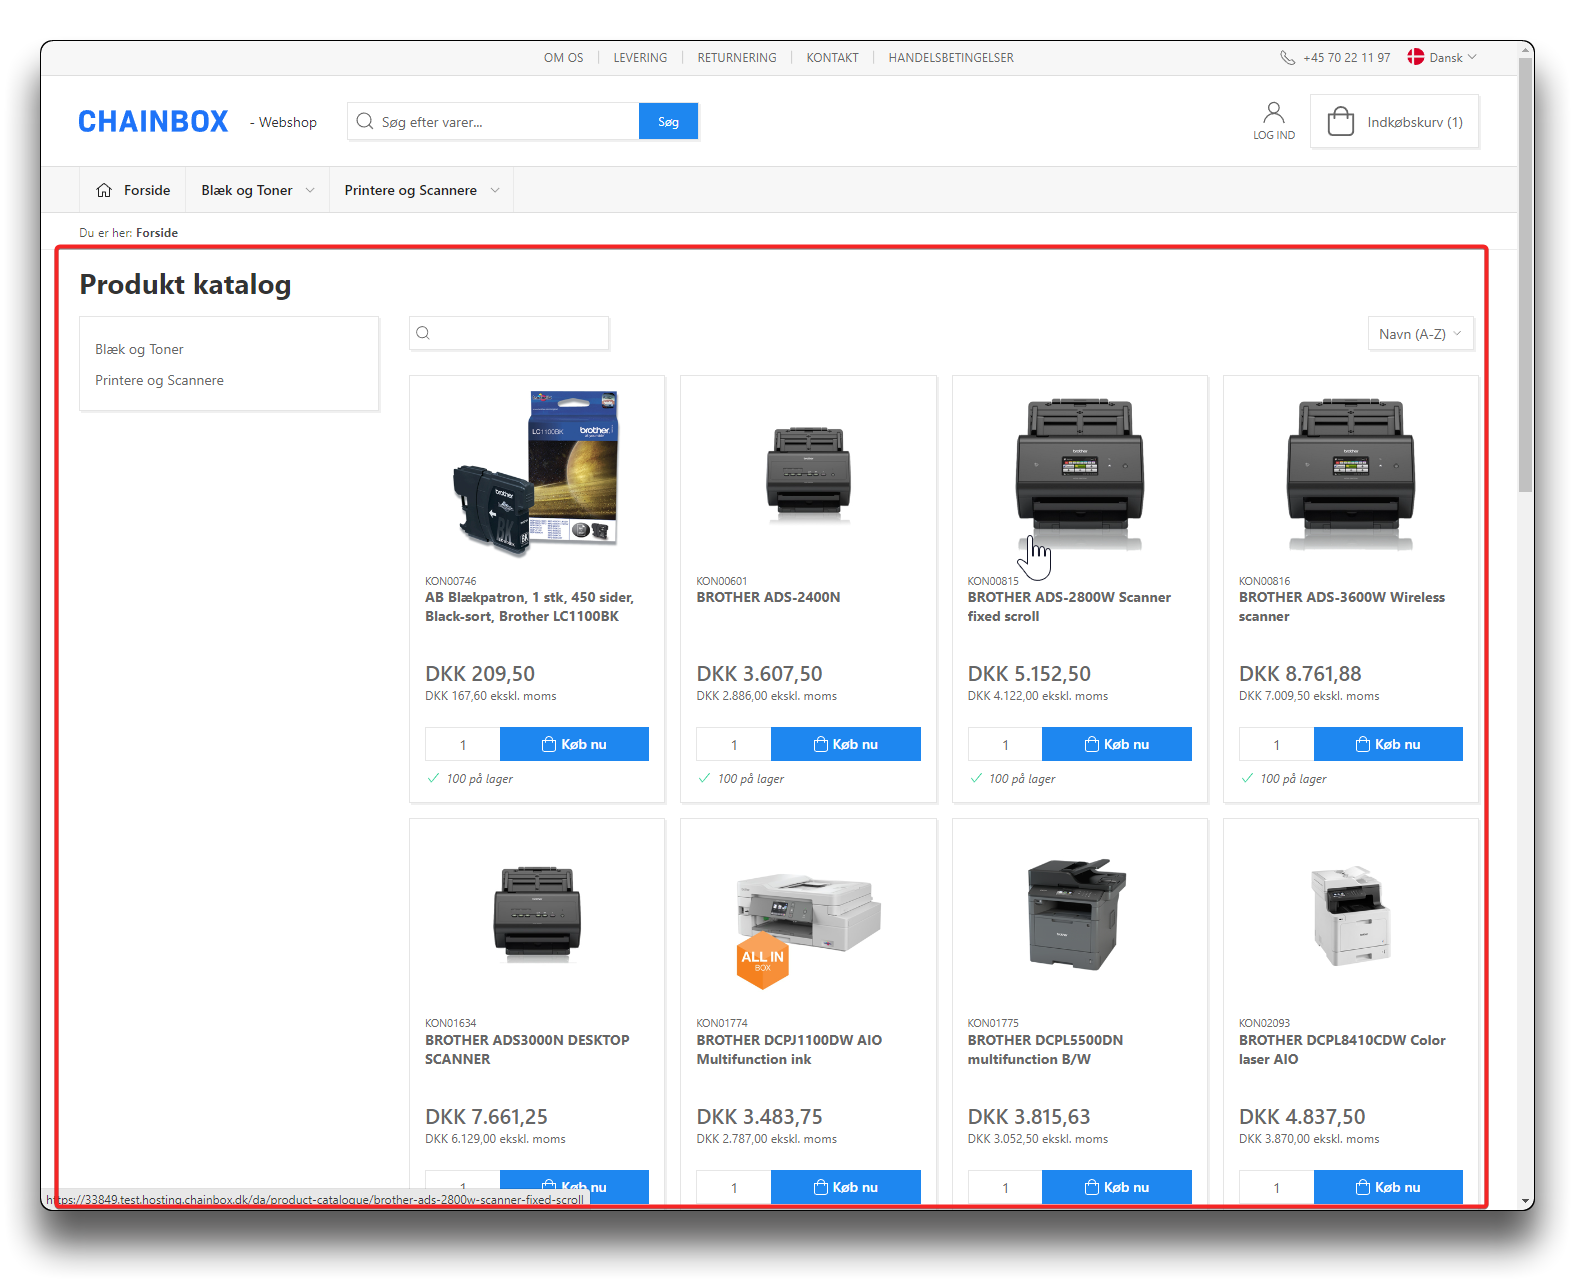
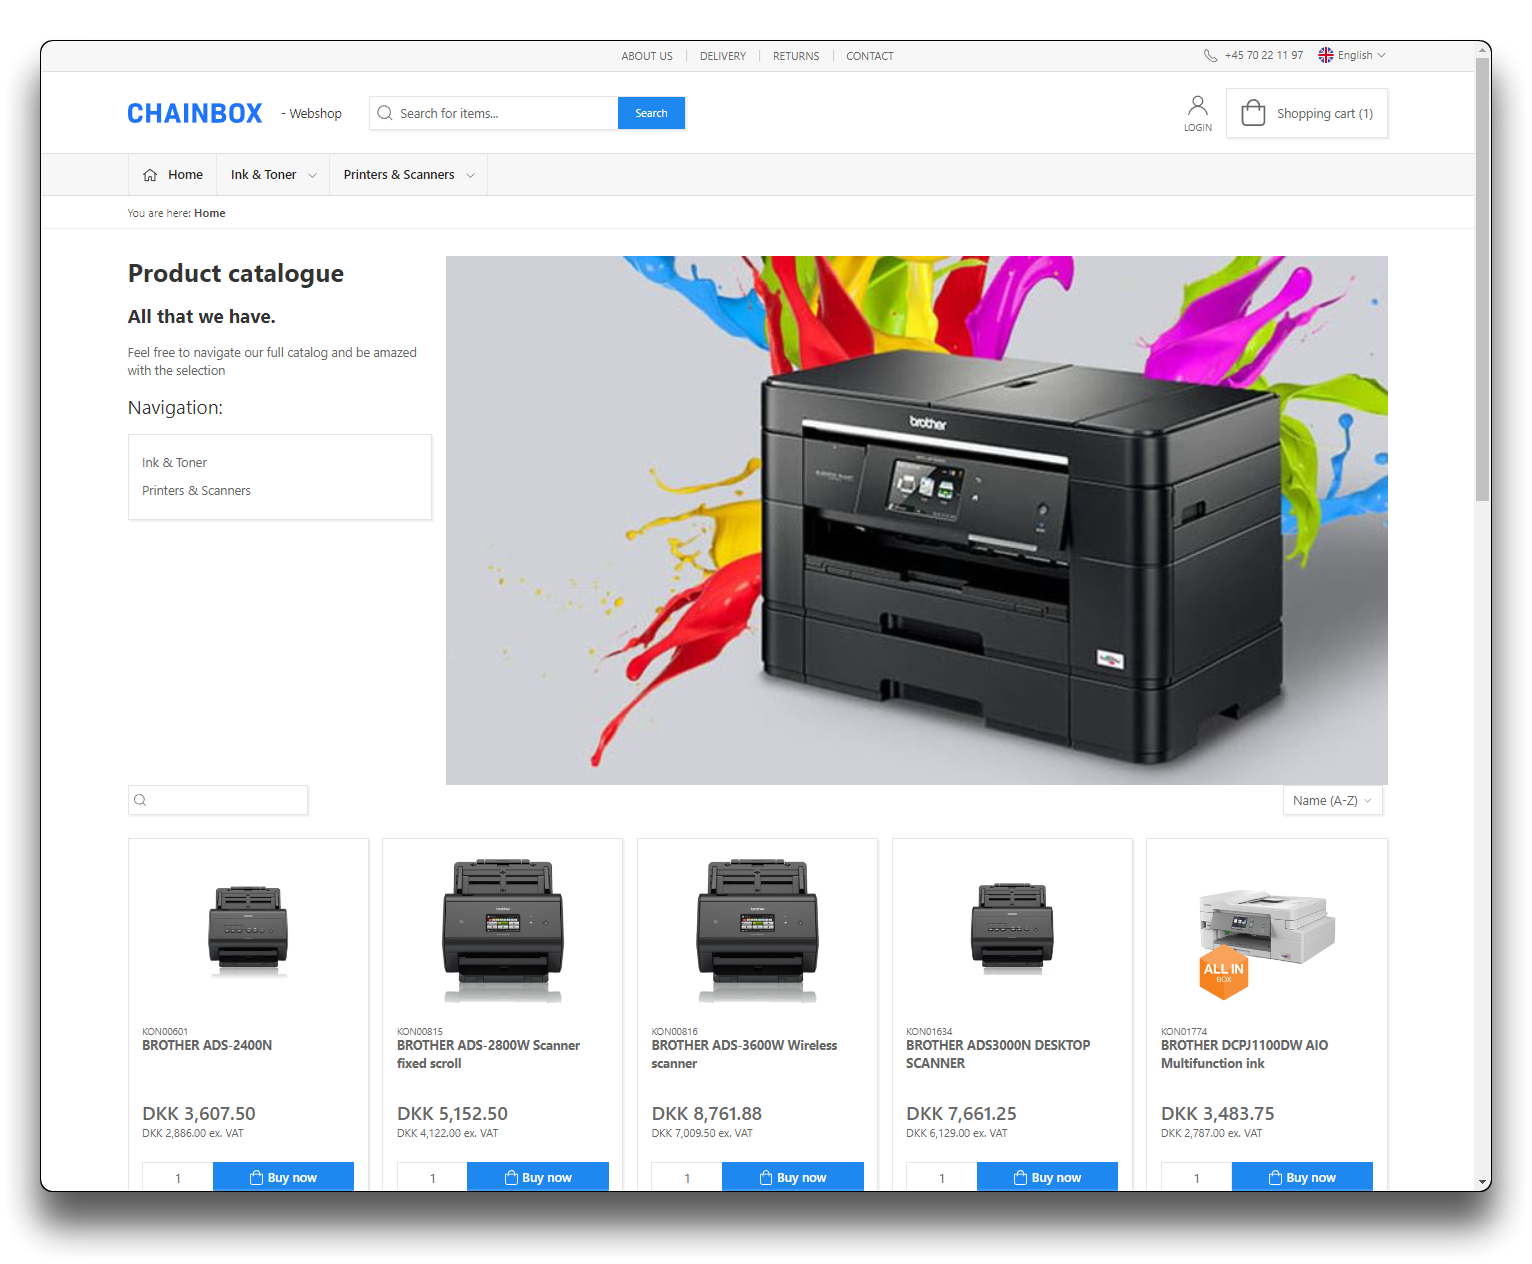
Default Category page on Webshop
System default template with no options to edit and no other options in the template drop-down list.
If you wish to defer from the default template and build your own this is done as follows:
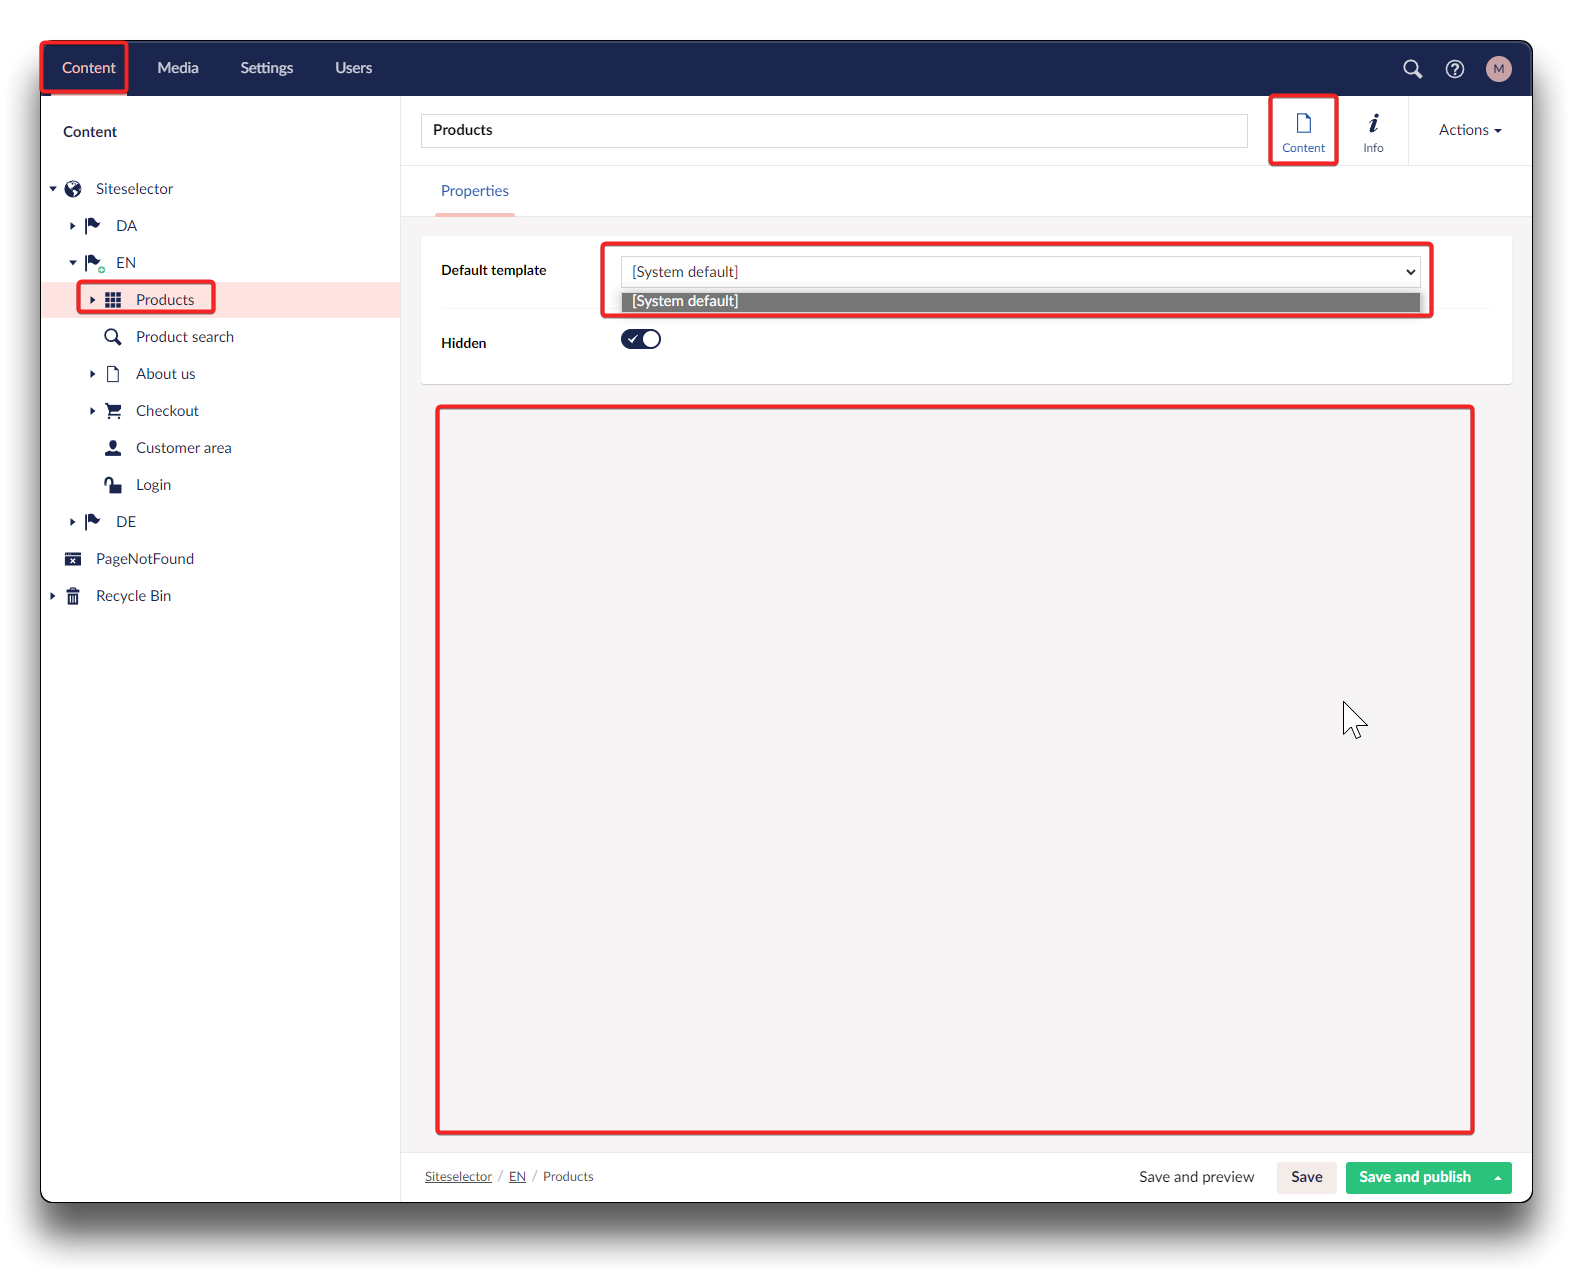
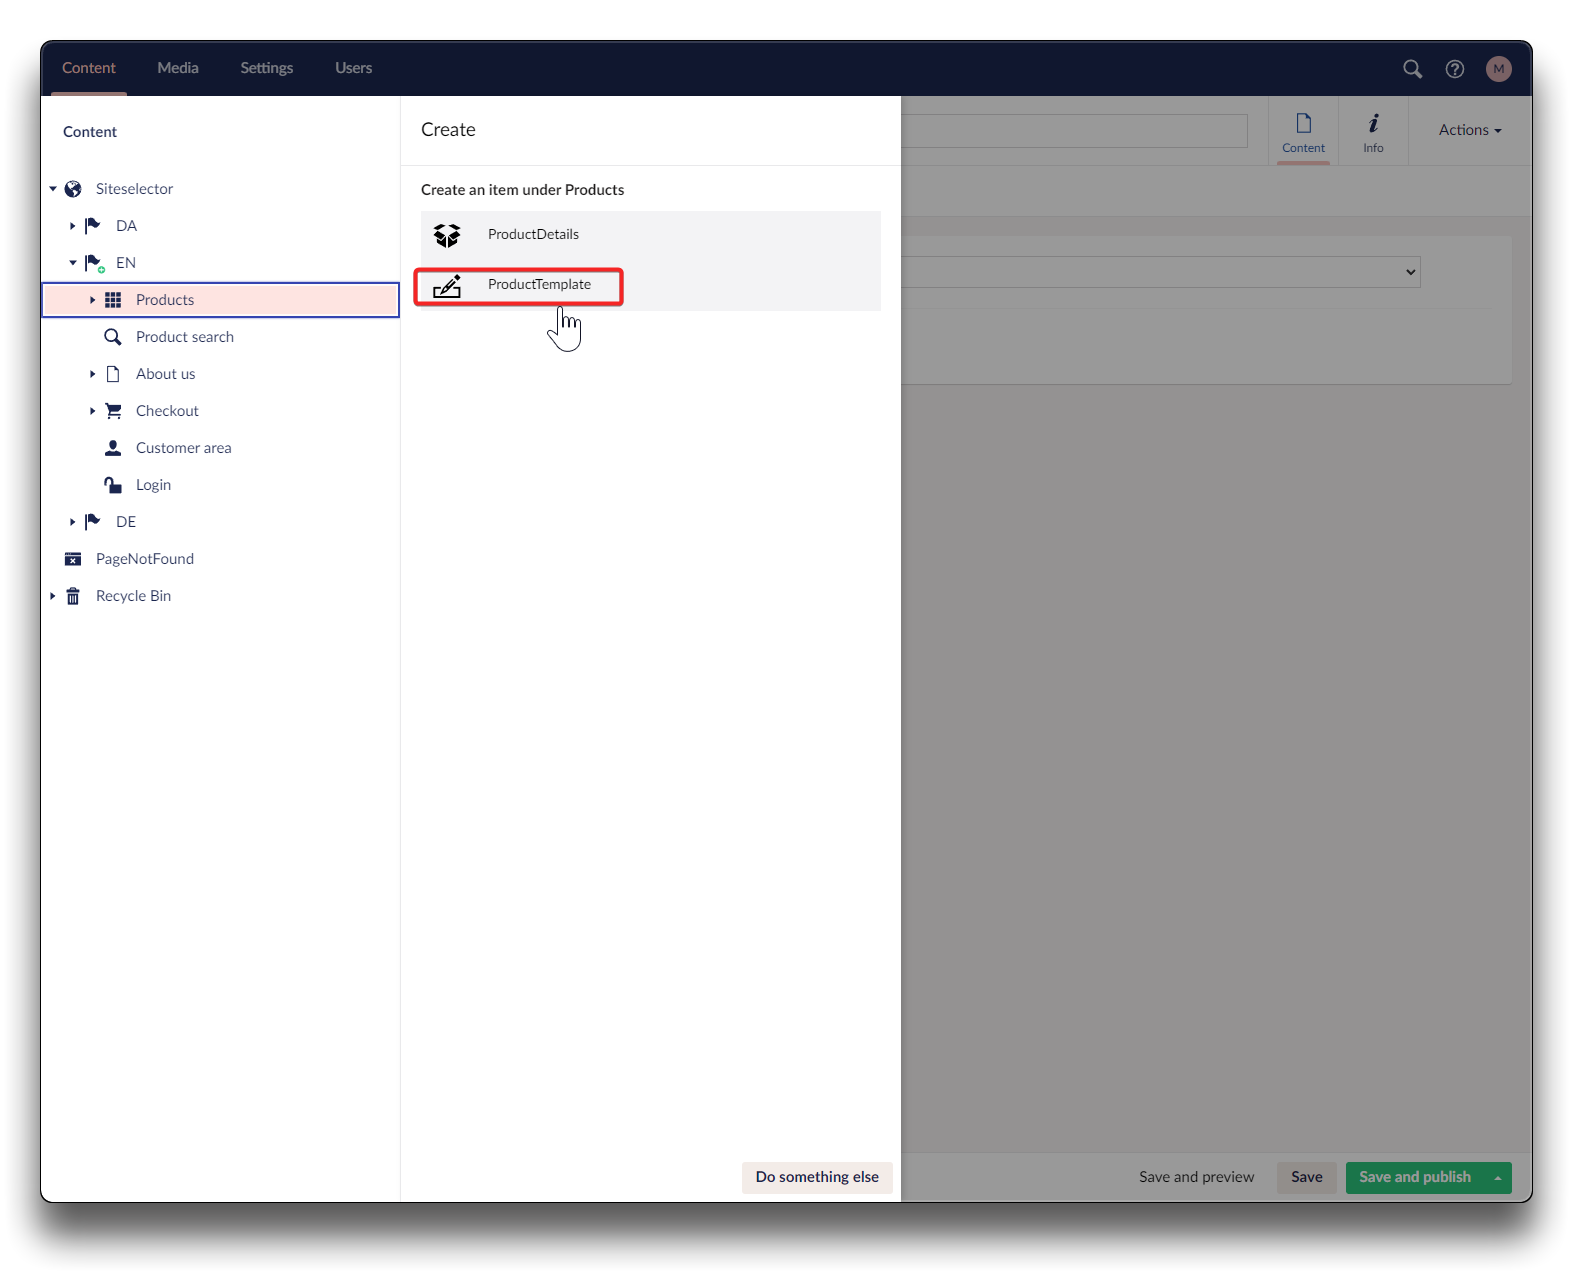
Create a new Category Template
Click the 3 dots and choose "Do something else". Click "Create"
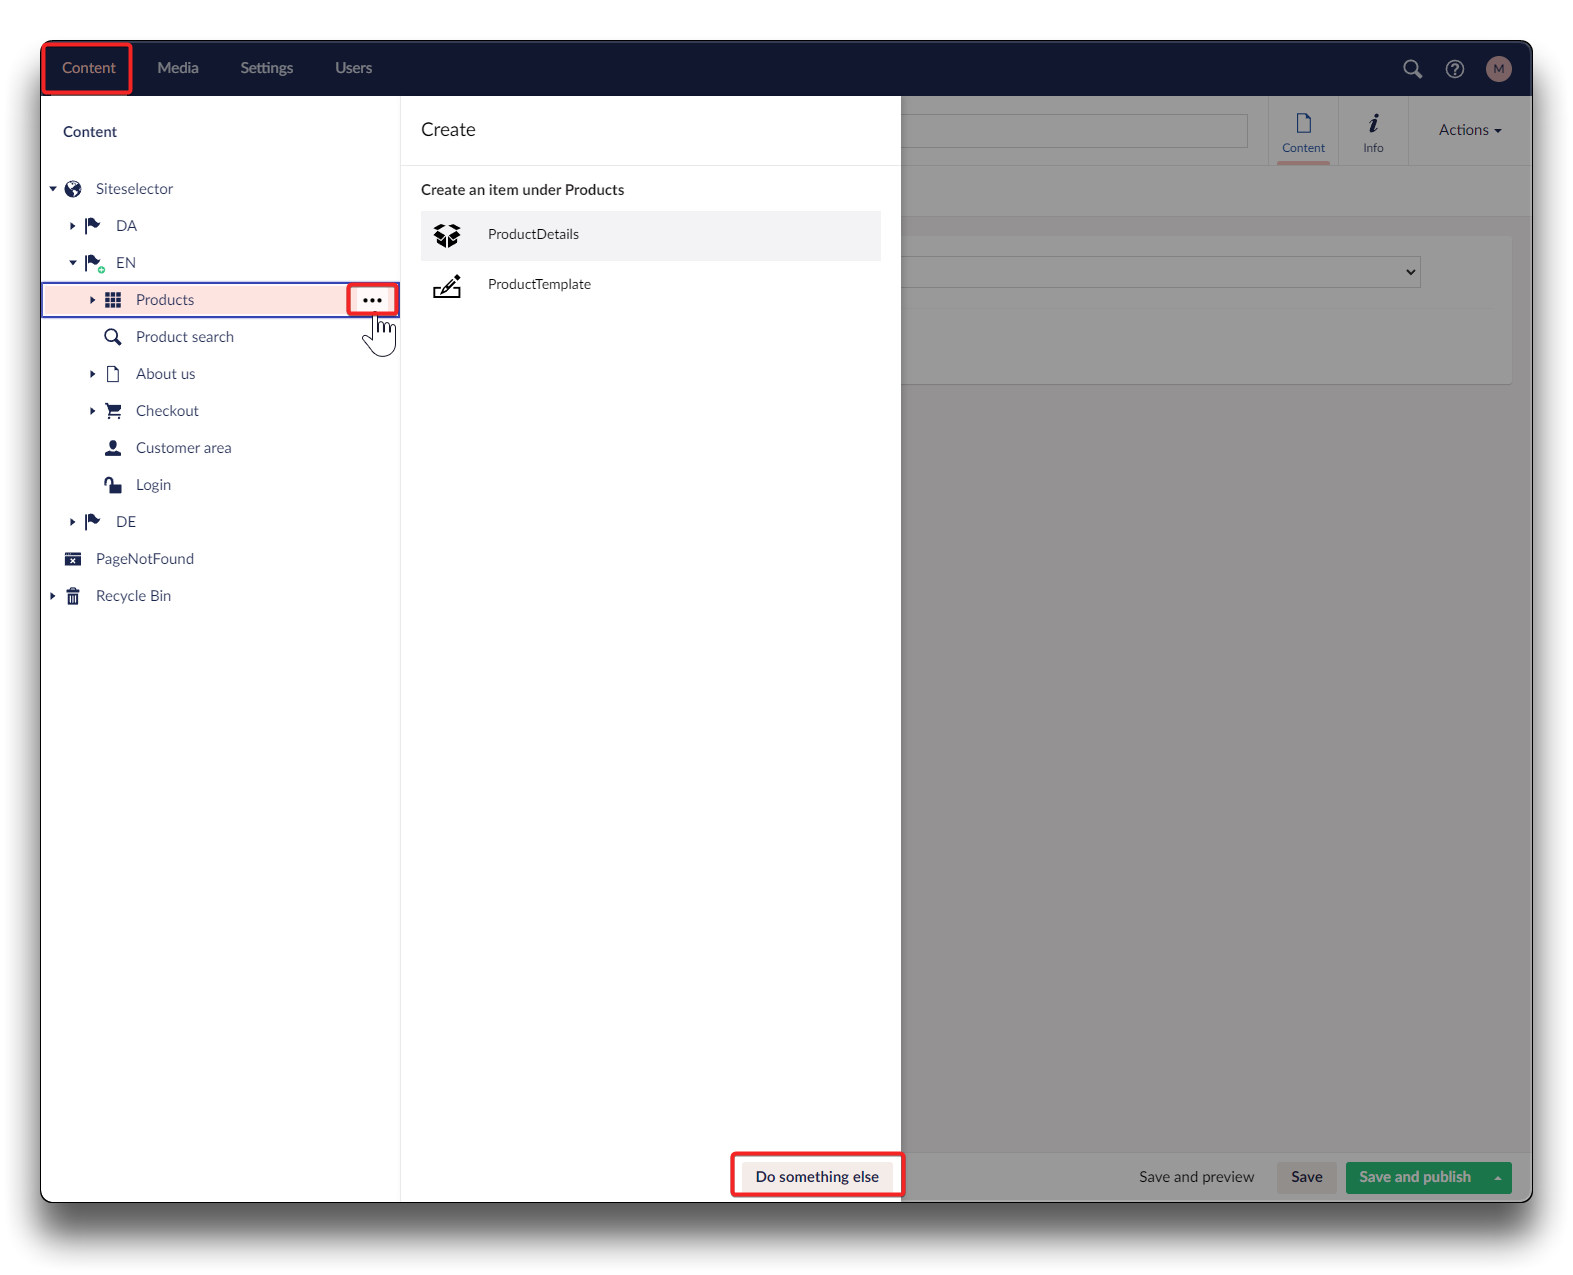
Creating a new category list template - step 1
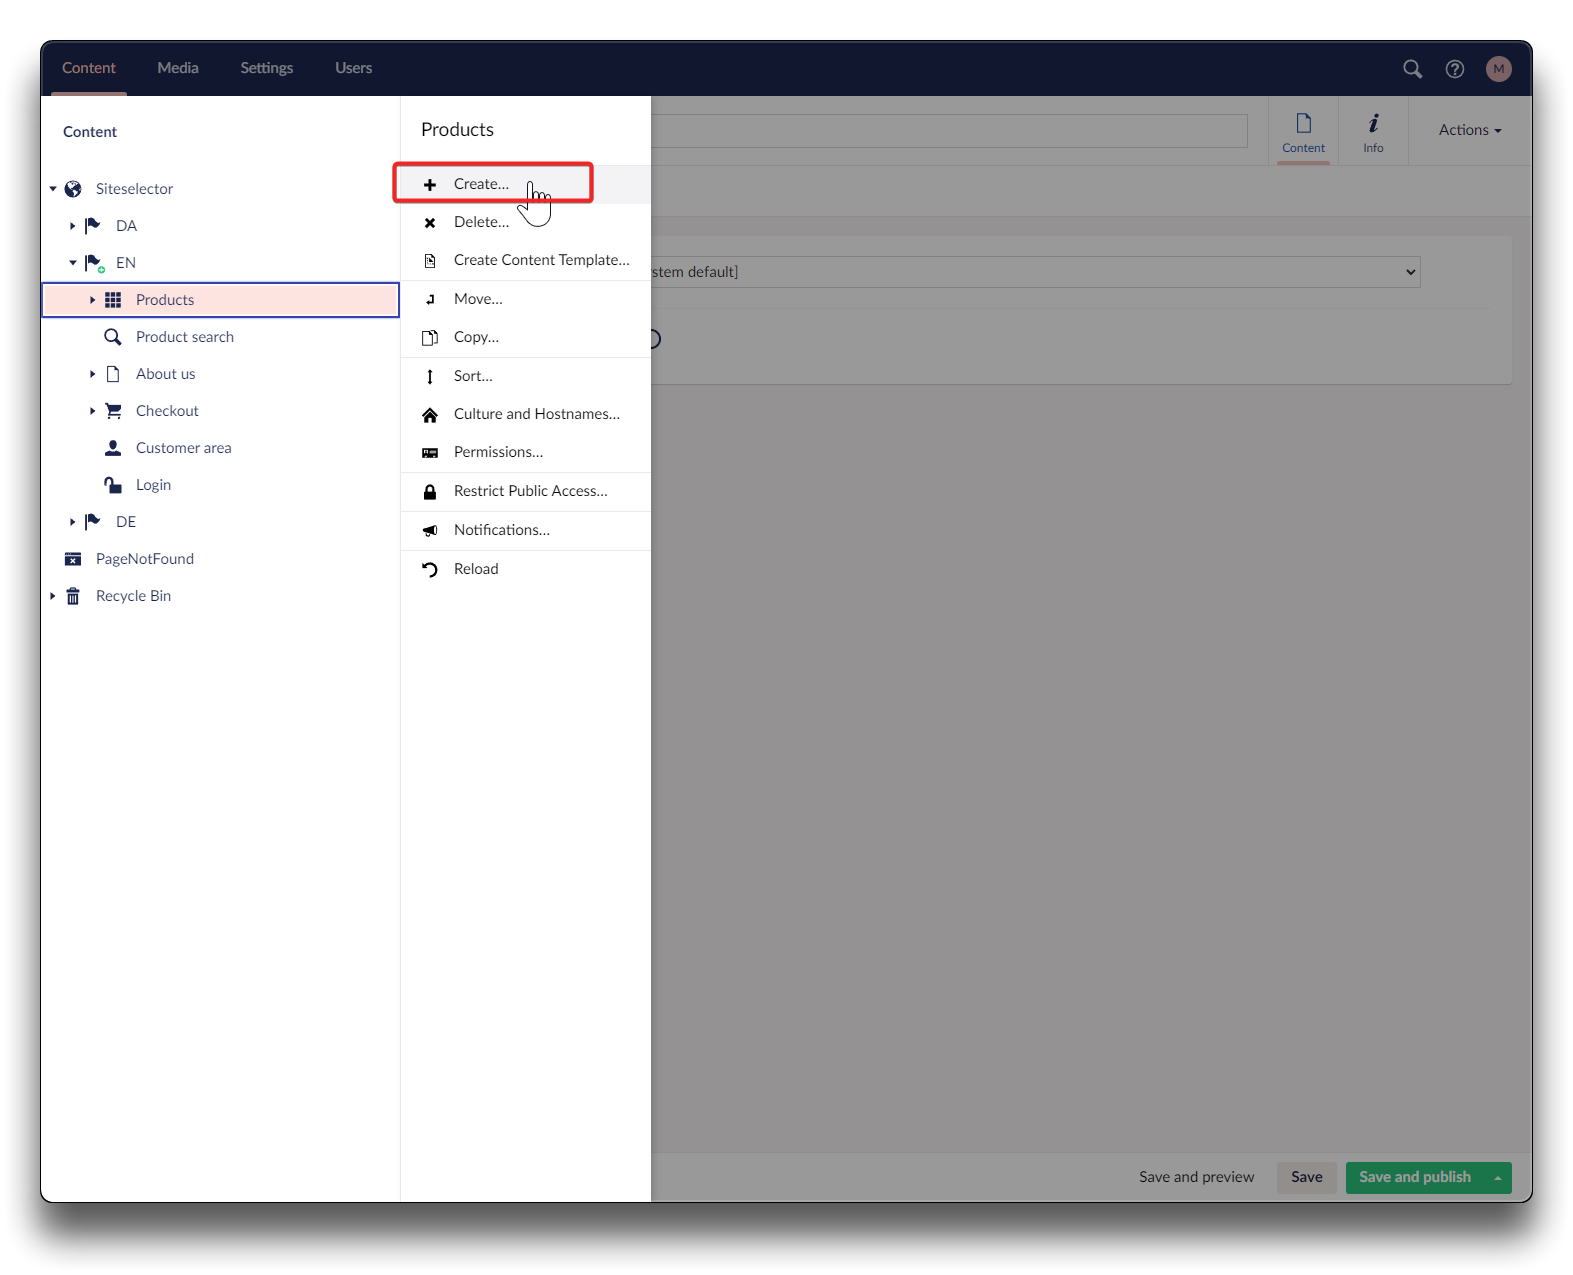
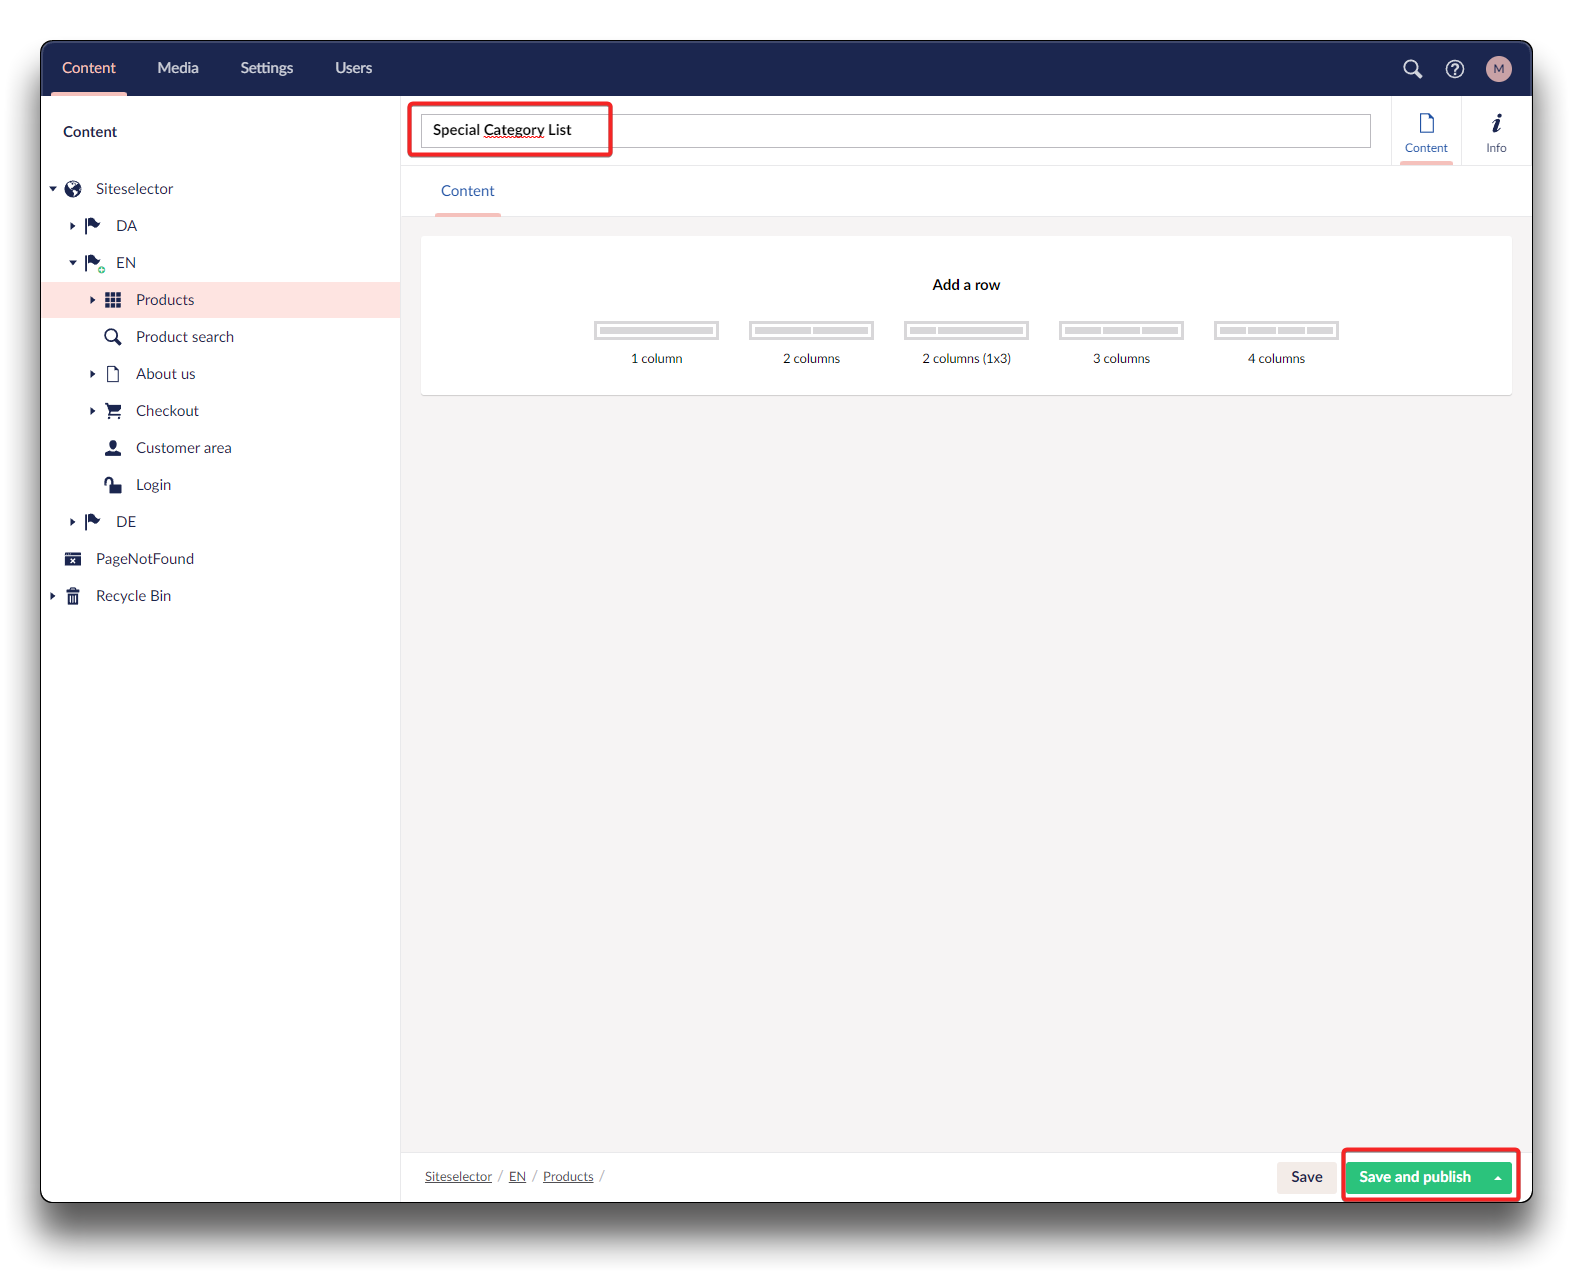
Creating a new category list template - step 2
Choose "ProductTemplate", give it a name and click "Save and publish"
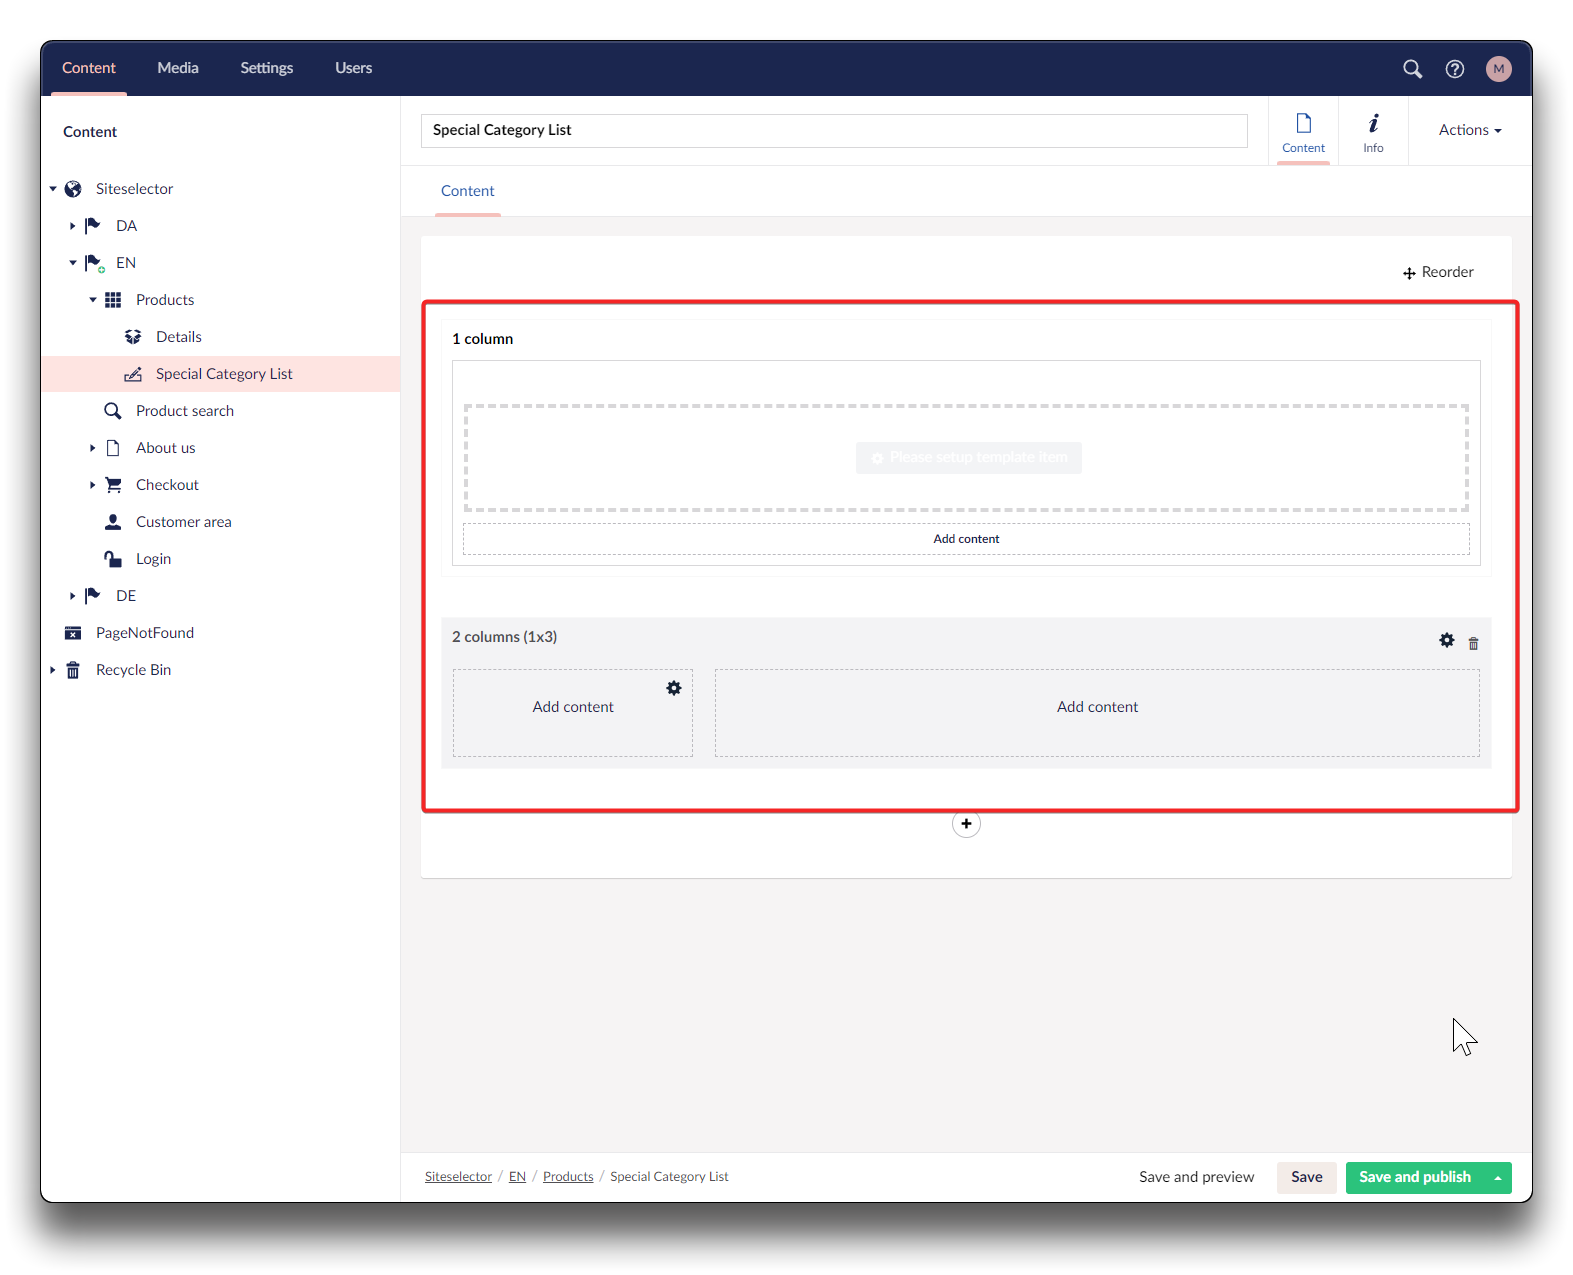
Creating a new category list template - step 3
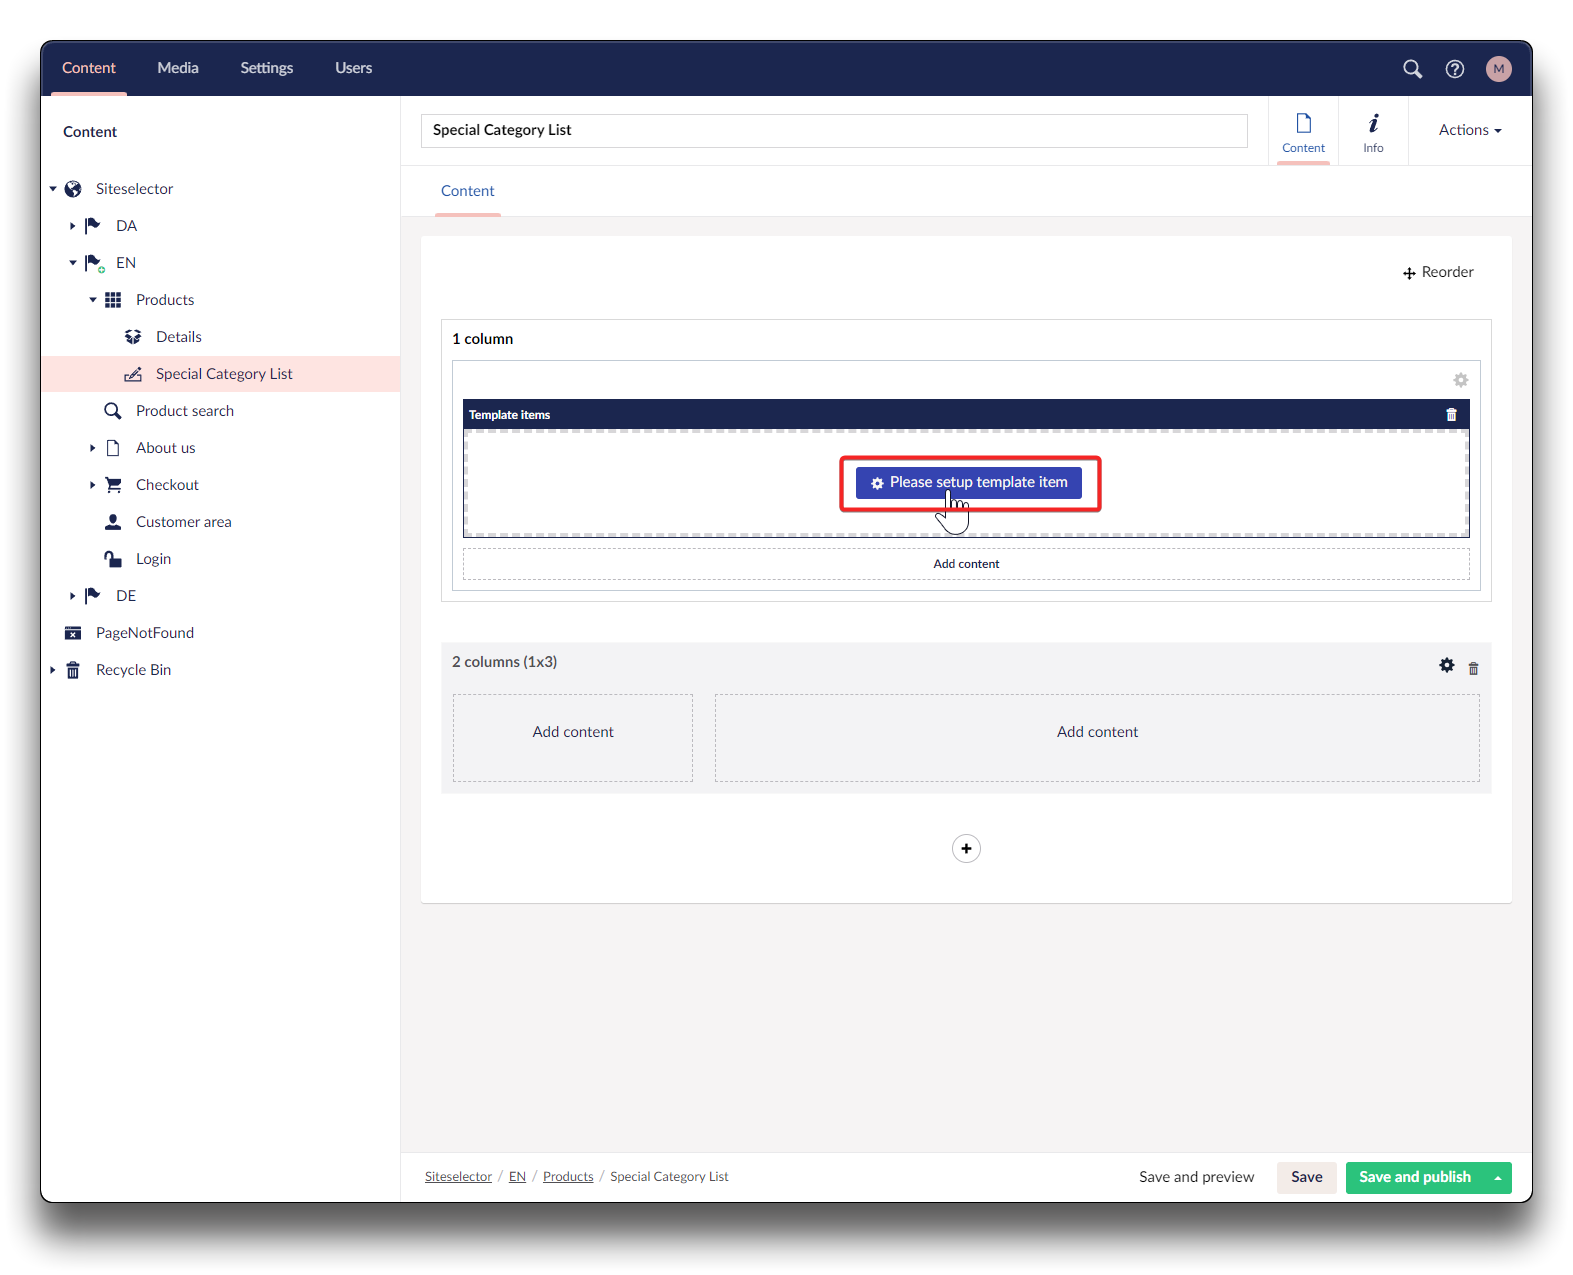
Creating a new category list template - step 4
Warning
Important! Name and save the template BEFORE adding content
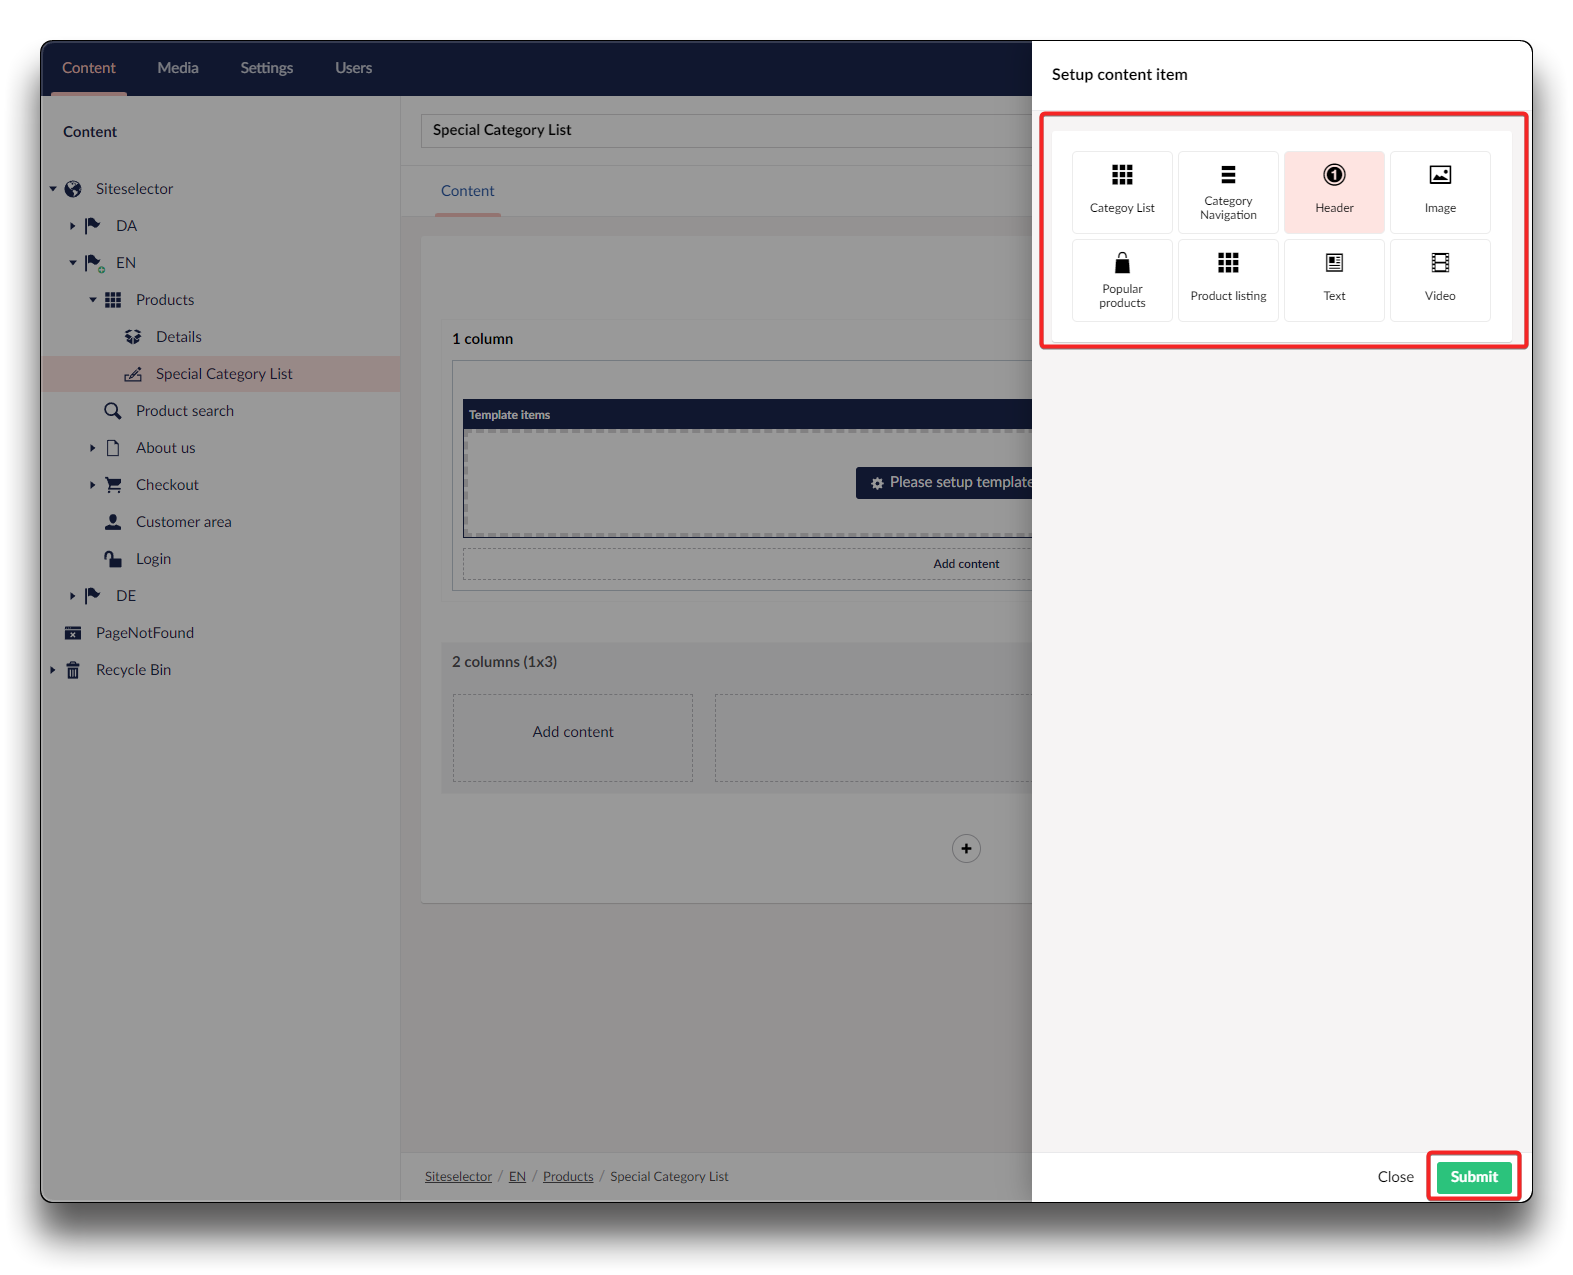
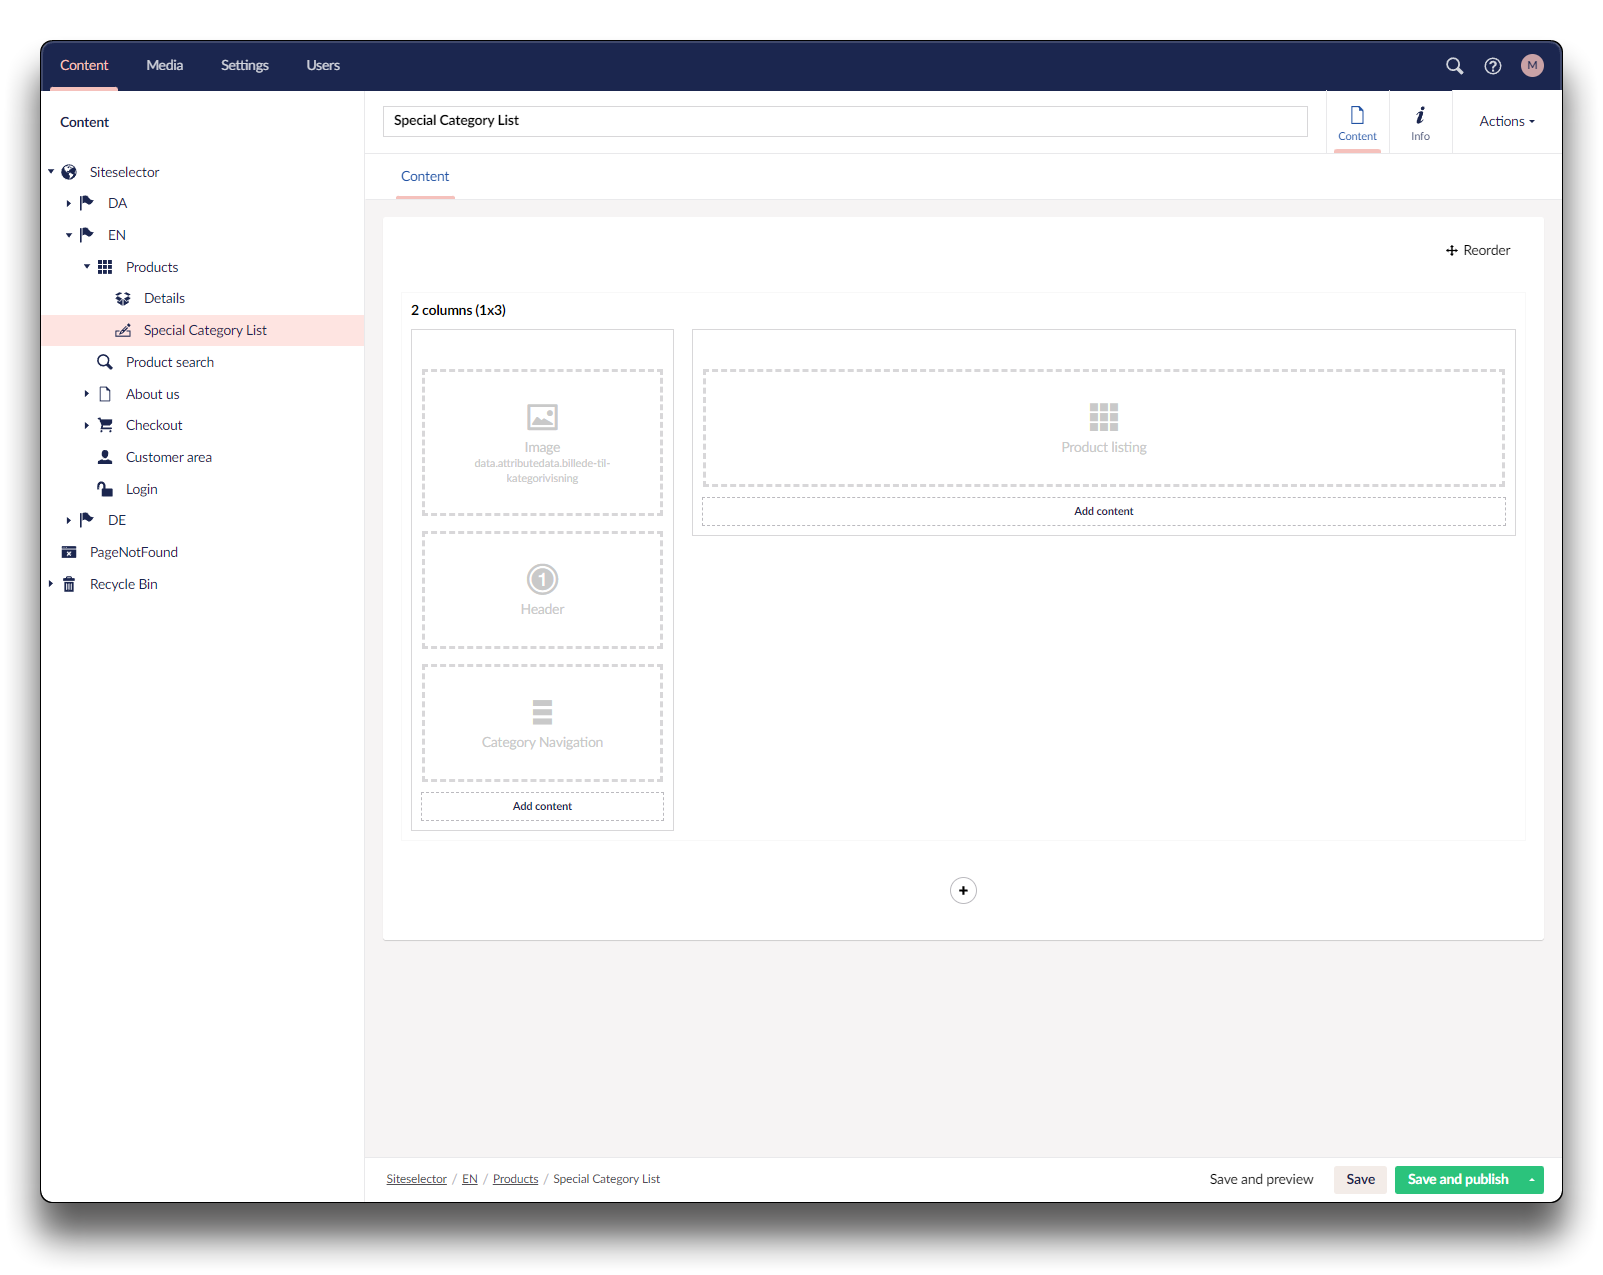
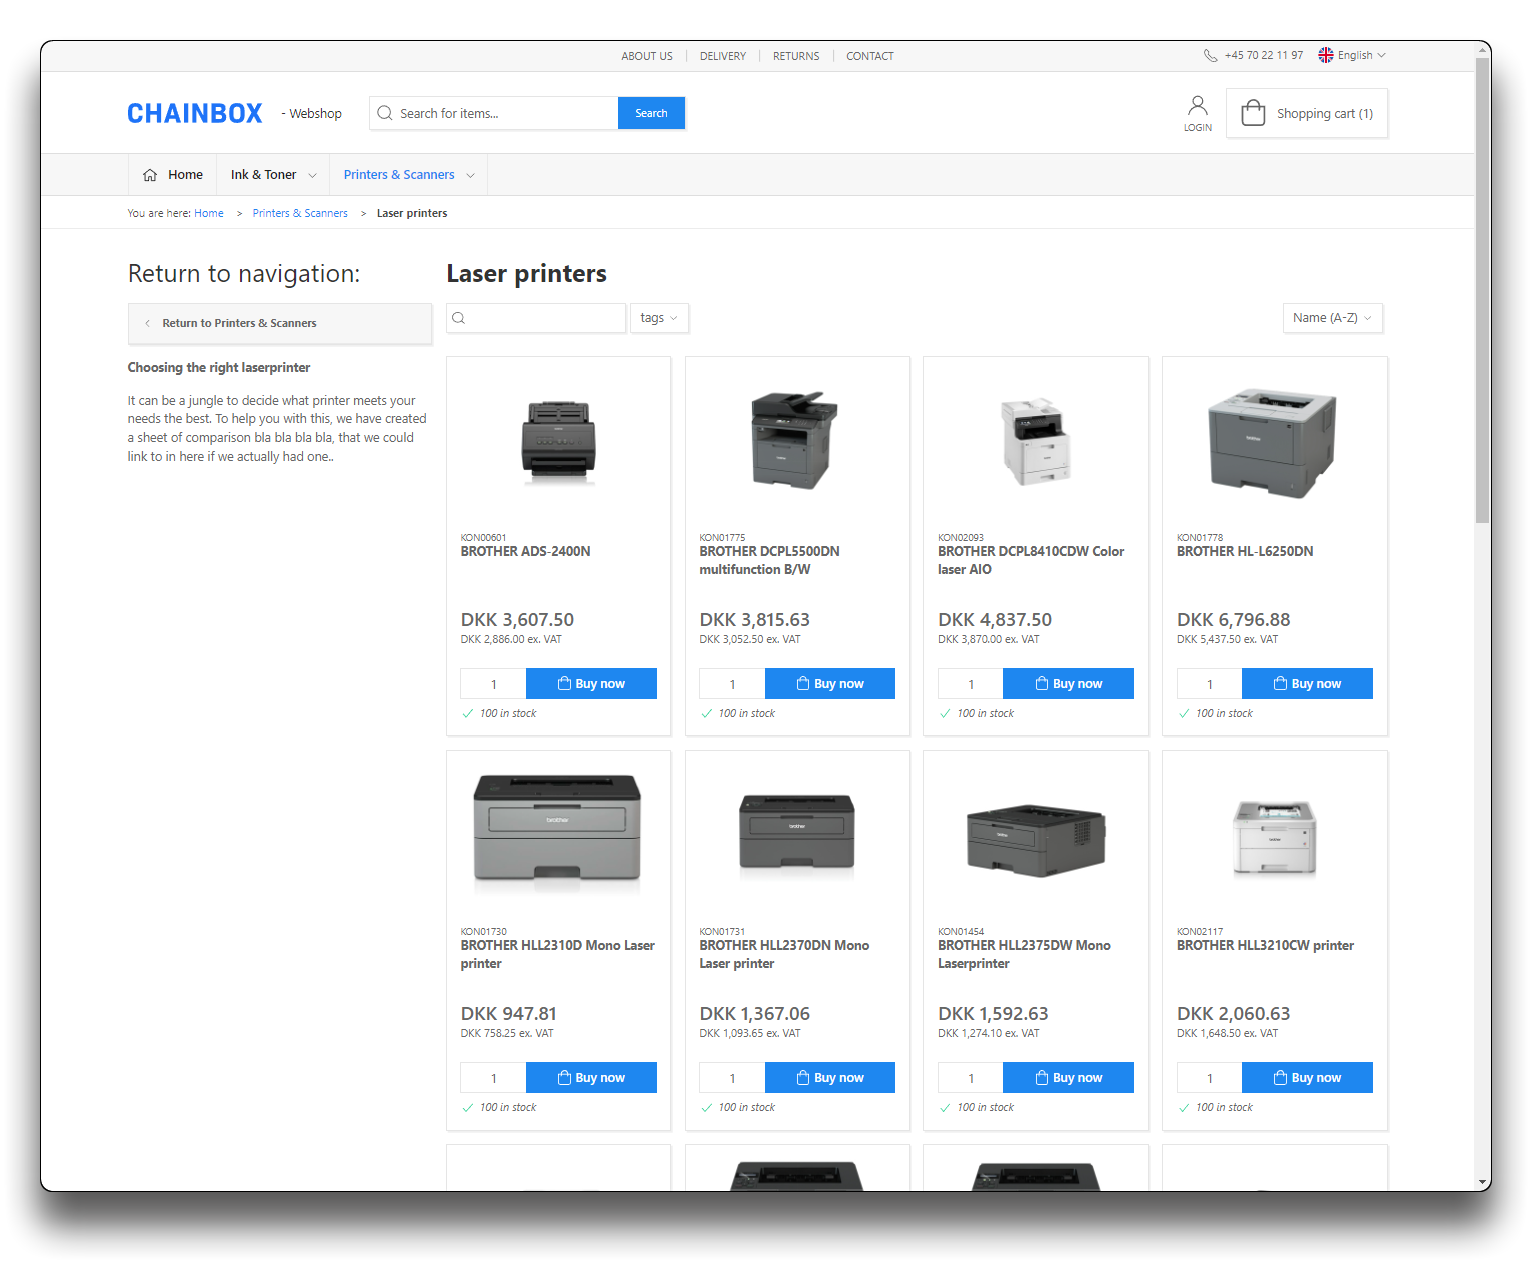
Add Template Items to your new Category template
Your new Category list template is now ready for you to add content into. For this example, we re-create the default template to show you what basic items the default Category list consists of, as inspiration to develop further, but more examples will follow.
Set up rows, columns and content
Choose the rows with the number of columns in as you wish. Click in each and choose relevant Template Items
Adding content to new category list - step 1
Adding content to new category list - step 2
Adding content to new category list- step 3
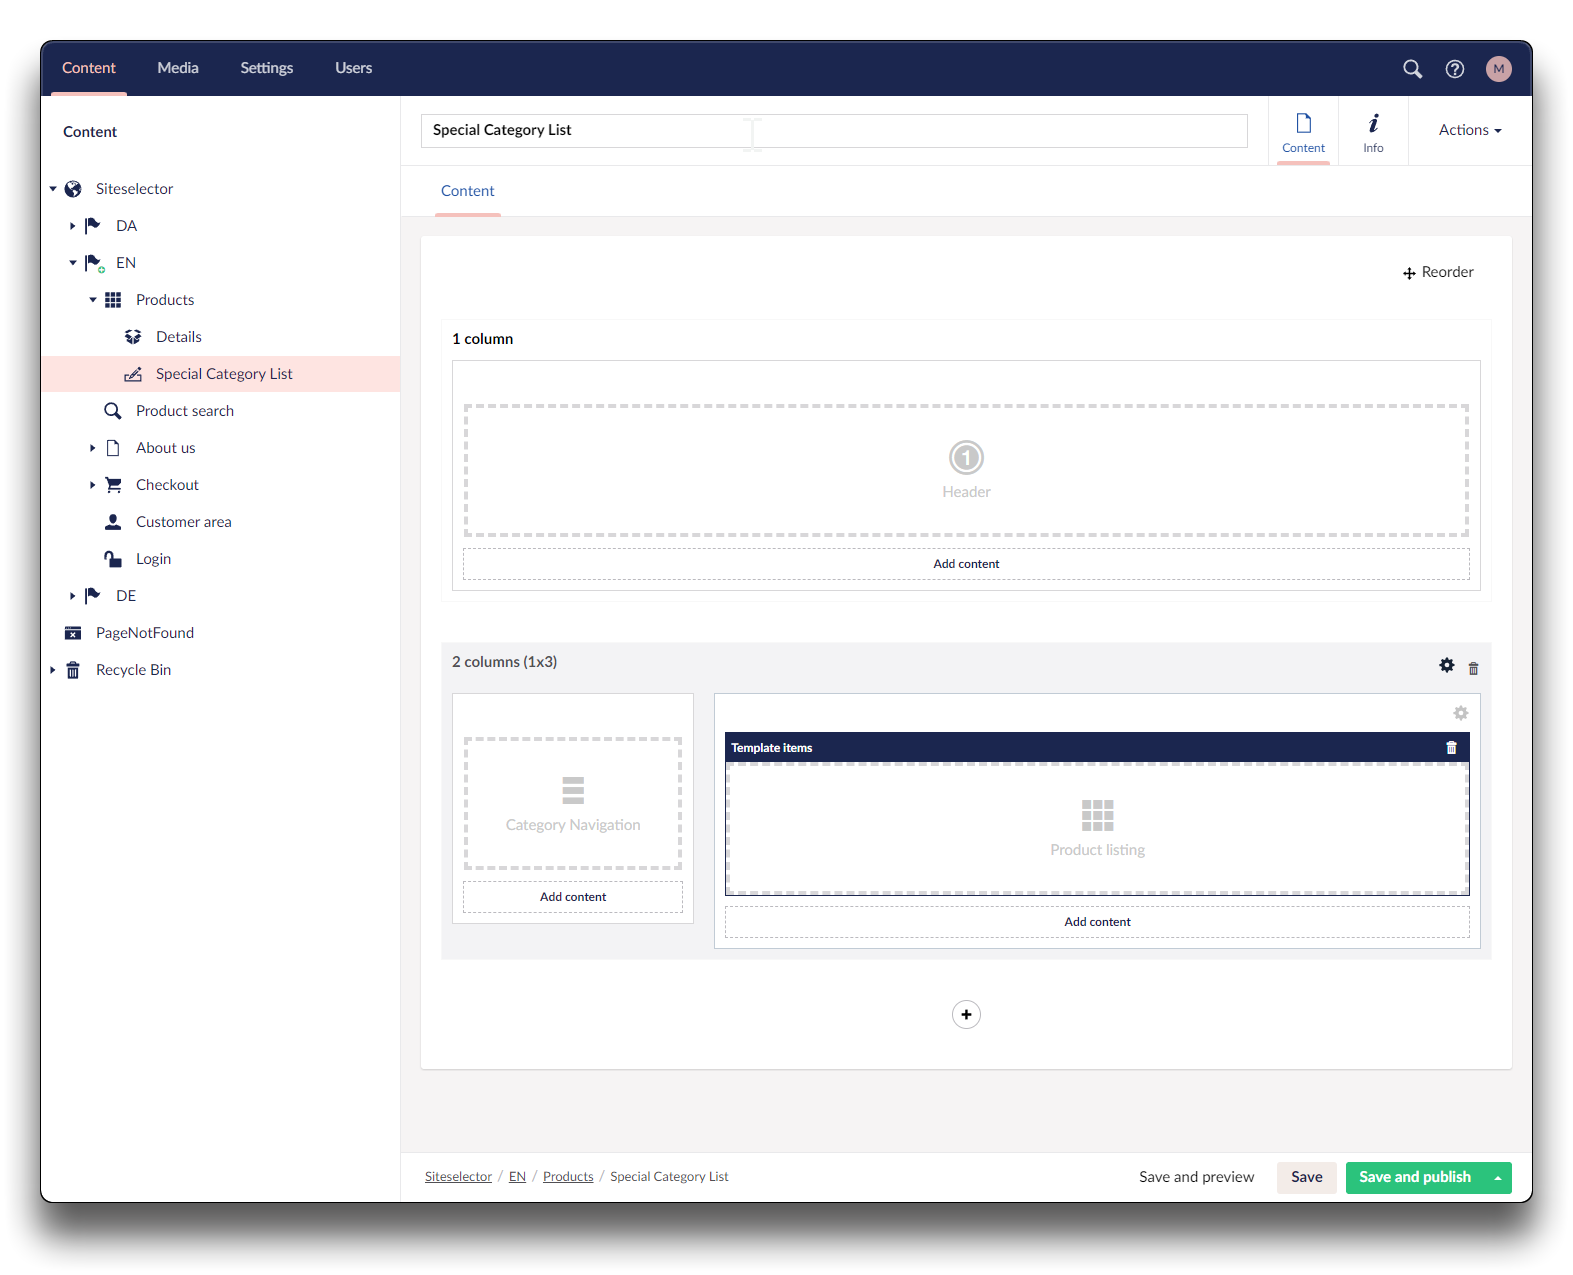
Adding content to new category list - step 4
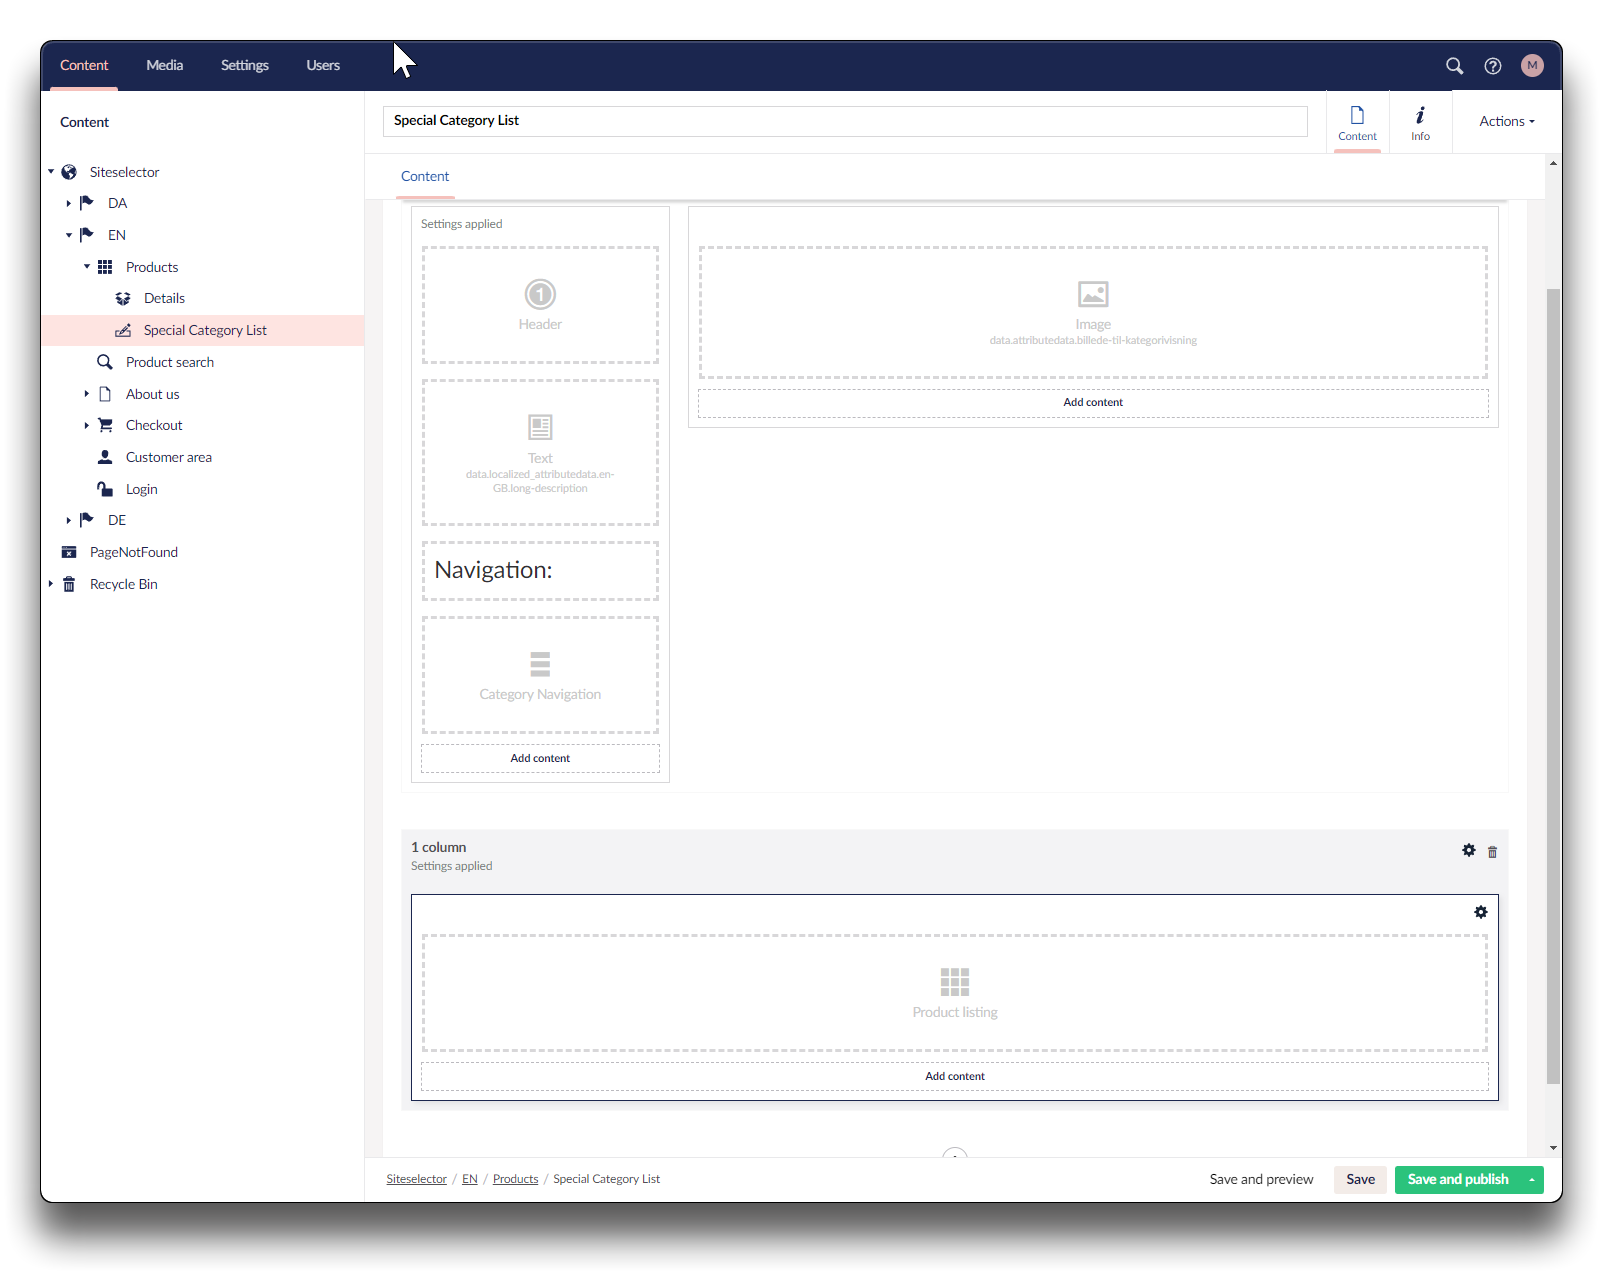
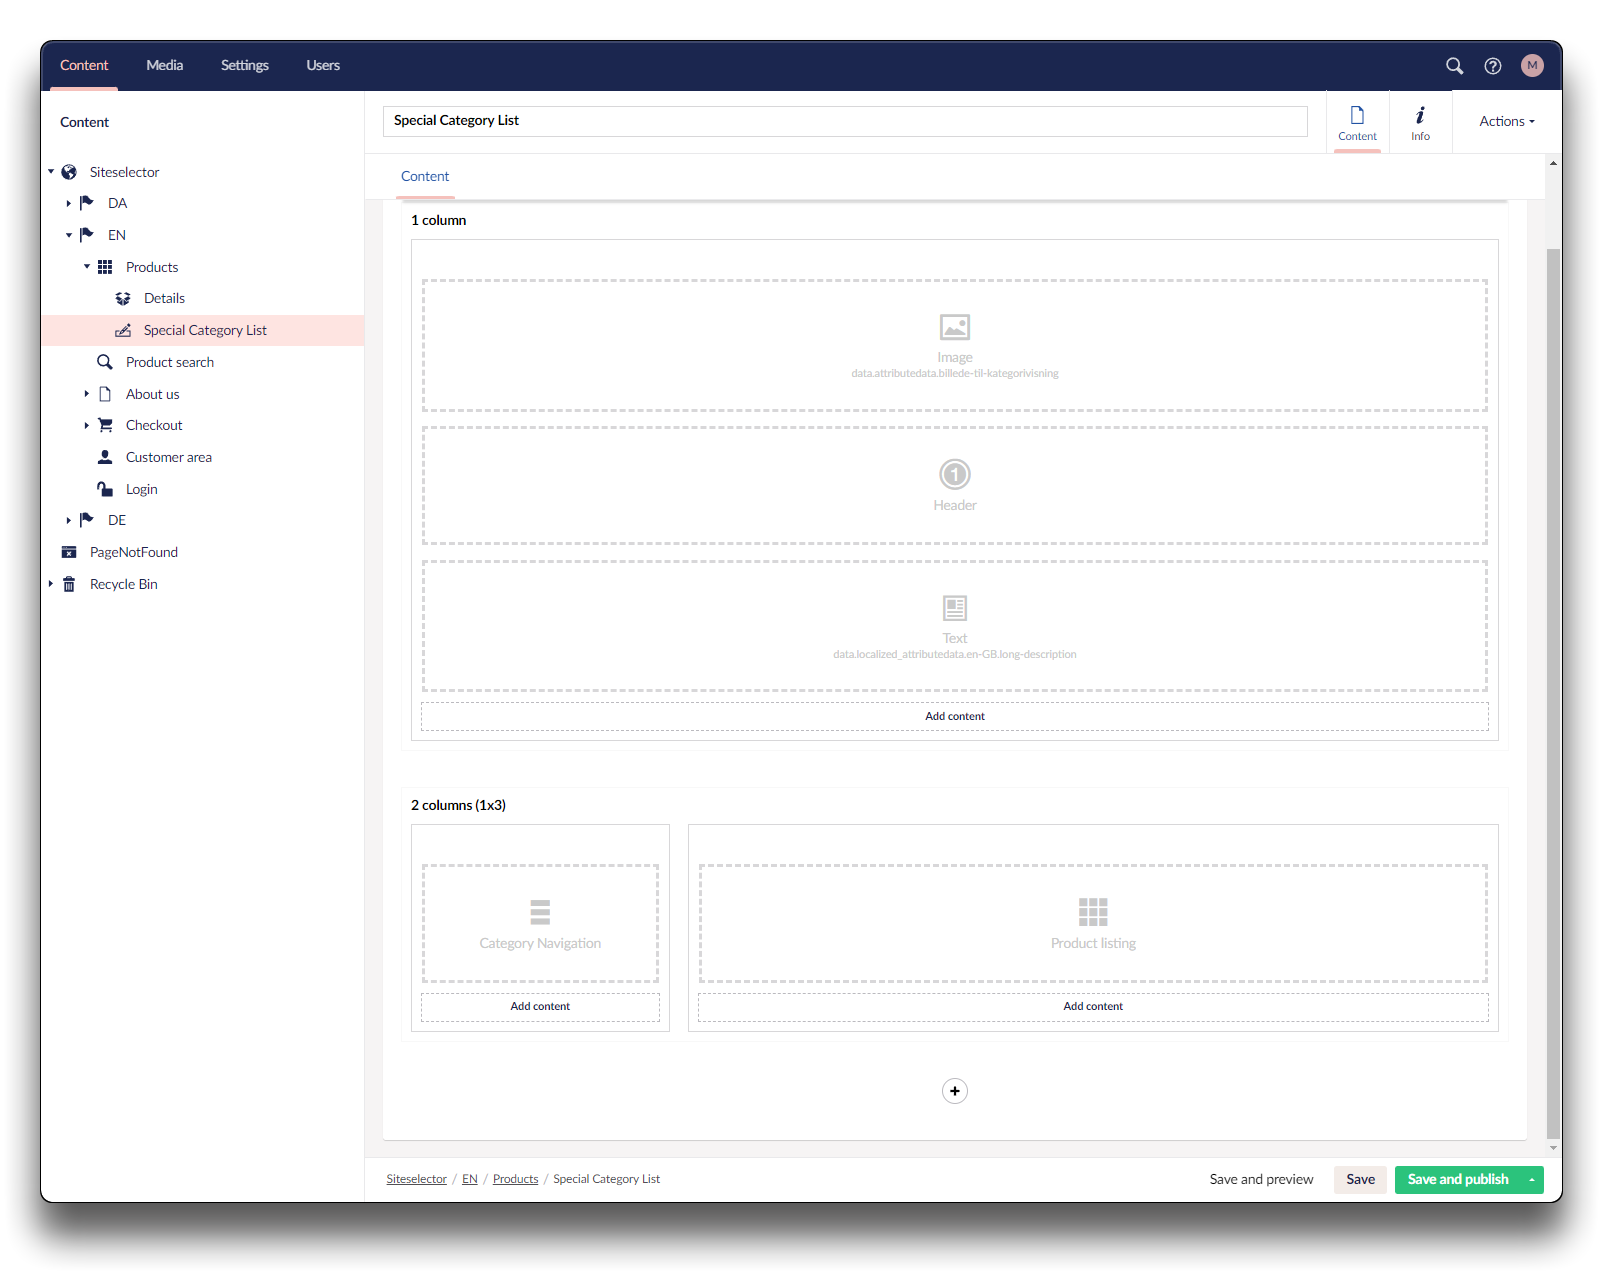
As shown in step 4, the template now contains a headline (name of the category) in the top, and a divided row with Category navigation to the left, and product-listing to the right.
To find information on the functionality of each template item, please check below link
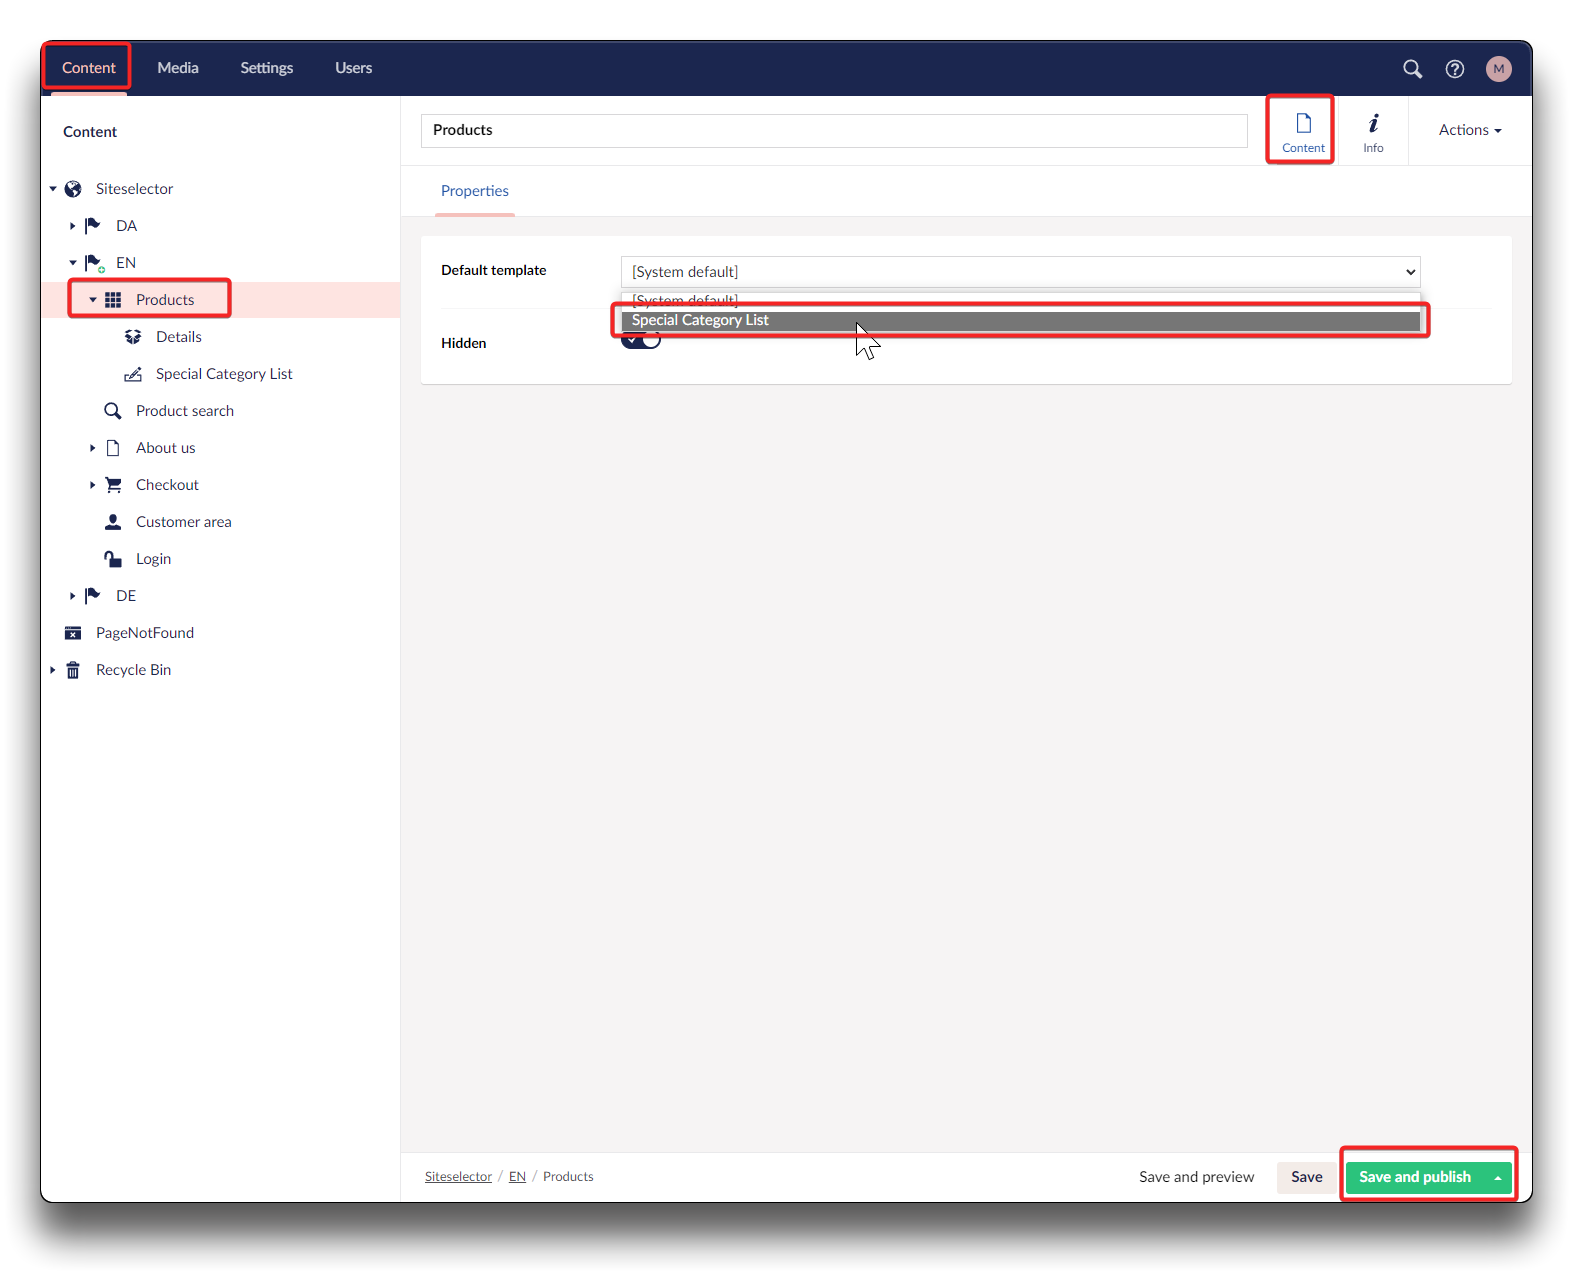
Select and use your new Category template
The new template itself will not drive any change to the webshop, before it is chosen as Default template, as shown below, and then click "Save and publish".
Comparing the default category list with our newly created list

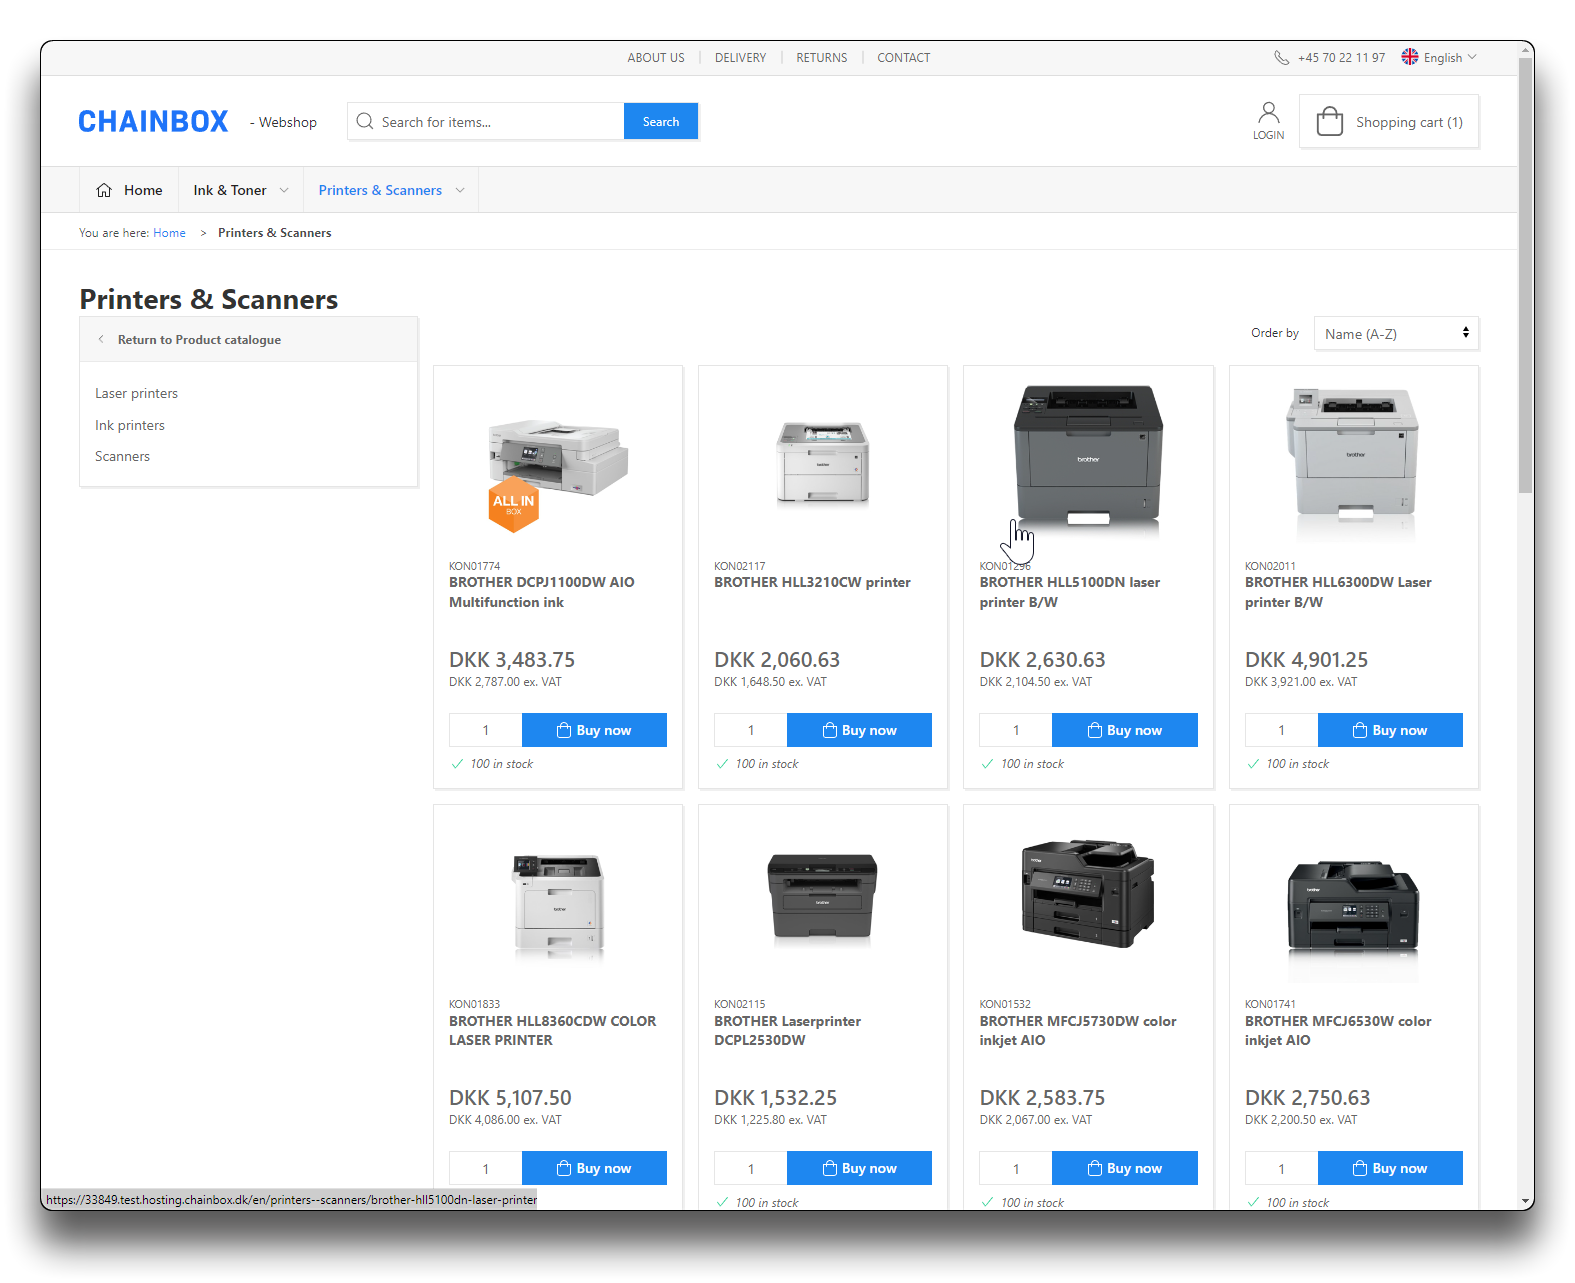
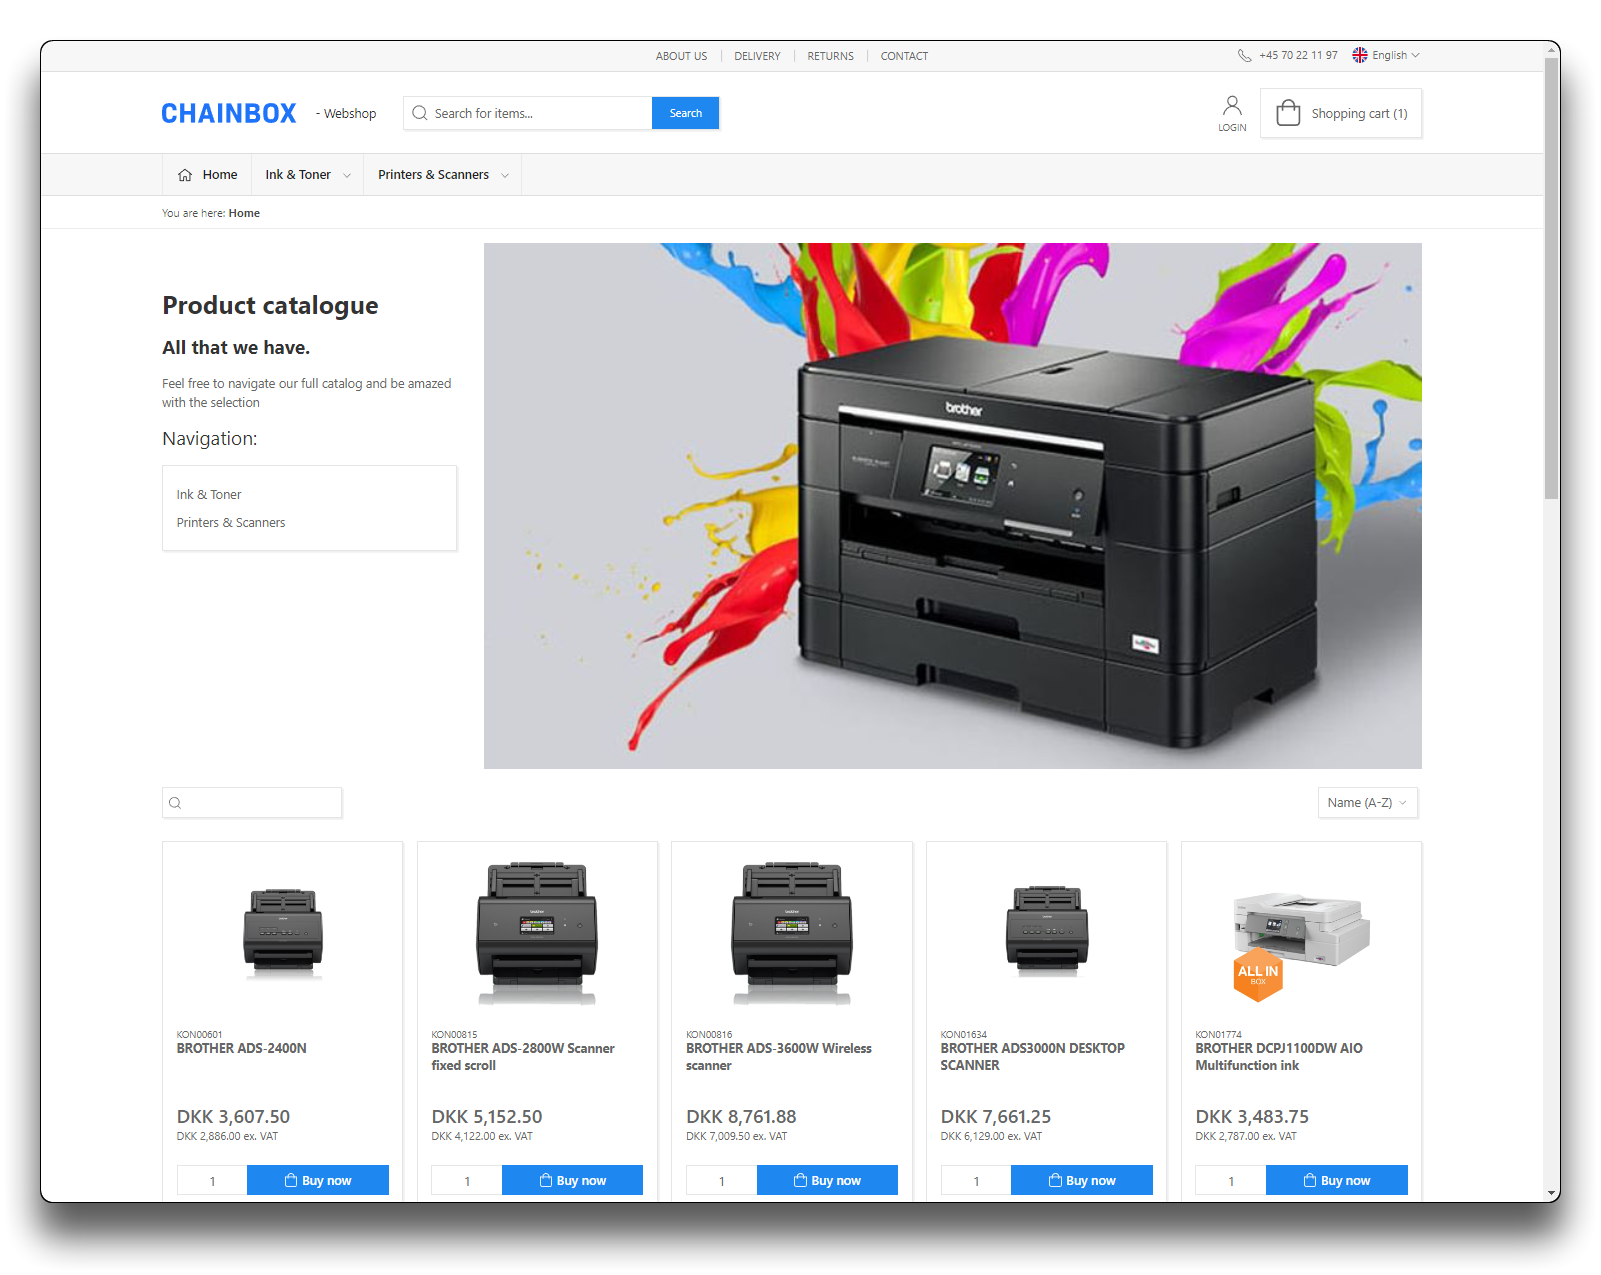
Category list with system default
New "Special Category List"
As you may notice in the above, there are some slight differences in the space between the rows/columns, change those under settings, as you would with any other rows/columns through "Add spacing" or choosing a different value under "Grid column spacing".
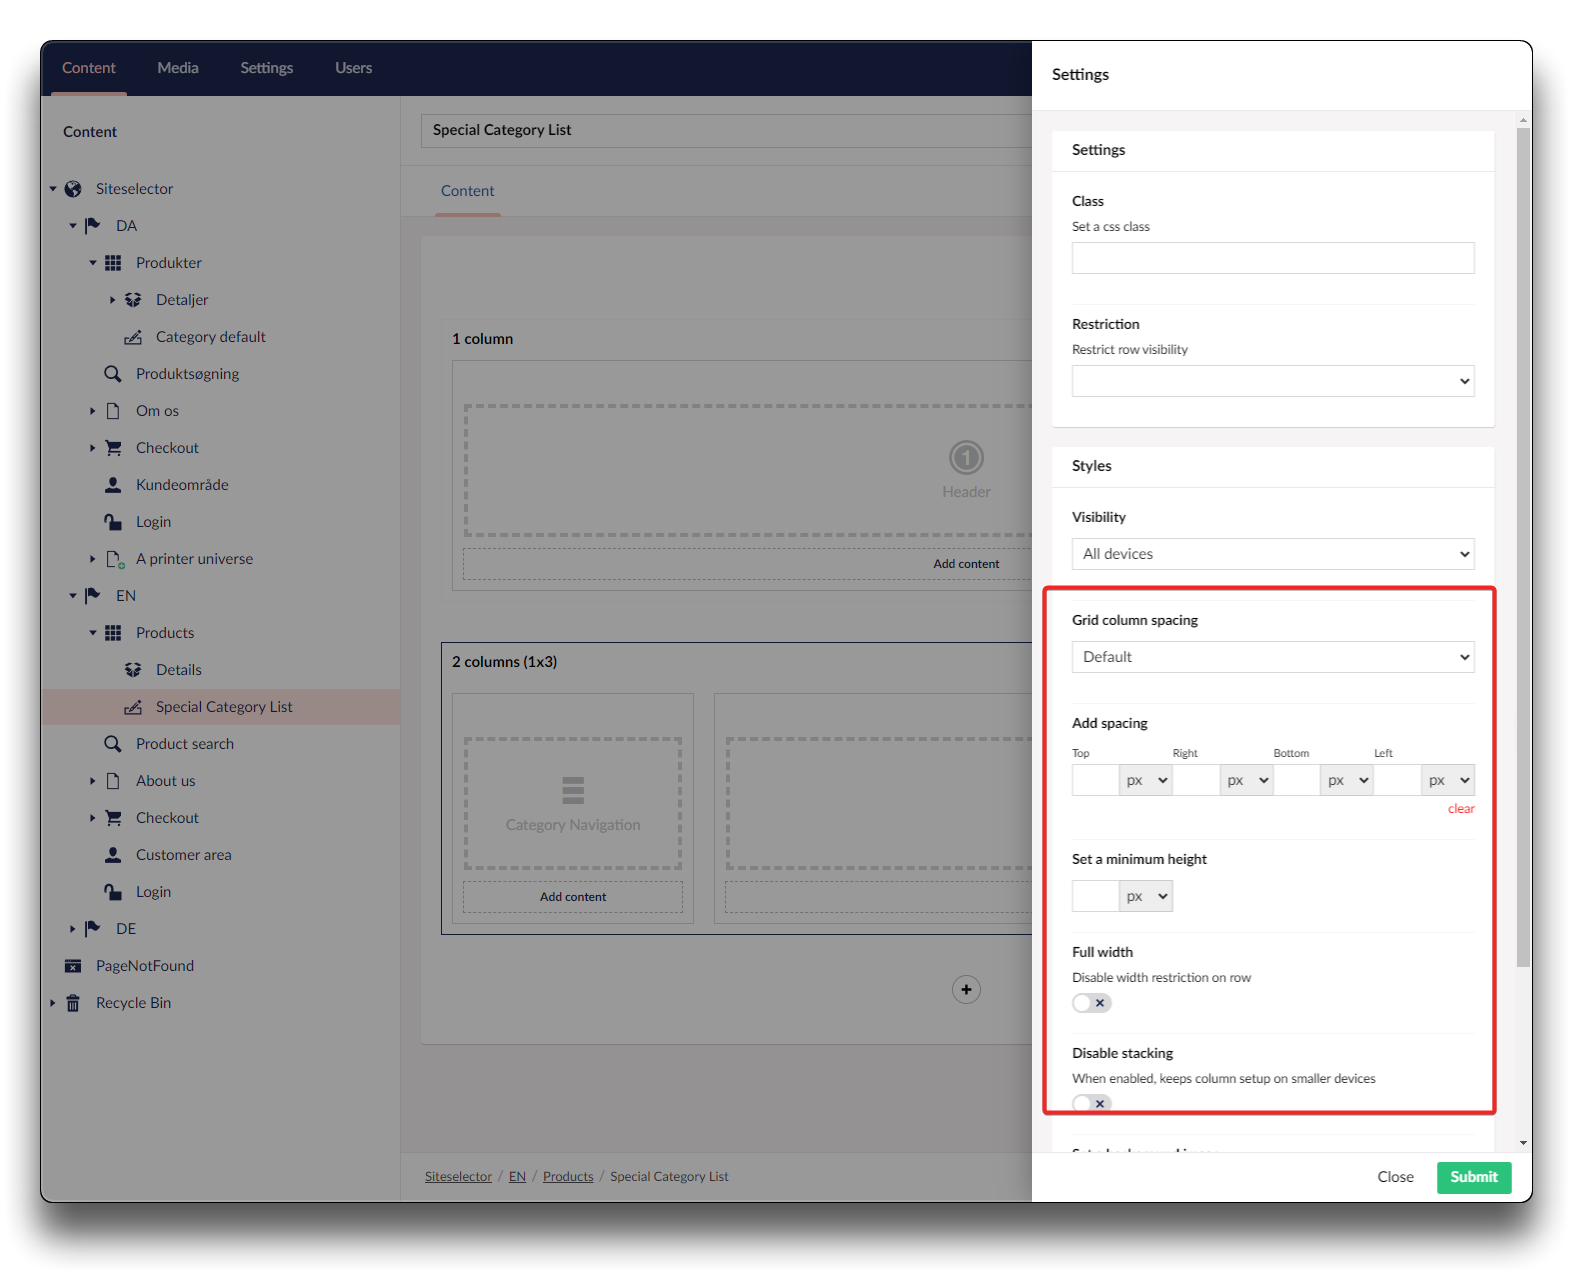
Adding space to columns/rows
Other template examples for inspiration:
Alternative category list layout
Result in Webshop
Alternative category list layout
Result on webshop
Alternative category list layout

Result on webshop
Control what categories should use which Category template
Your new category list template could be your new default for what-ever category you navigate to OR, you could control that certain levels of your category-tree/a specific category, should have one template and other levels another template! To do this we need a field in your Product Management System (PIM), in which we state the name of template to use.
With a 3 level category structure for this example, we have created 3 Category-list templates each with different designs
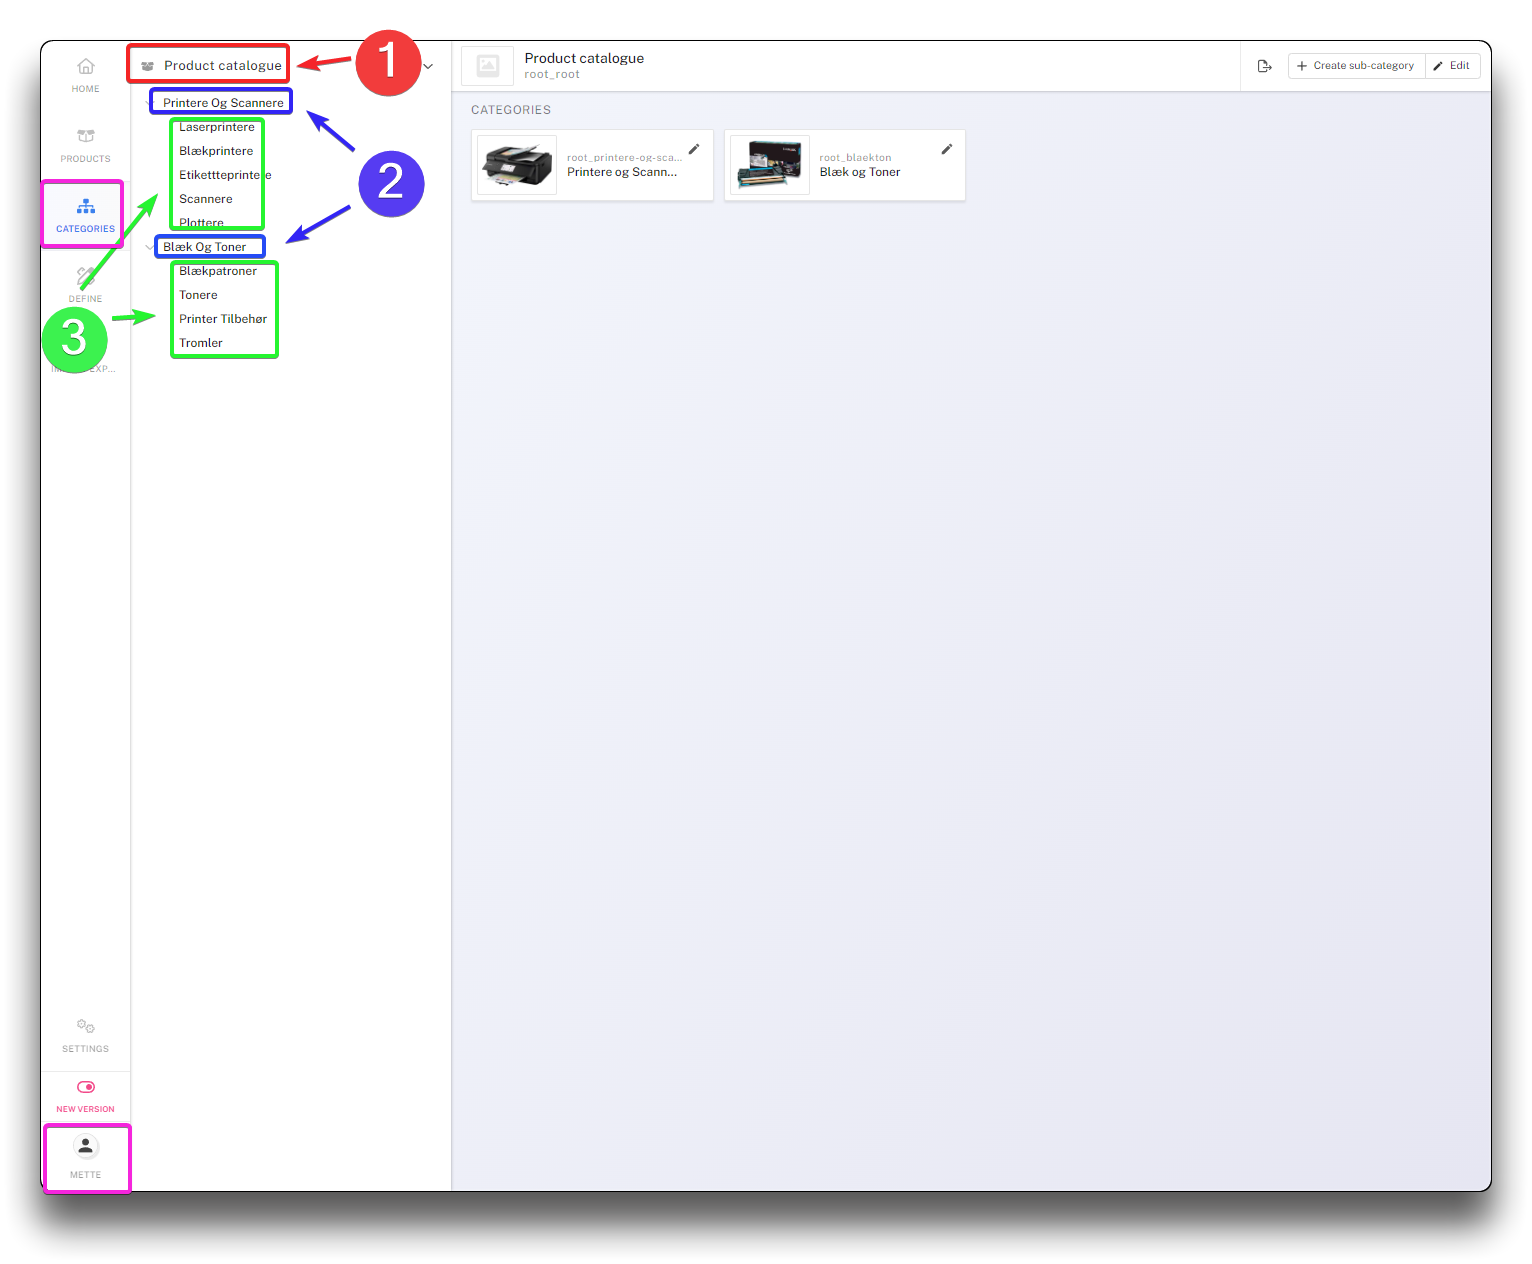
3 levels of categories
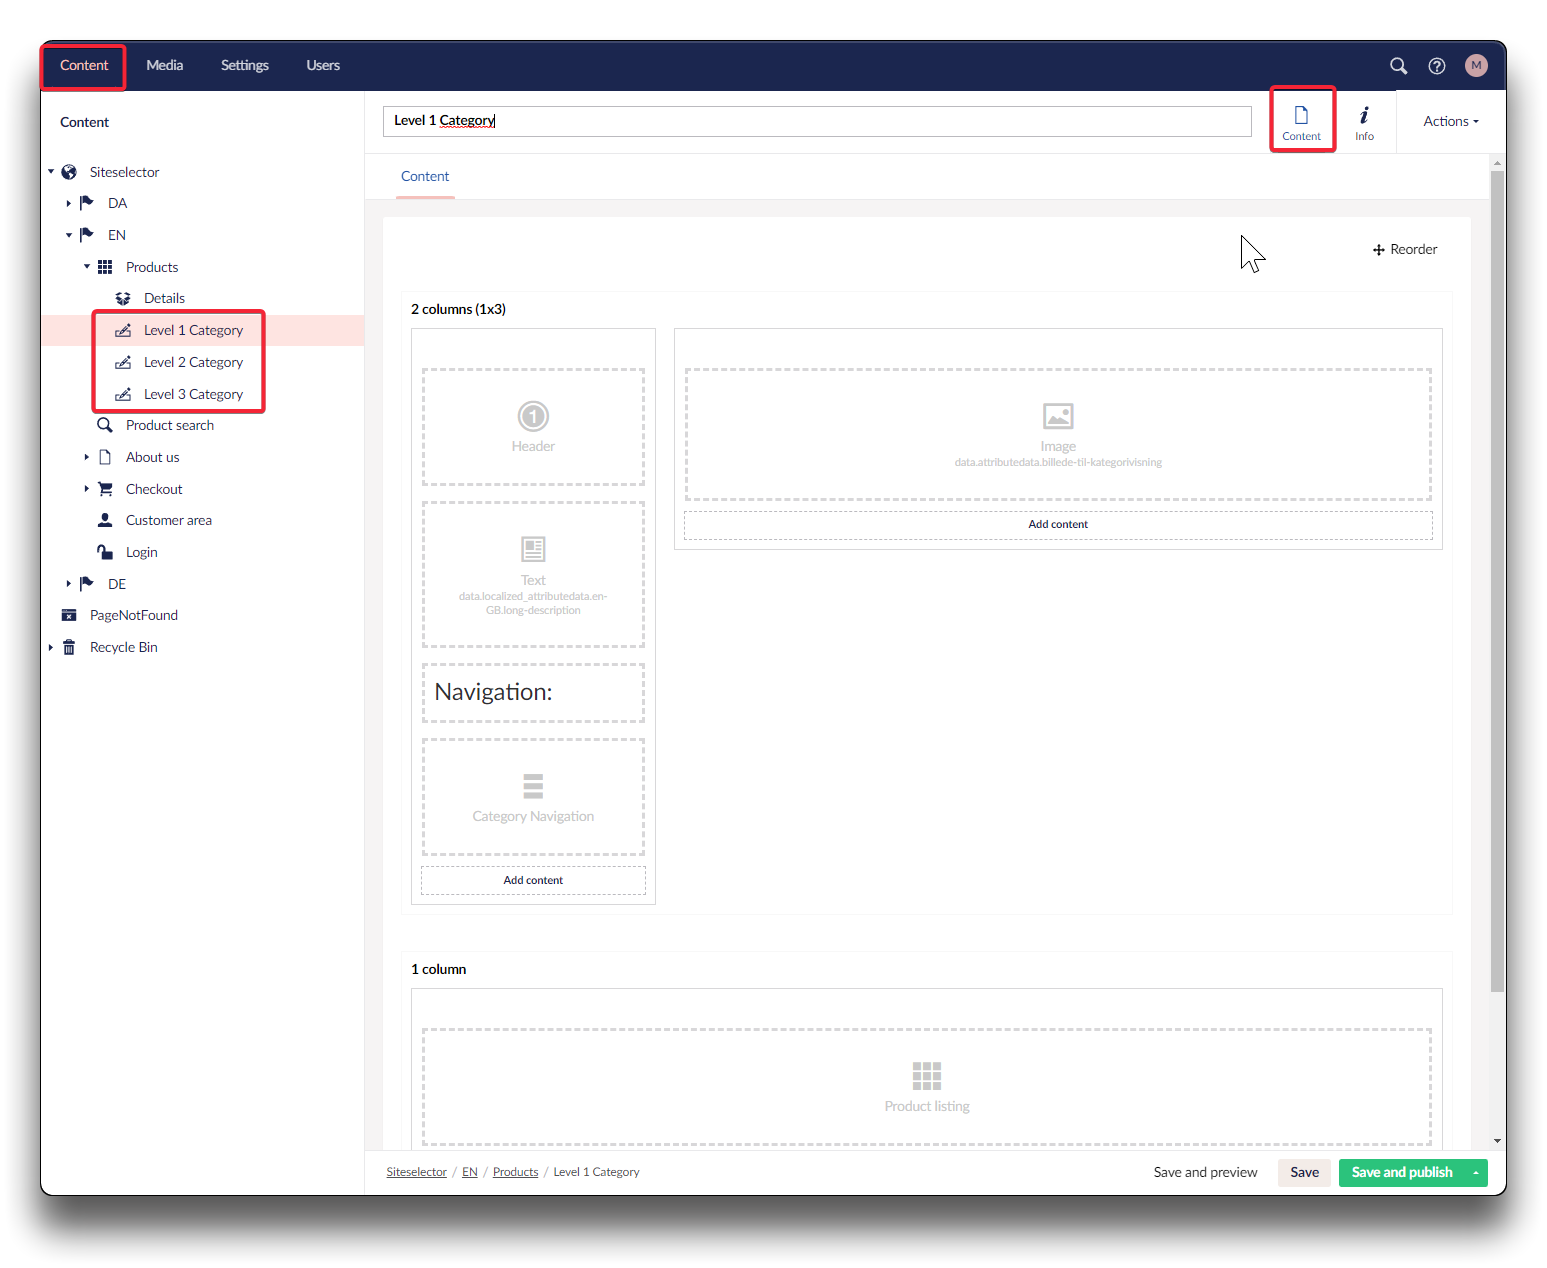
3 template designs in Umbraco
Creating a category template-field in PIM
Go to your Product Information Management (PIM) system and choose "Define" - "Attributes" and click "Create attribute"

Creating a new attribute-field "category-template" - step 1
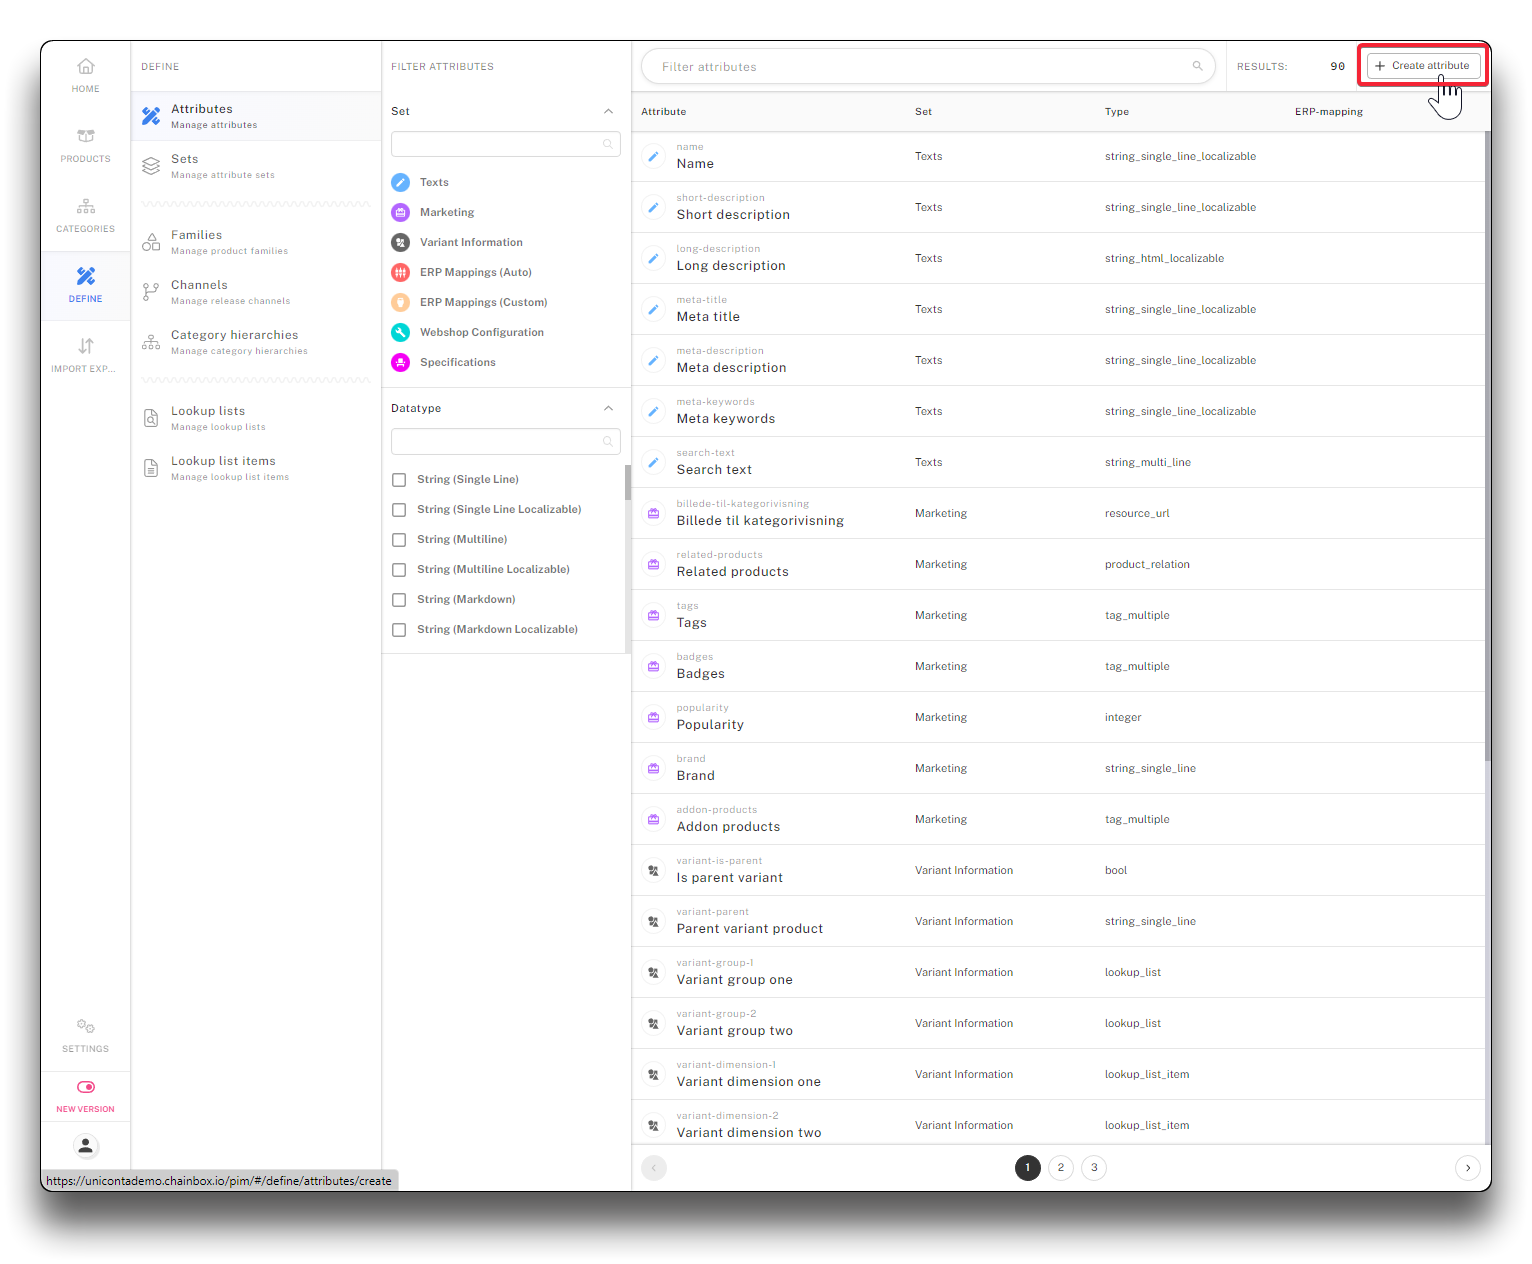
Creating a new attribute-field "category-template" - step 2
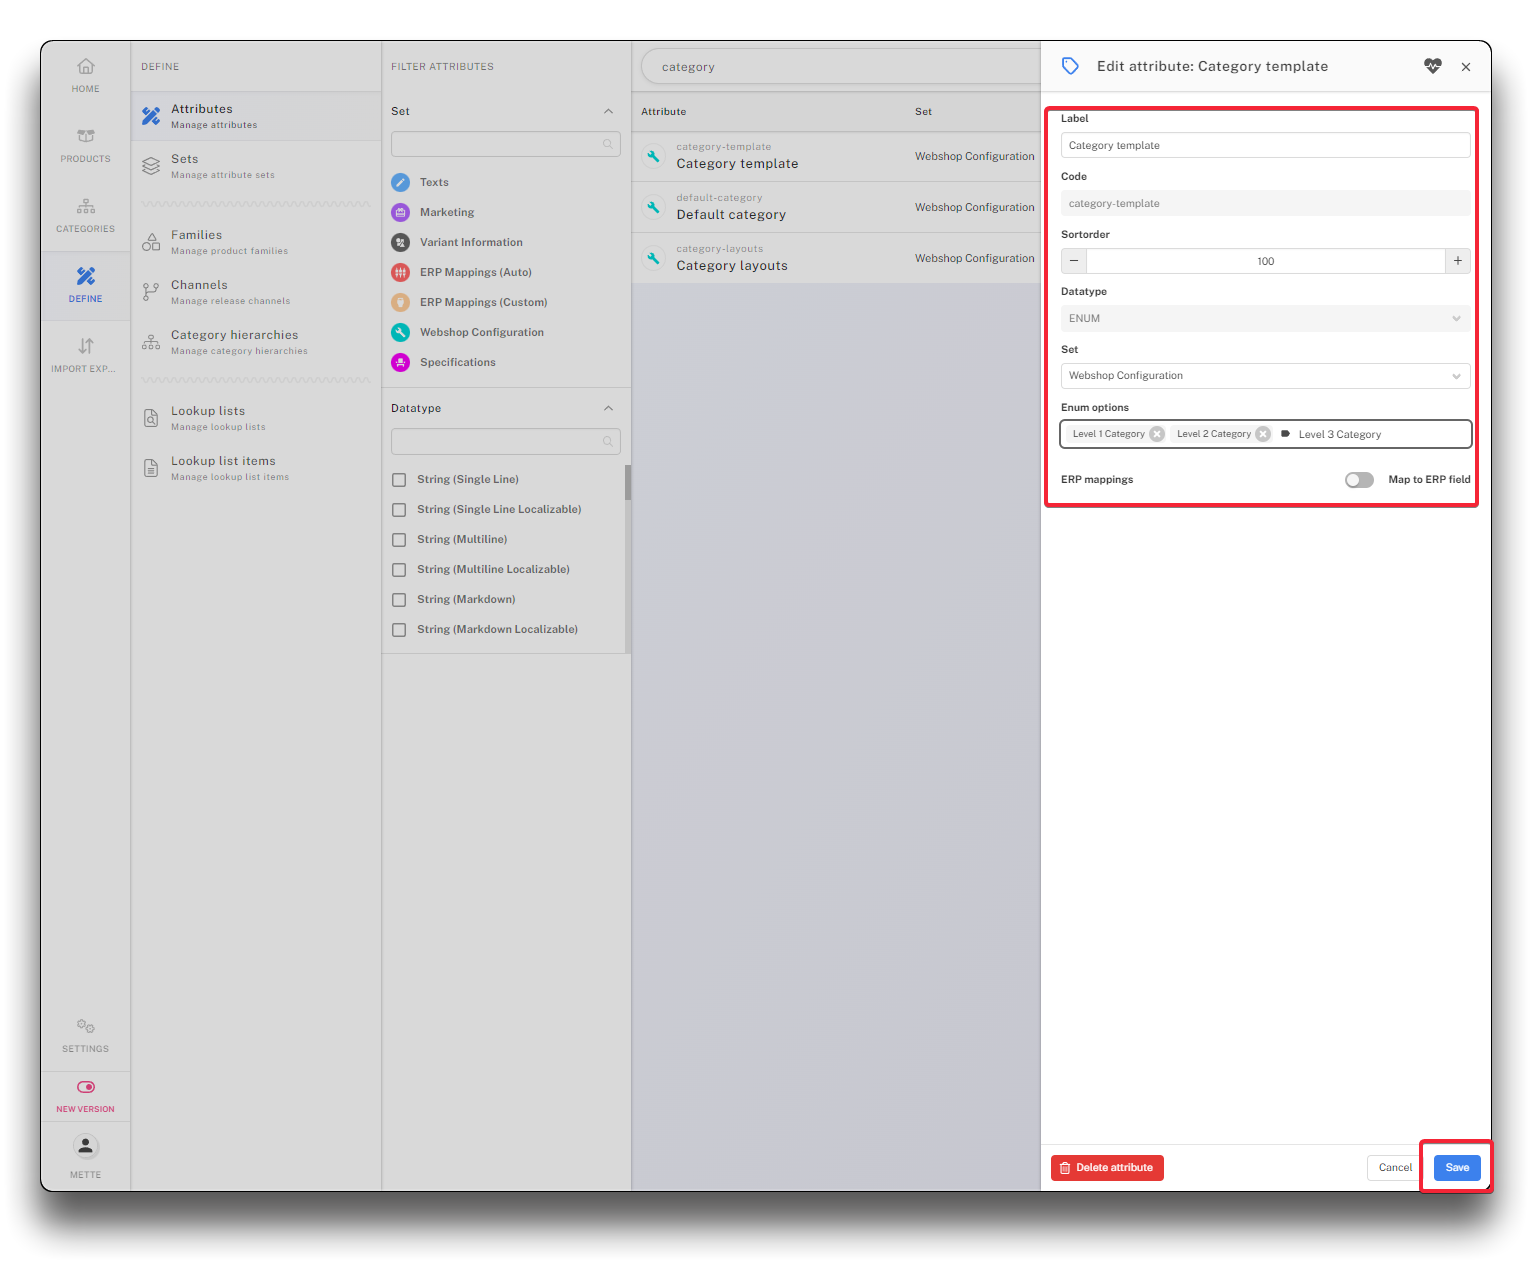
Fill out the fields and click "Save". See explanation offield-functionalities further down.
Creating a new attribute-field "category-tempalte" - step 3
Label
Name the field so the function of the field is clear, we suggest Category template
Code
Code must be defined as "category-template". Any other code will cause this function to fail.
Sortorder
Optional, will influence listing in PIM
Datatype
Choose "ENUM"
Set
Choose "Webshop Configuration". This determins under what section you will find the field under PIM Categories
Enum options
Enter the naming of all your category templates, exactly as named in Umbraco and press enter after each name.
ERP mappings
Must remain disabled, since the field does not come from the ERP-system
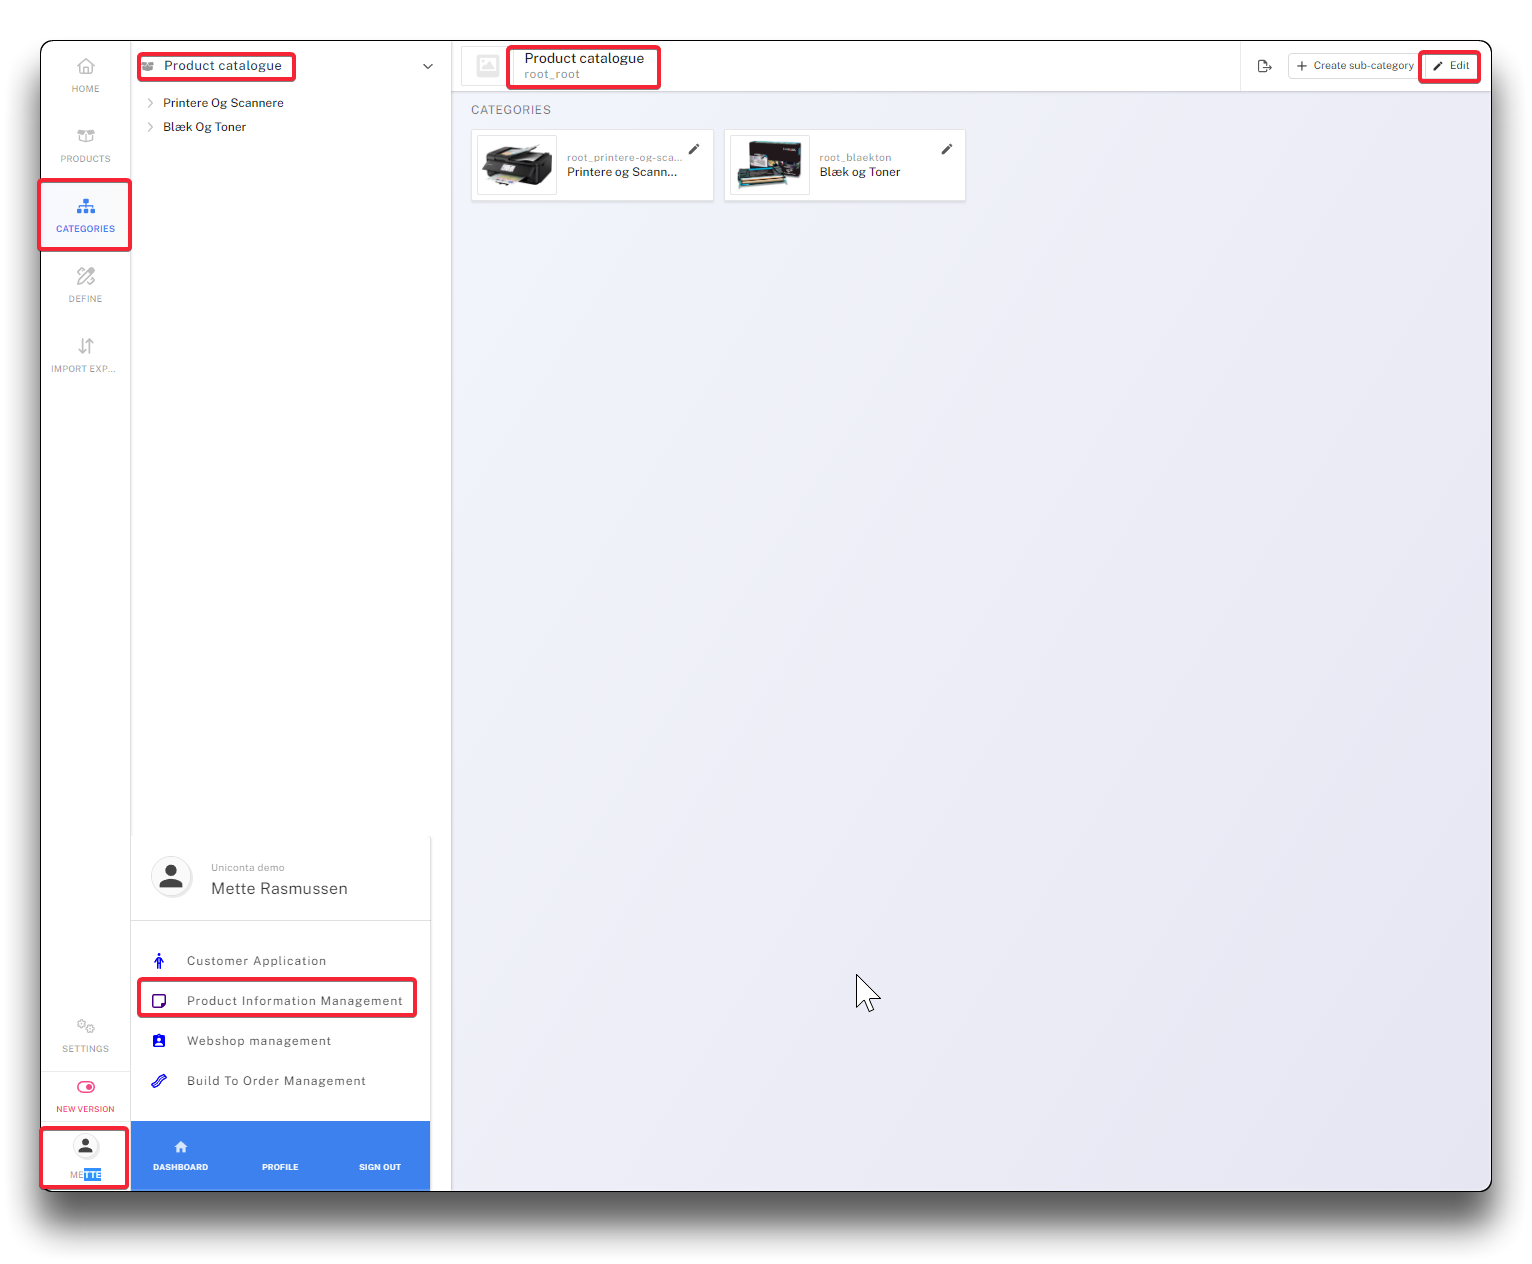
Adding the field to specific Categories in PIM
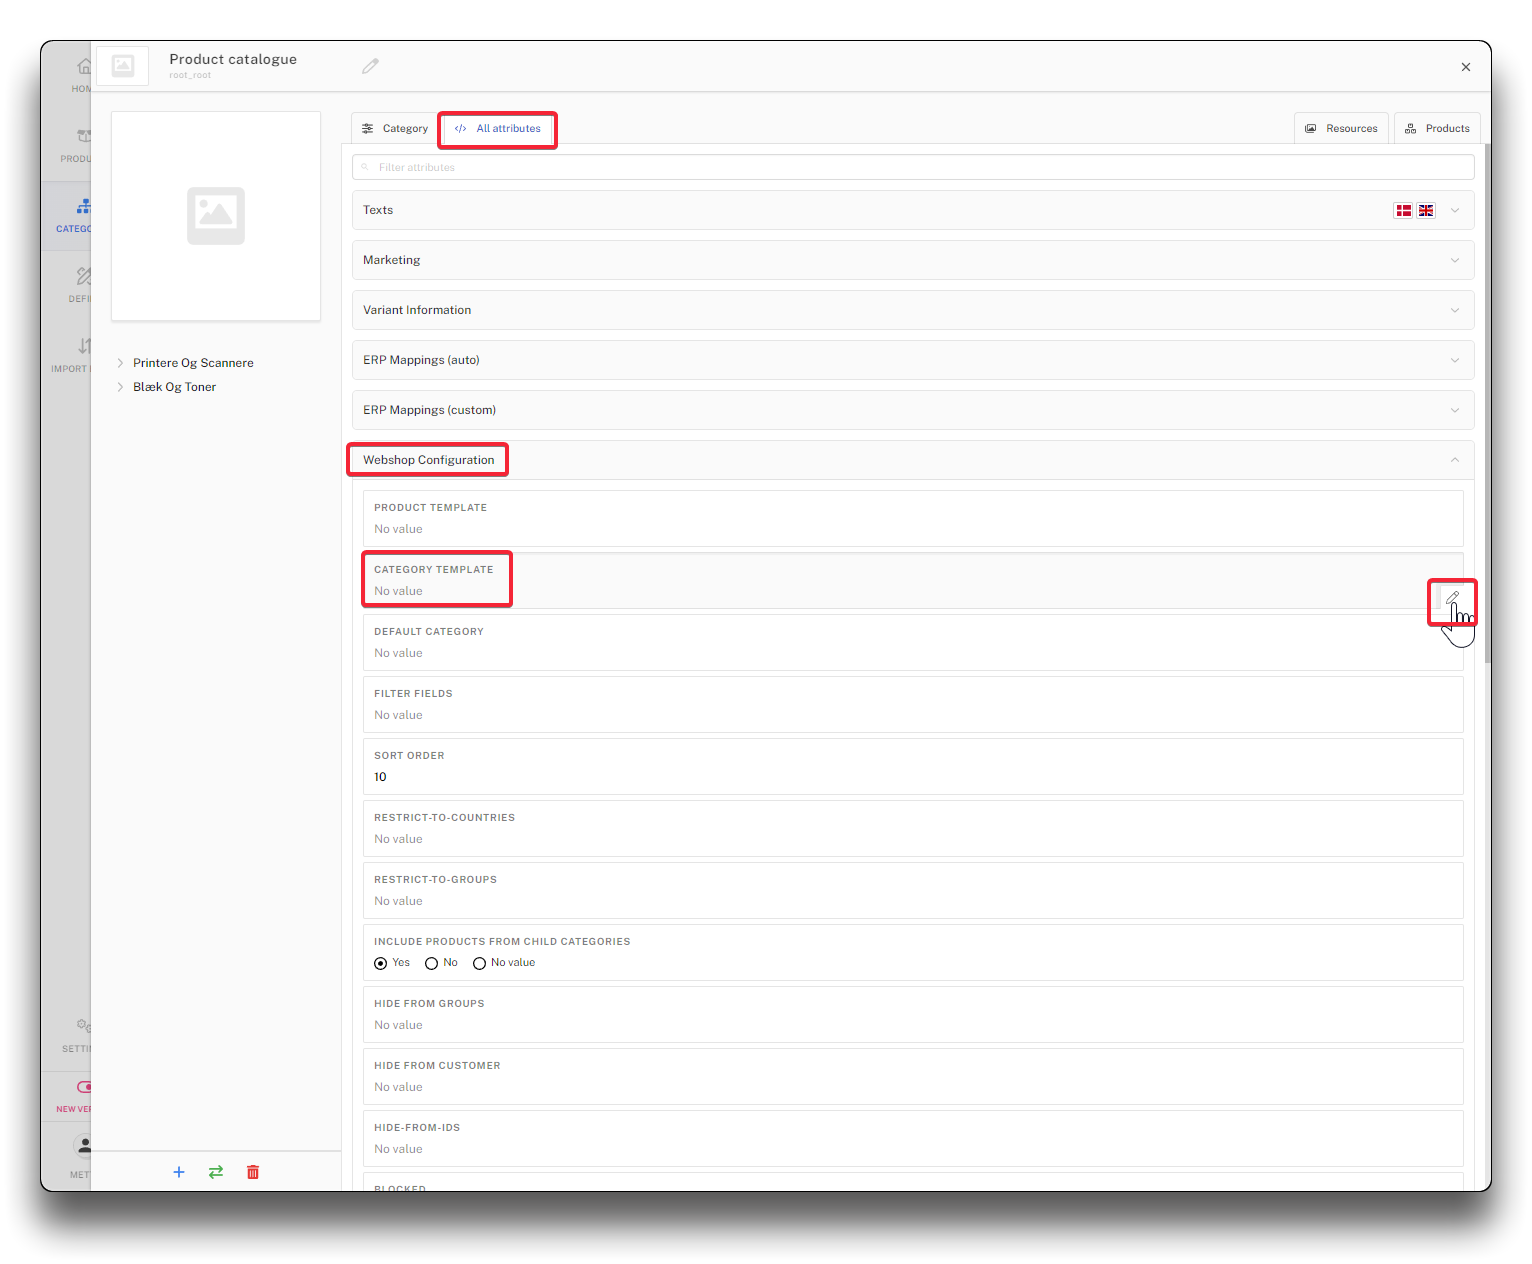
Navigate to your category of choice and click "Edit", find your "Category template" filed under the section "All attributes", "Webshop Configuration", click the edit-icon
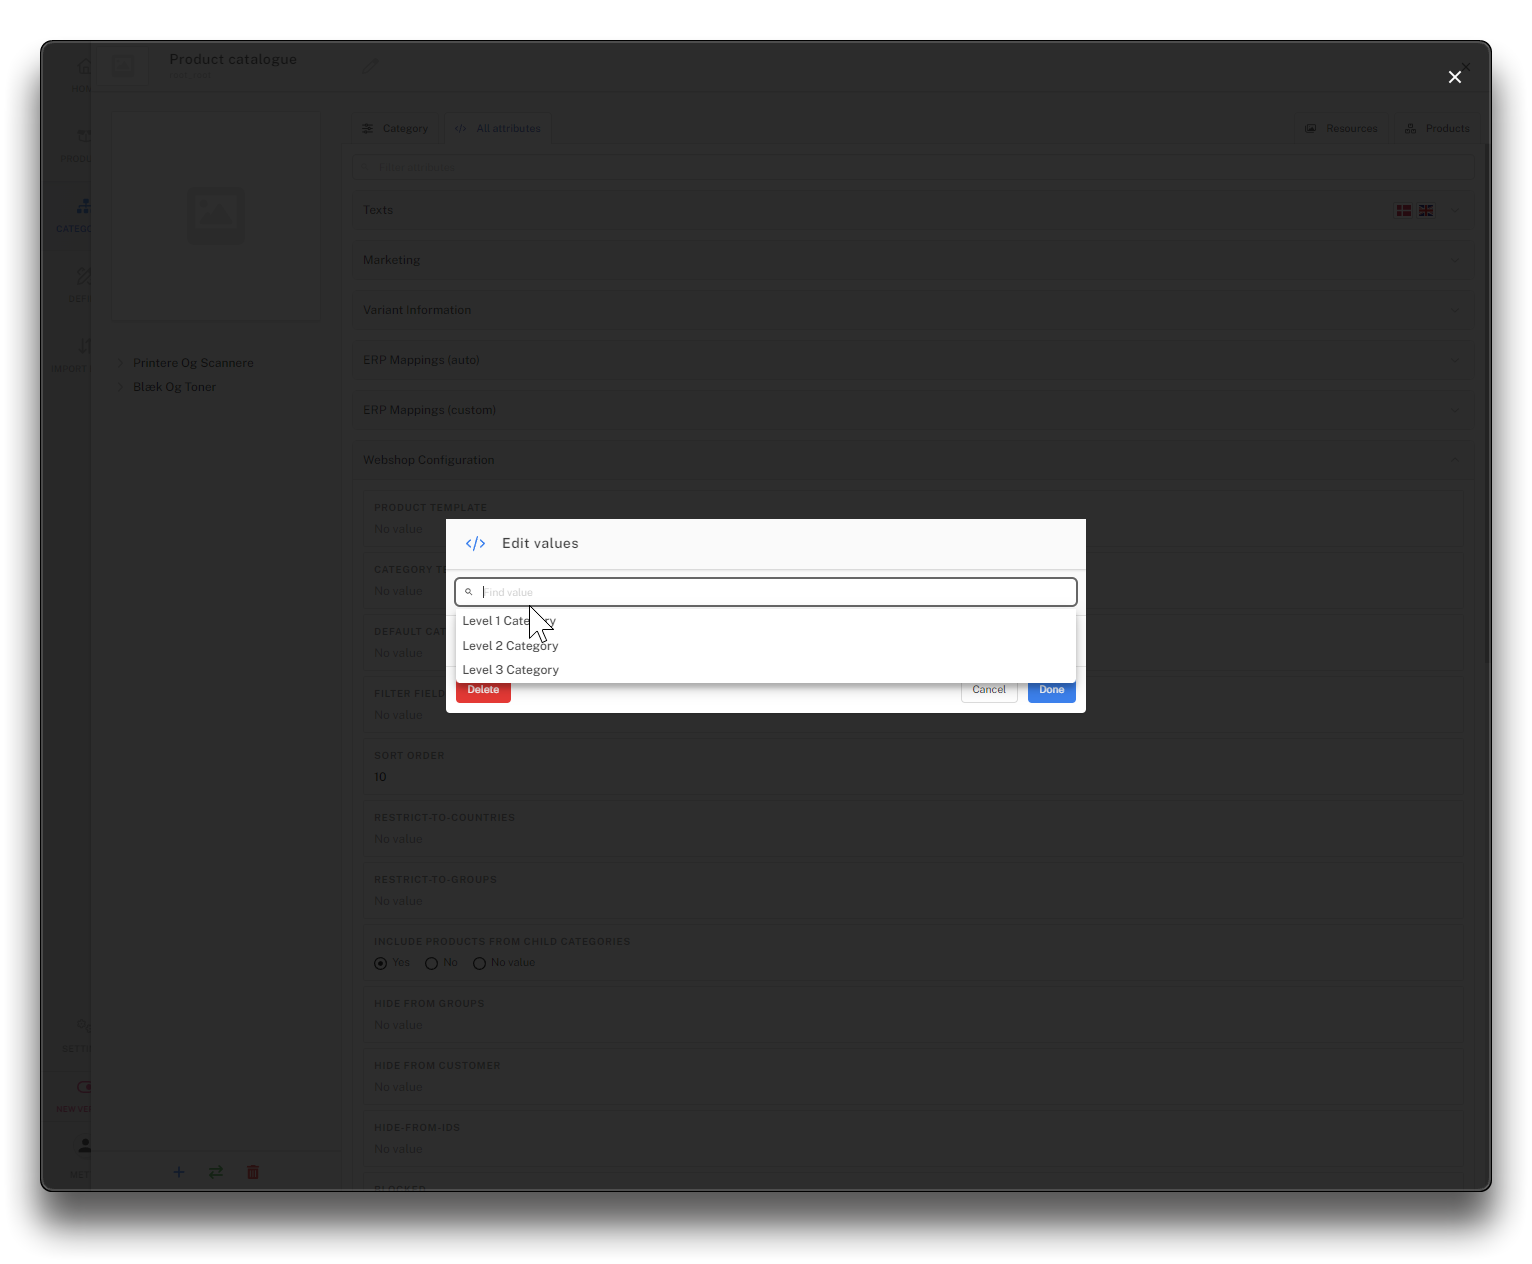
Populating field "category-template" in PIM - step 1
Populating filed "category-tempalte" in PIM - step 2
Choose the template from the dropdown menu you wish to be used for this category and click "Done".
Populating field "category-template" in PIM - step 3
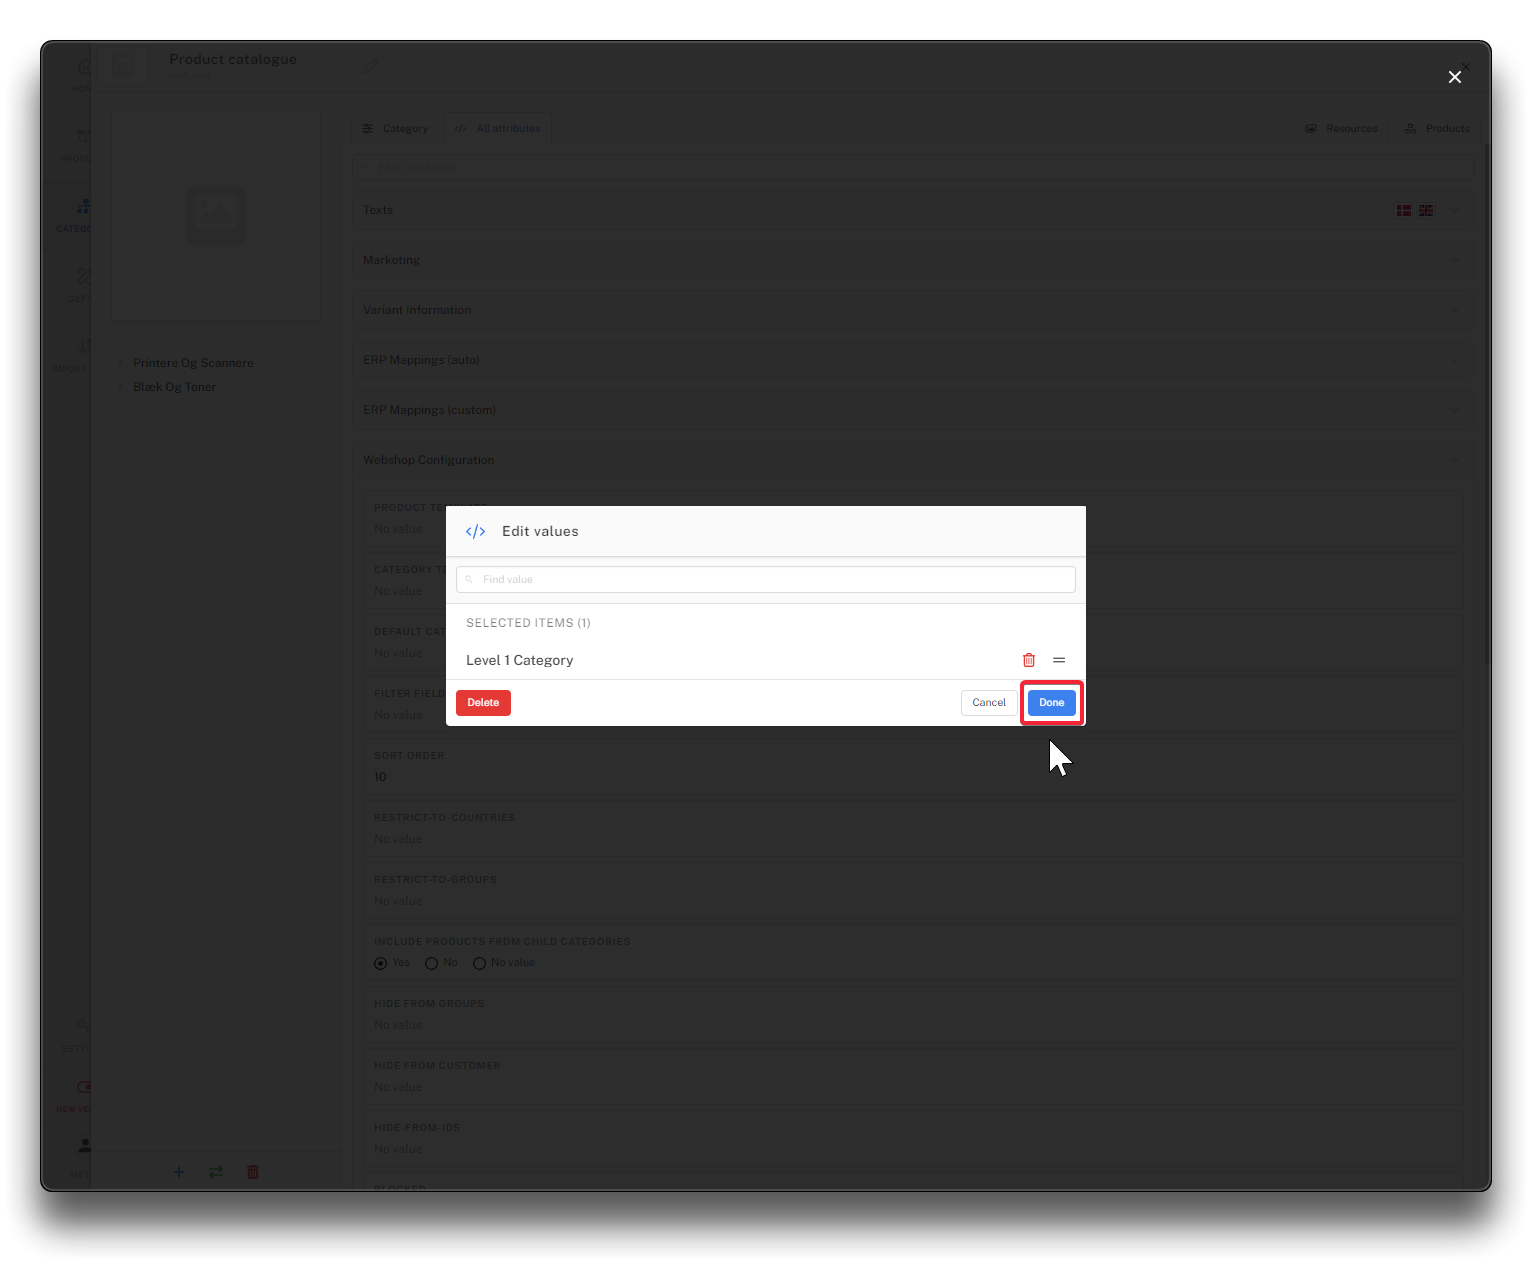
Populating field "category-template" in PIM - step 4
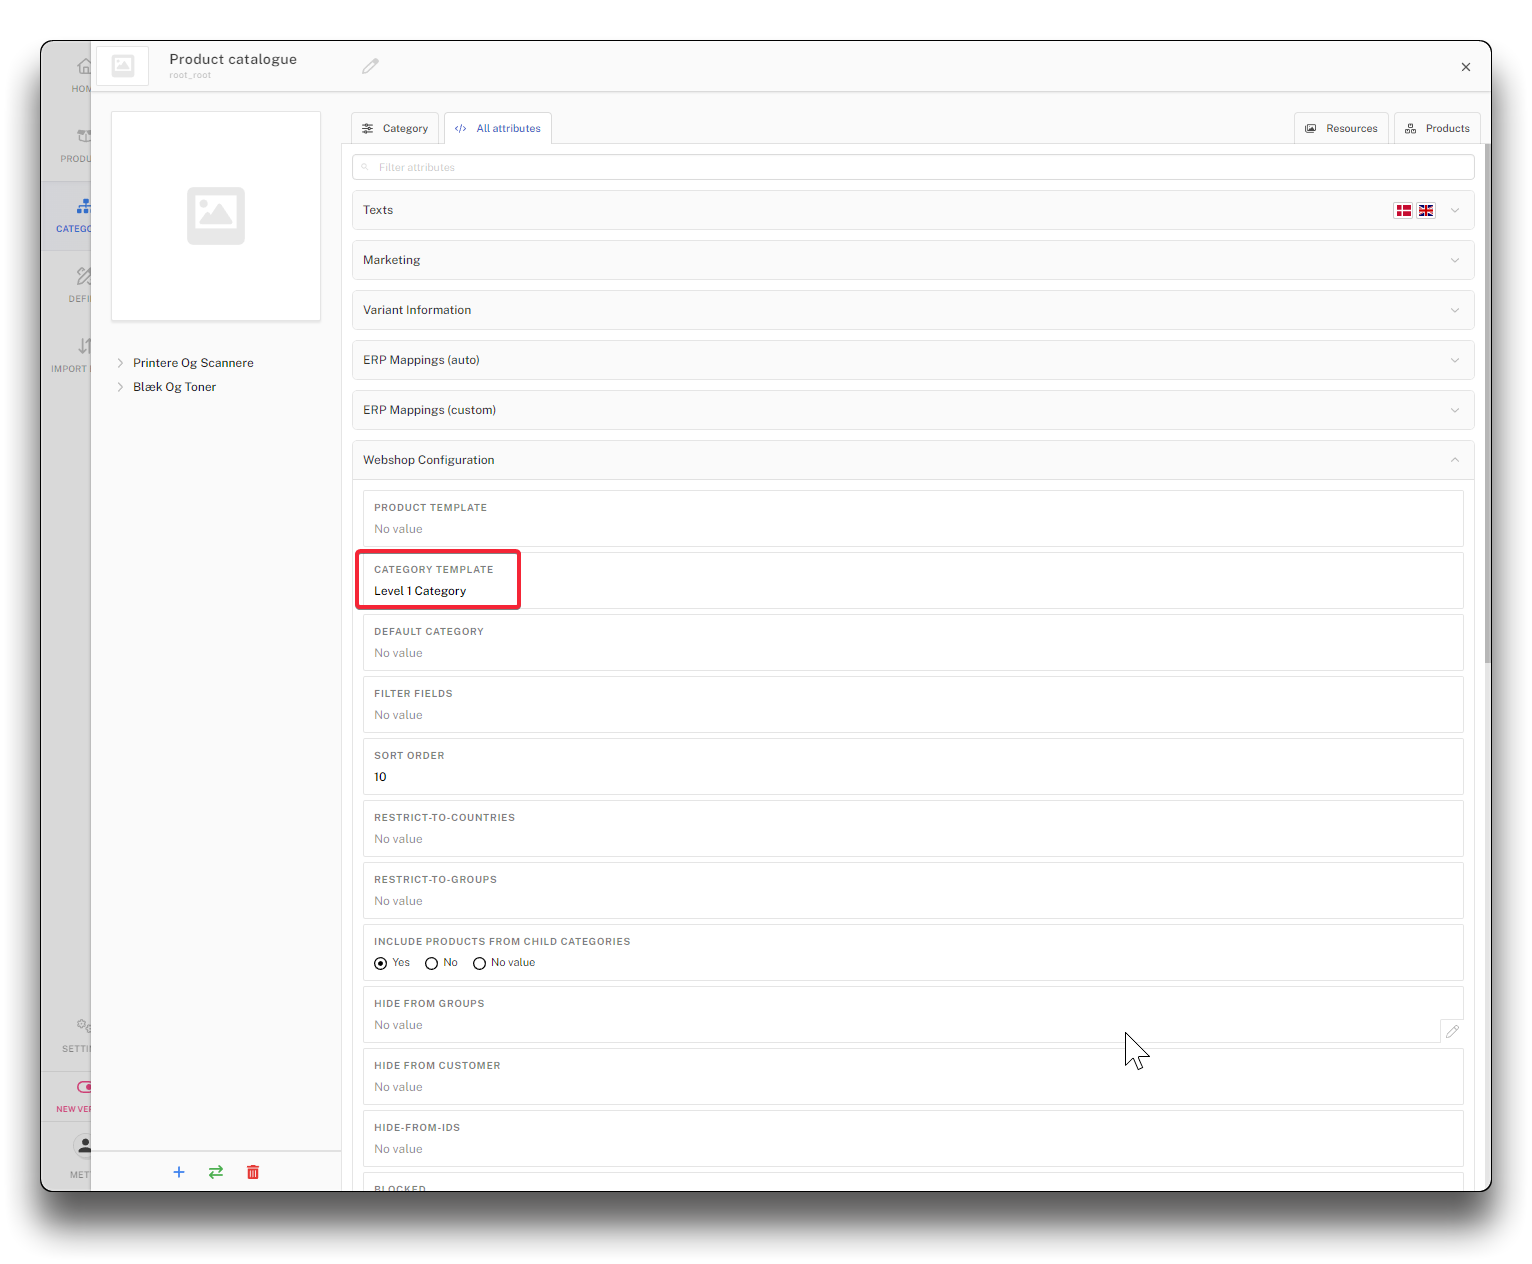
Your choice will now be visible as shown below, and can be edited at any time. Continue with all the categories you wish to attach a specific template to. In Umbraco you will continue to have your Default template defined as "System default". This will mean that any categories that does not have a special template assigned to them in PIM, will use the default template.
Populating field "category-template" in PIM - step 5

Default category template set to "System default"
Category level 1 design
Category level 2 design
Category level 3 design