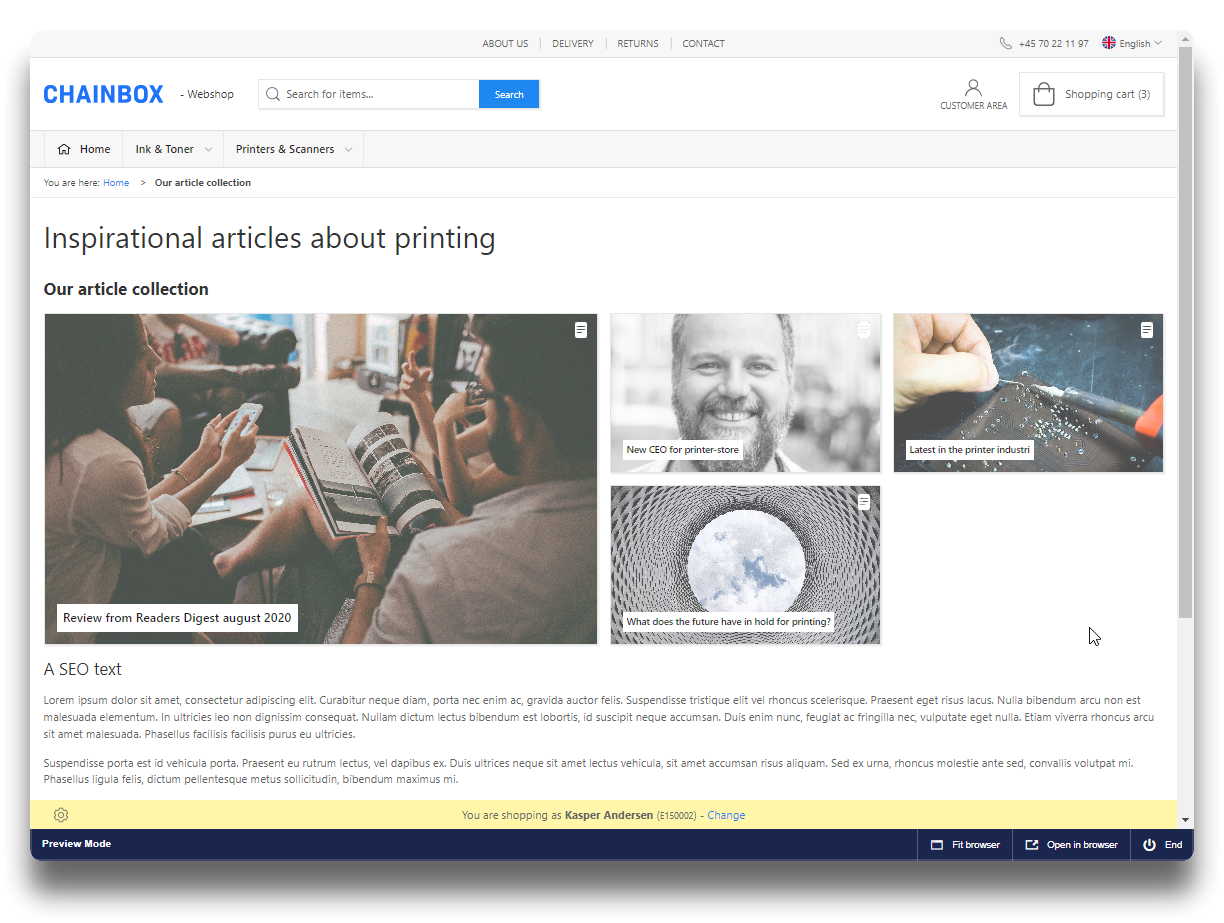
Article collection page
Creating a landingpage collection
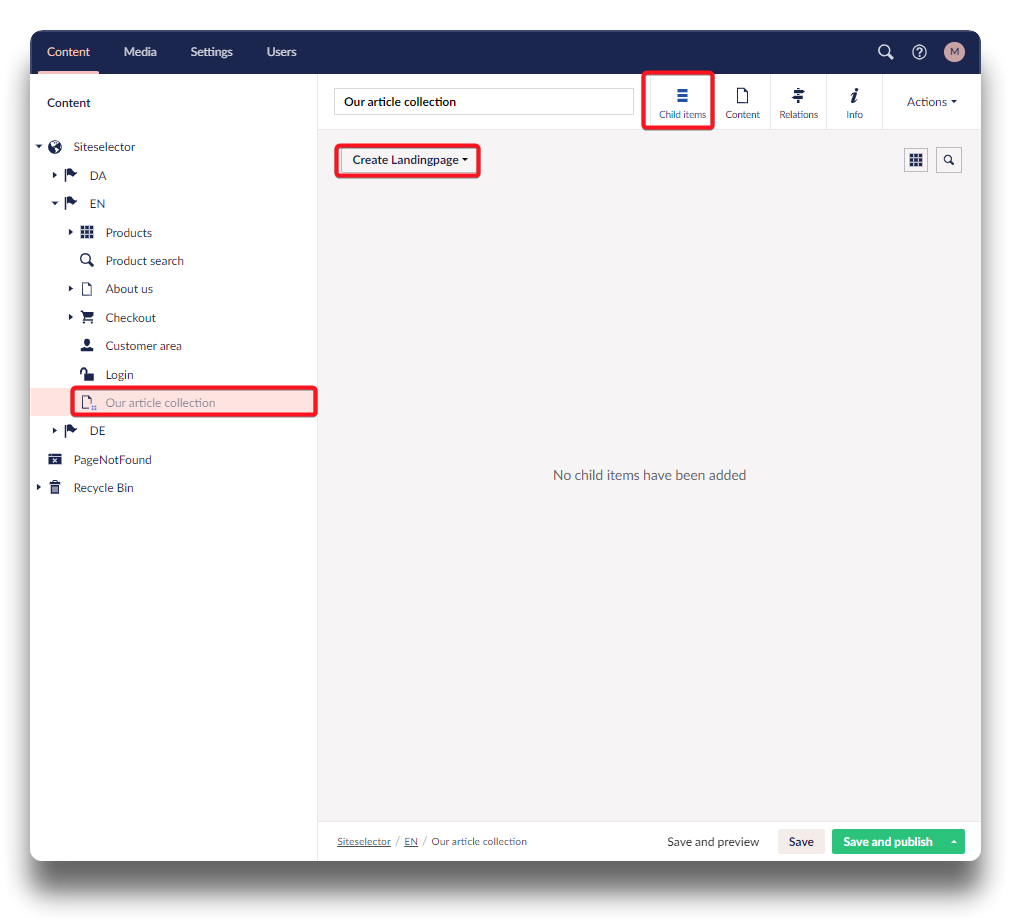
For this example, we will create a collection page for articles.
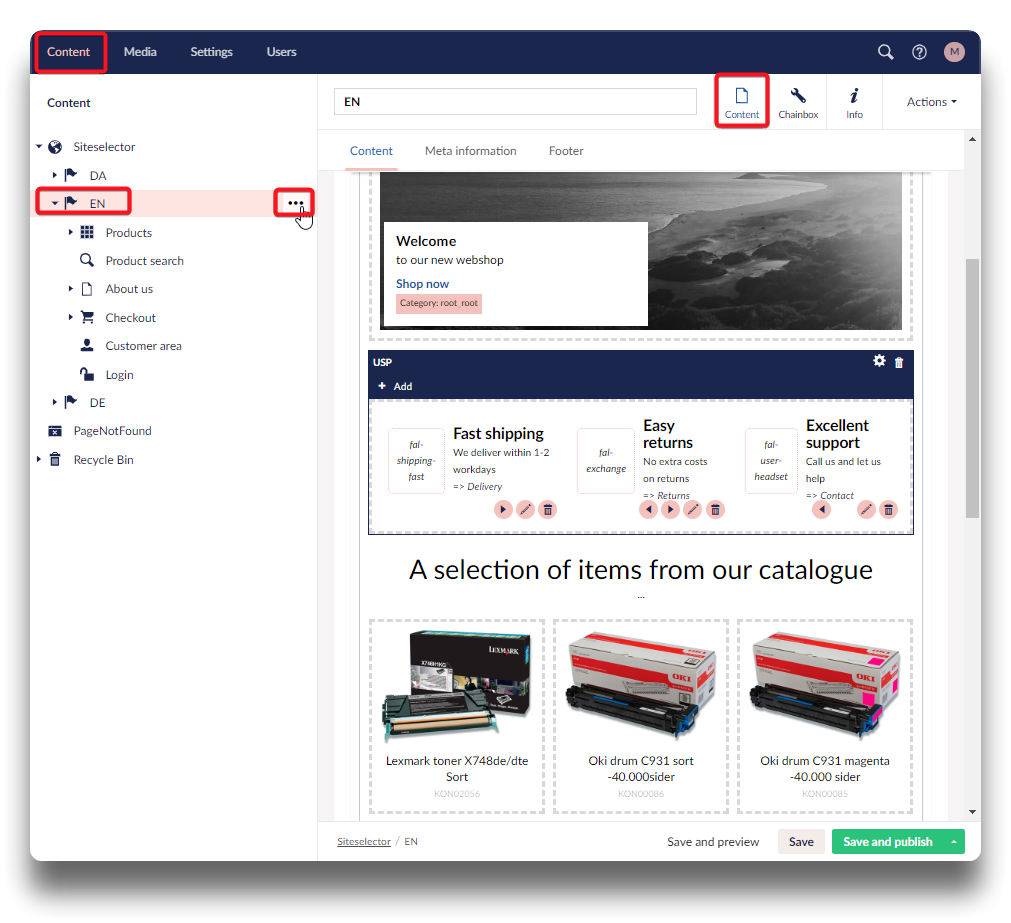
Go to the language node you wish to create the pages under.
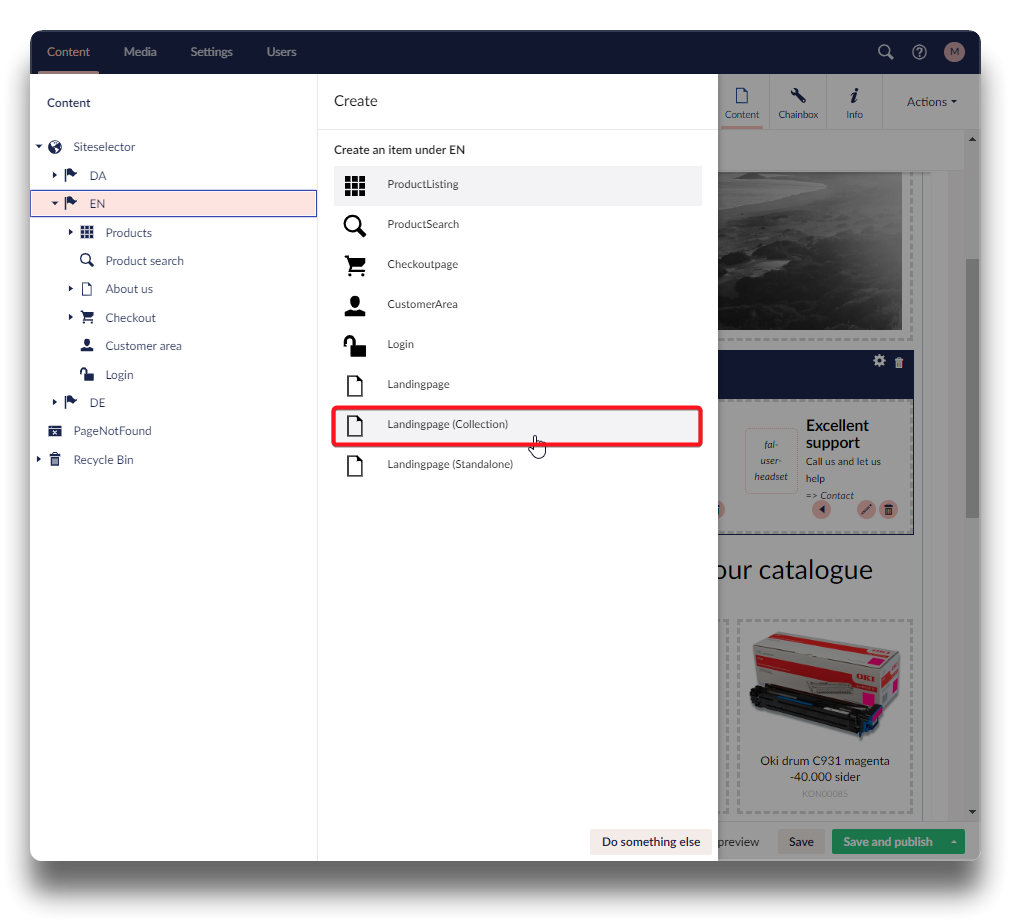
Click the 3 dots, and choose landingpage collection.
Creating landingpage collection - step 1
Creating landingpage collection - step 2
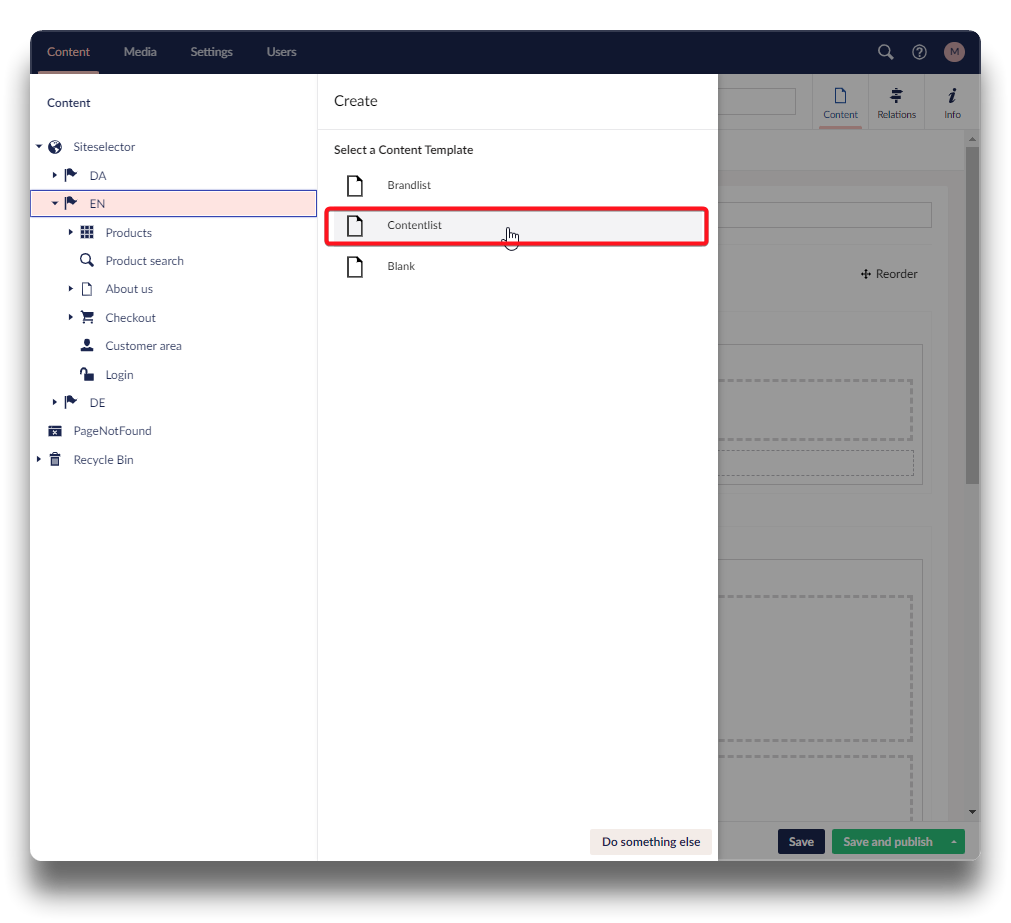
Collection offers 3 templates to choose from, these are suggestions amendable, so choose what comes closest to your needs. For this article page collection we choose Contentlist.
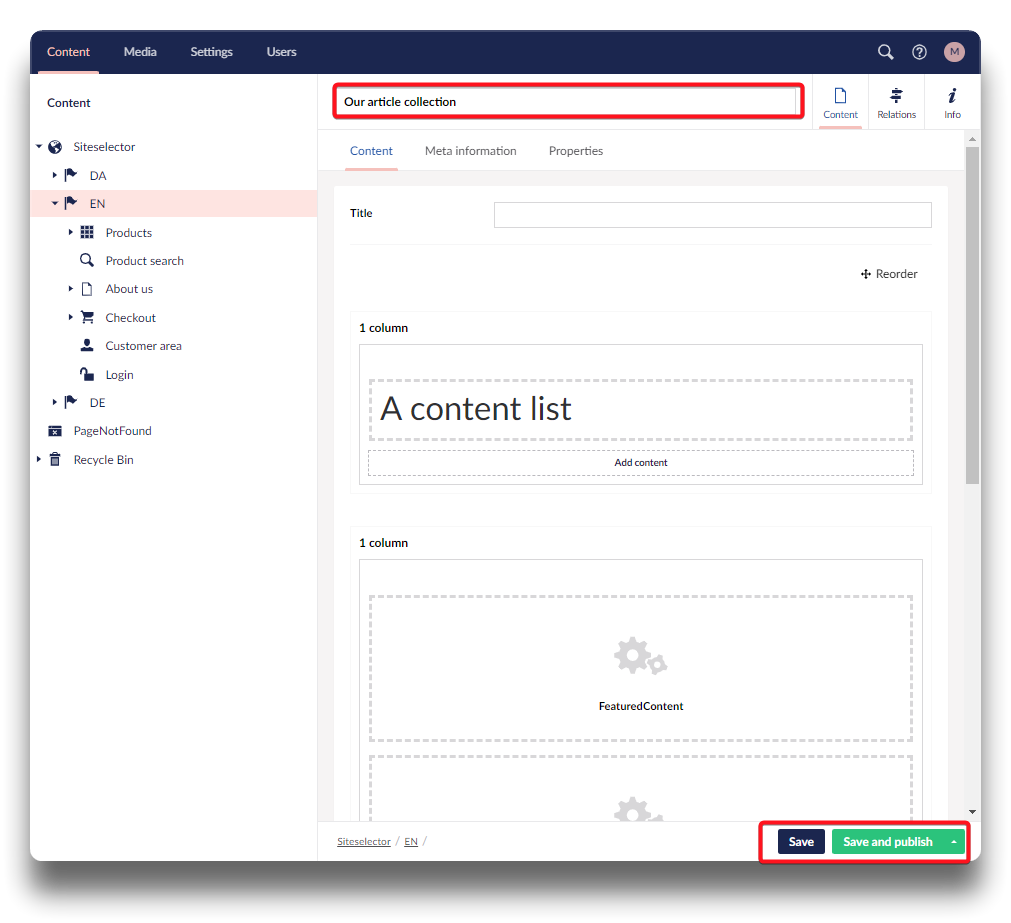
Name the collection page, and click "Save". This way we avoid publishing pages that are not ready yet.
Create landingpage collection - step 3
Create landingpage collection - step 4
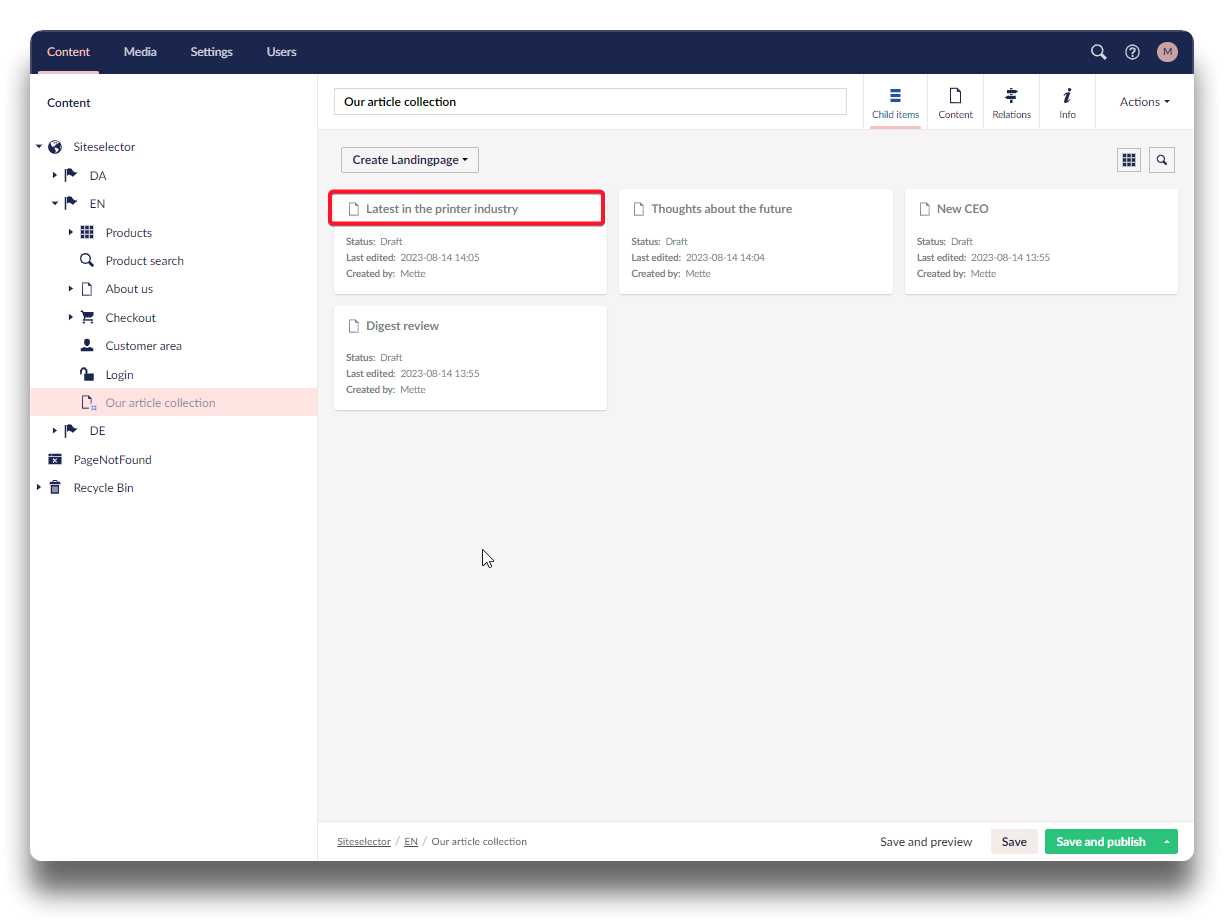
Creating child items
The individual articles we are creating will be regular landingpages with templates, but will present themselves on the collection page as child items.
Click out of the collection page and back into it, and now a new tab in the top will appear, called "Child items", from here click "Create Landing page" to create your first article for the collection.
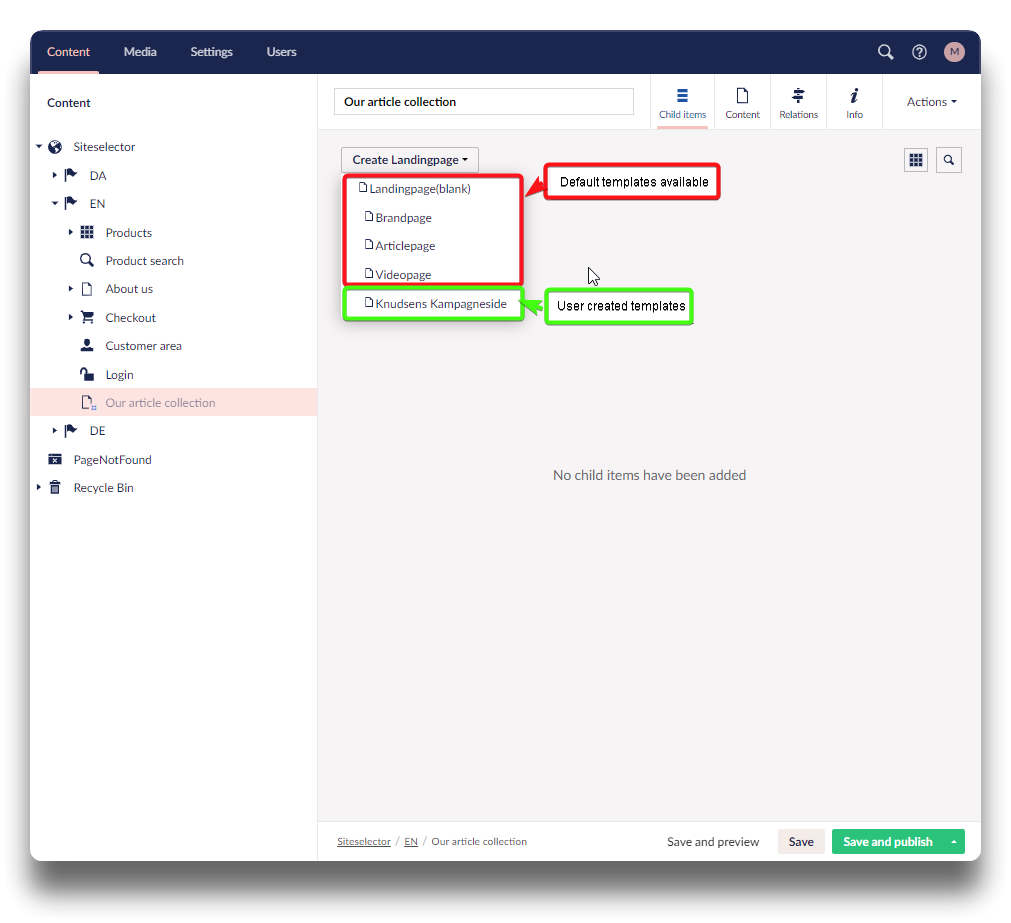
Now choose the template to create the individual page from. It could be from Chainbox default templates, or from templates that you created and saved yourself.
Create child items - step 1
Create child items - step 2
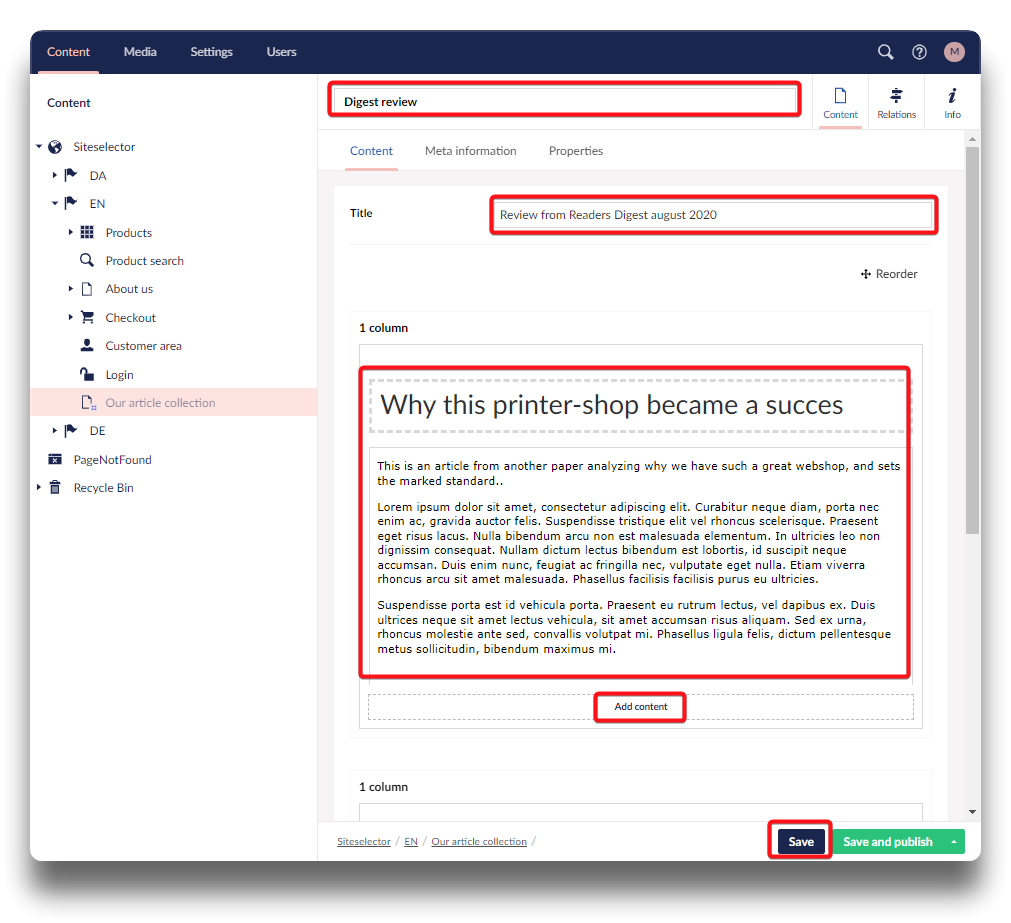
Since we are creating an article collection, the article template is chosen here. Start by naming the page, enter a title, and add content. Click "Save".
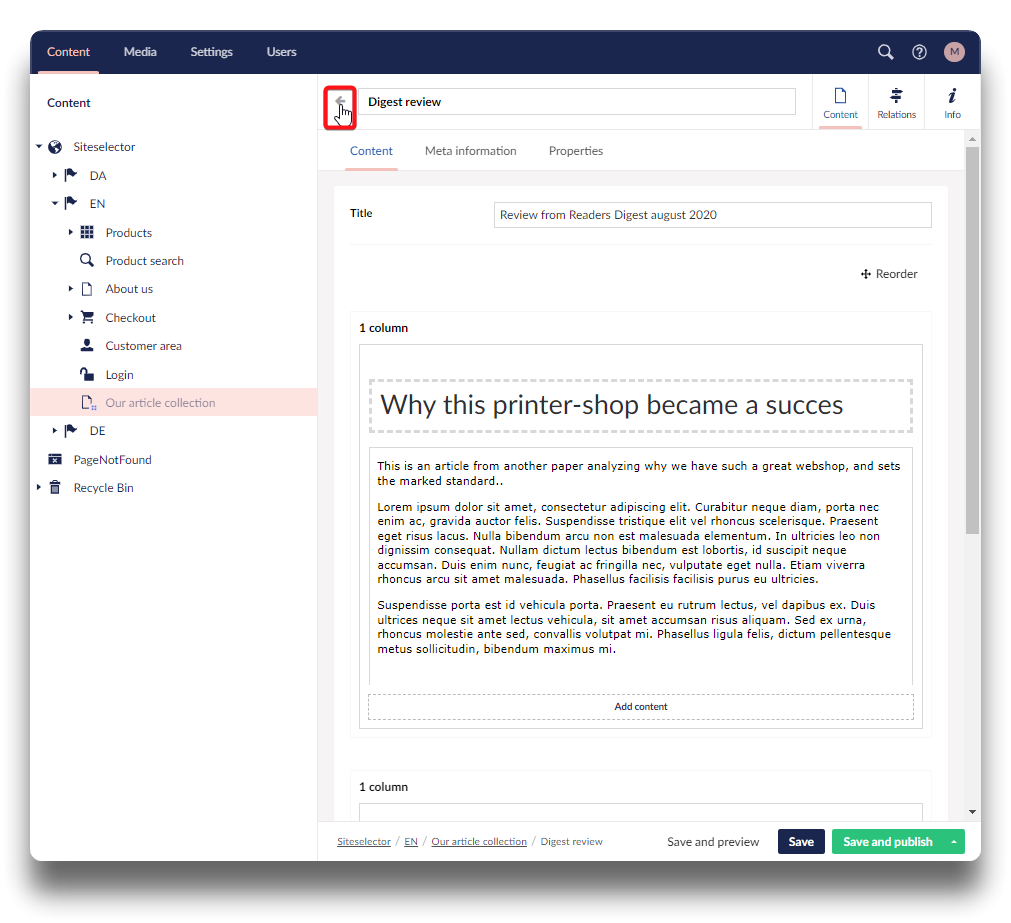
Use the Arrow to navigate back to the collection page, to add additional Child items.
Create child items - step 3
Create child items - step 4
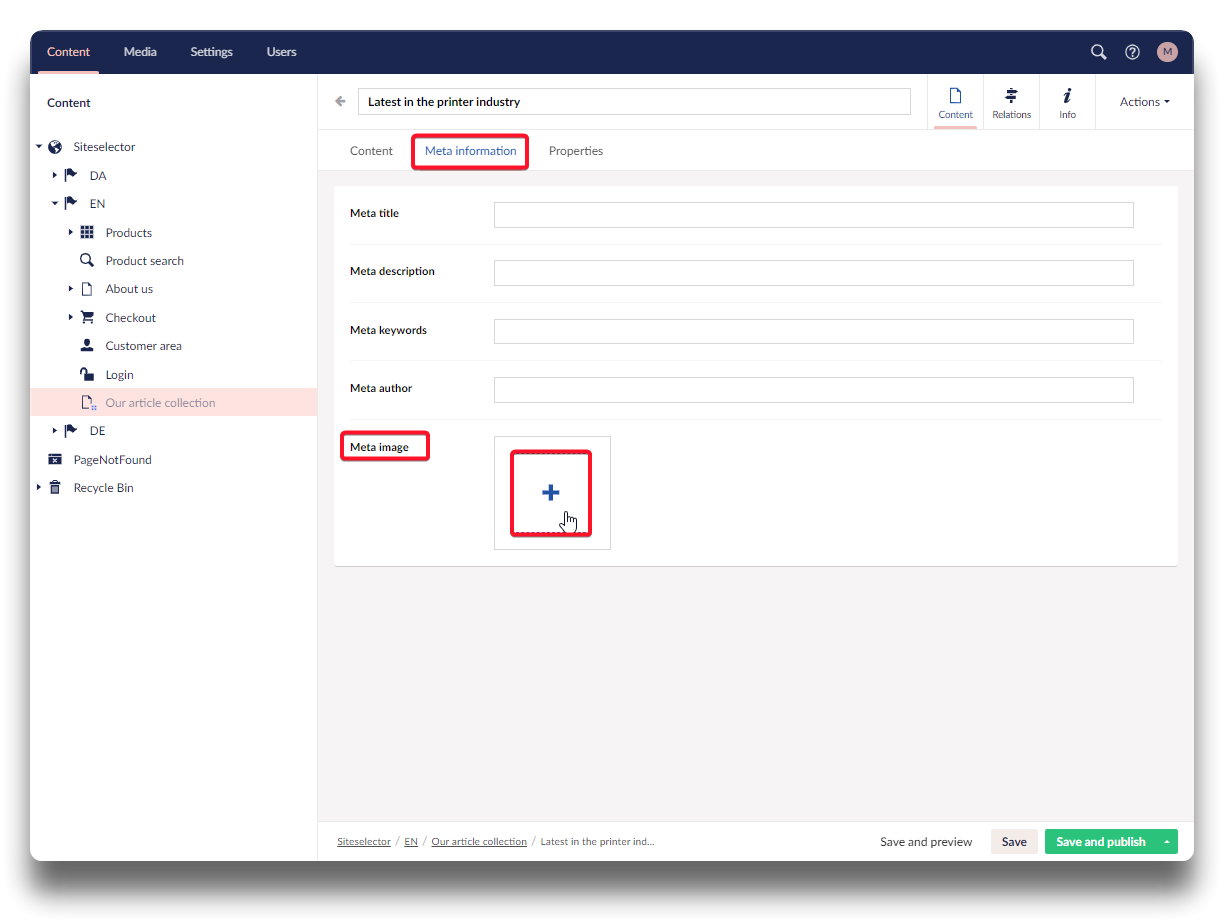
Adding Meta images to child items
Each child item can be presented in the article collection with an image. To add an image, click into the child item, choose the "Meta information" tab, and go down to Meta image.
Should there be a placeholder image, please erase that first.
Add meta image to child item - step 1
Add meta image to child item - step 2
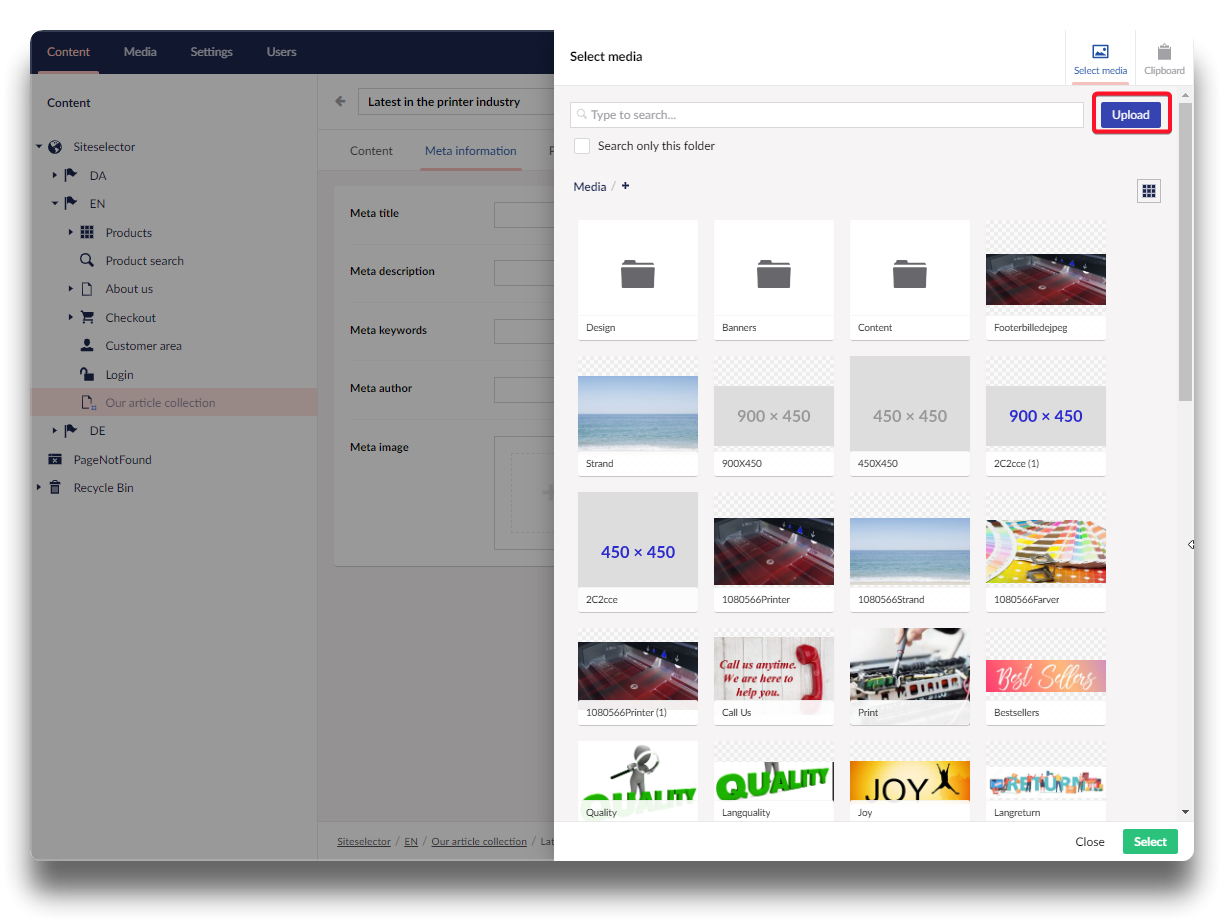
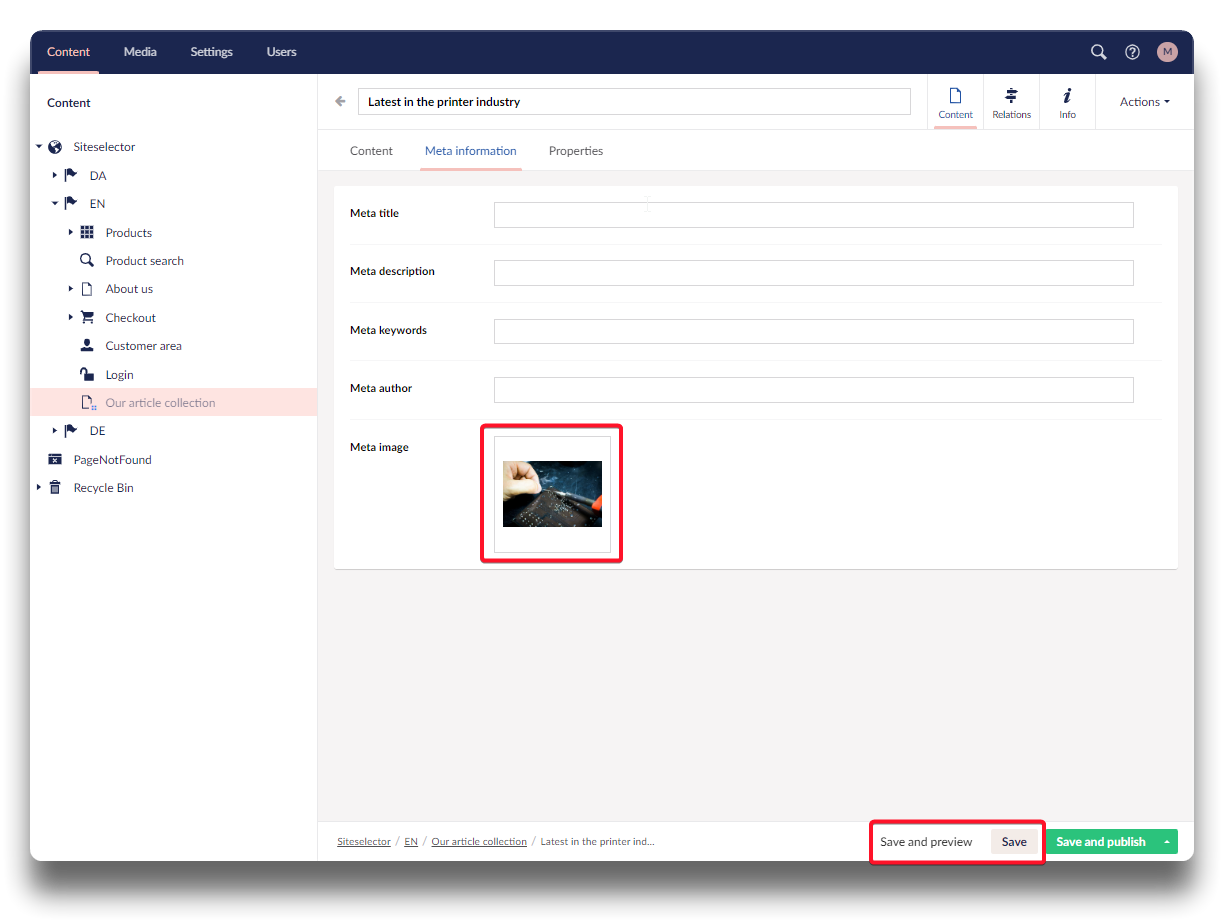
Click the "+" in the image, and upload or select from media folder the desired image. Click "Save".
Add meta image to child item - step 3
Add meta image to child item - step 4
Repeat on all child items.
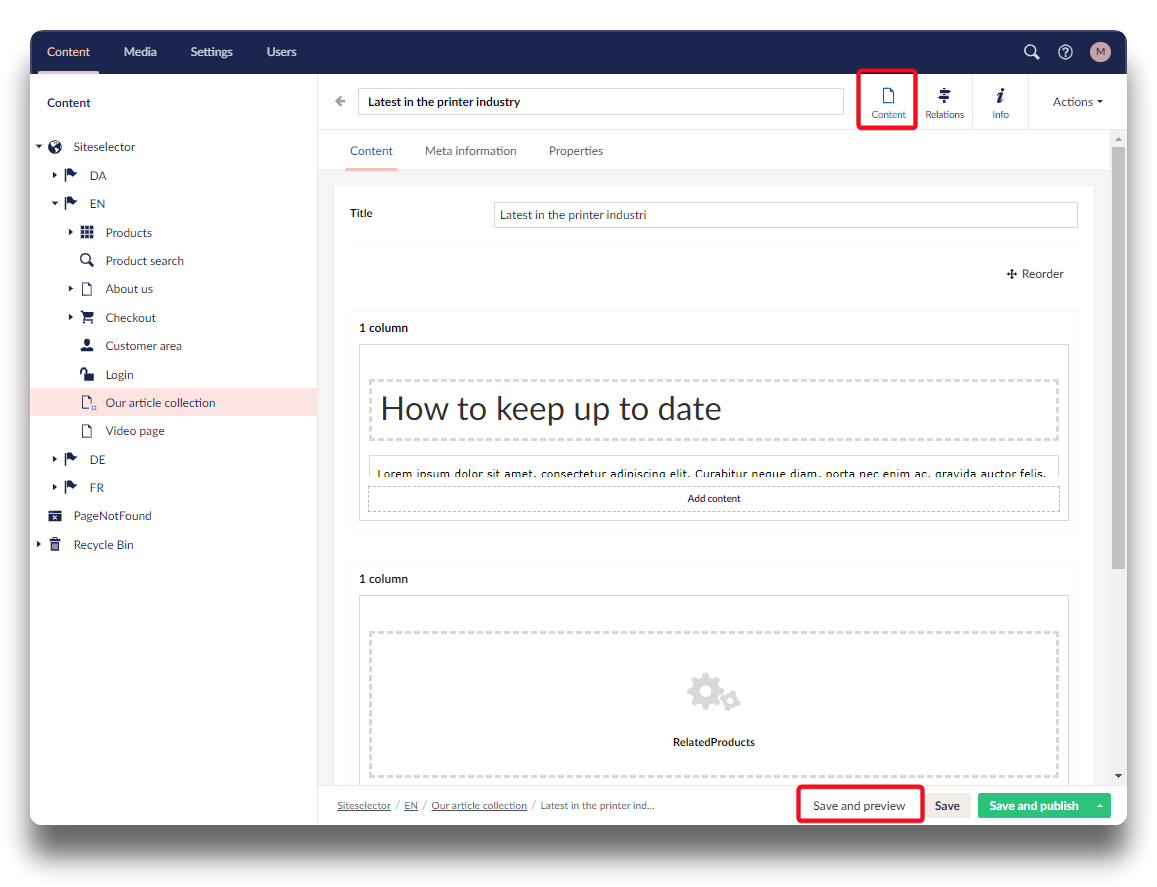
Click back on your Article collection page and click "Save and preview" to see the result of your non-published page.

Click to pre-view
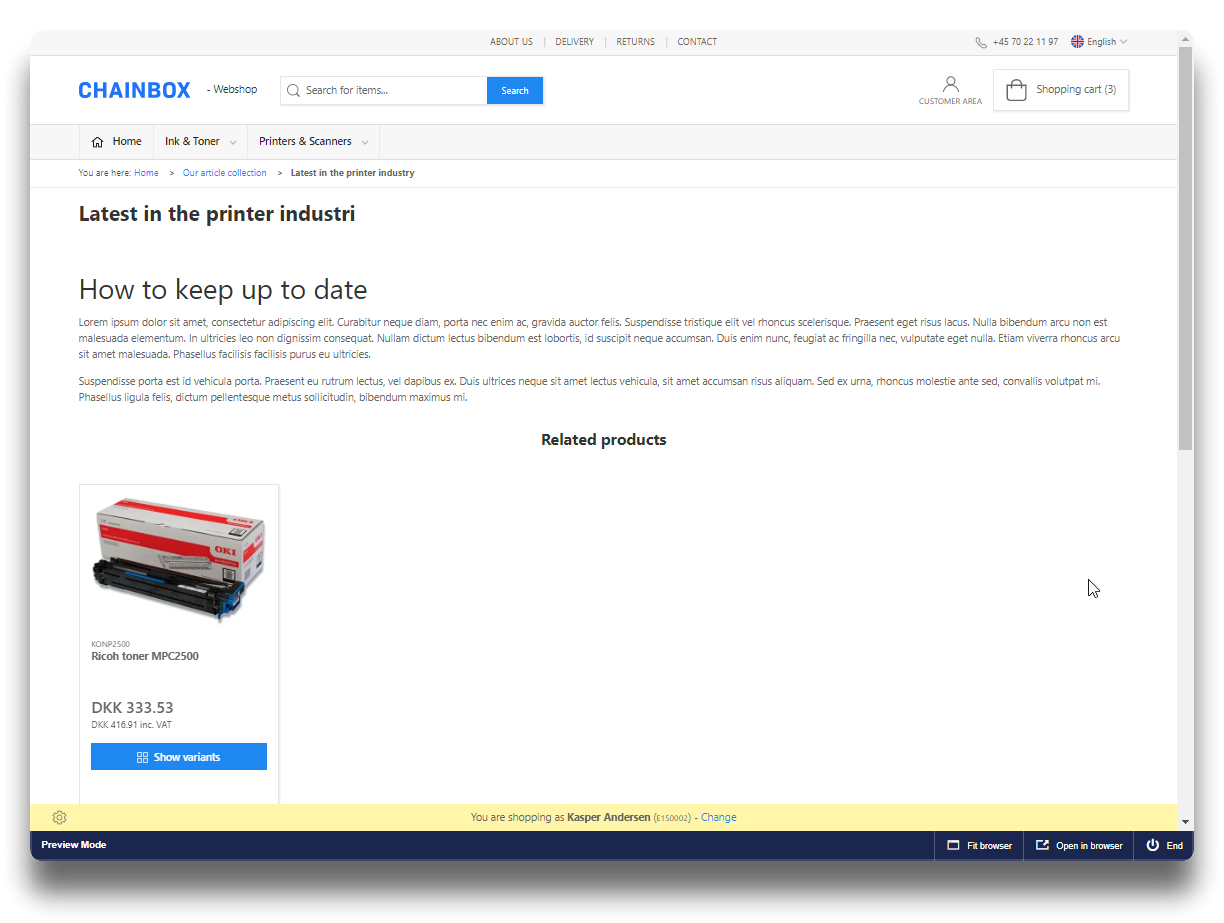
Result
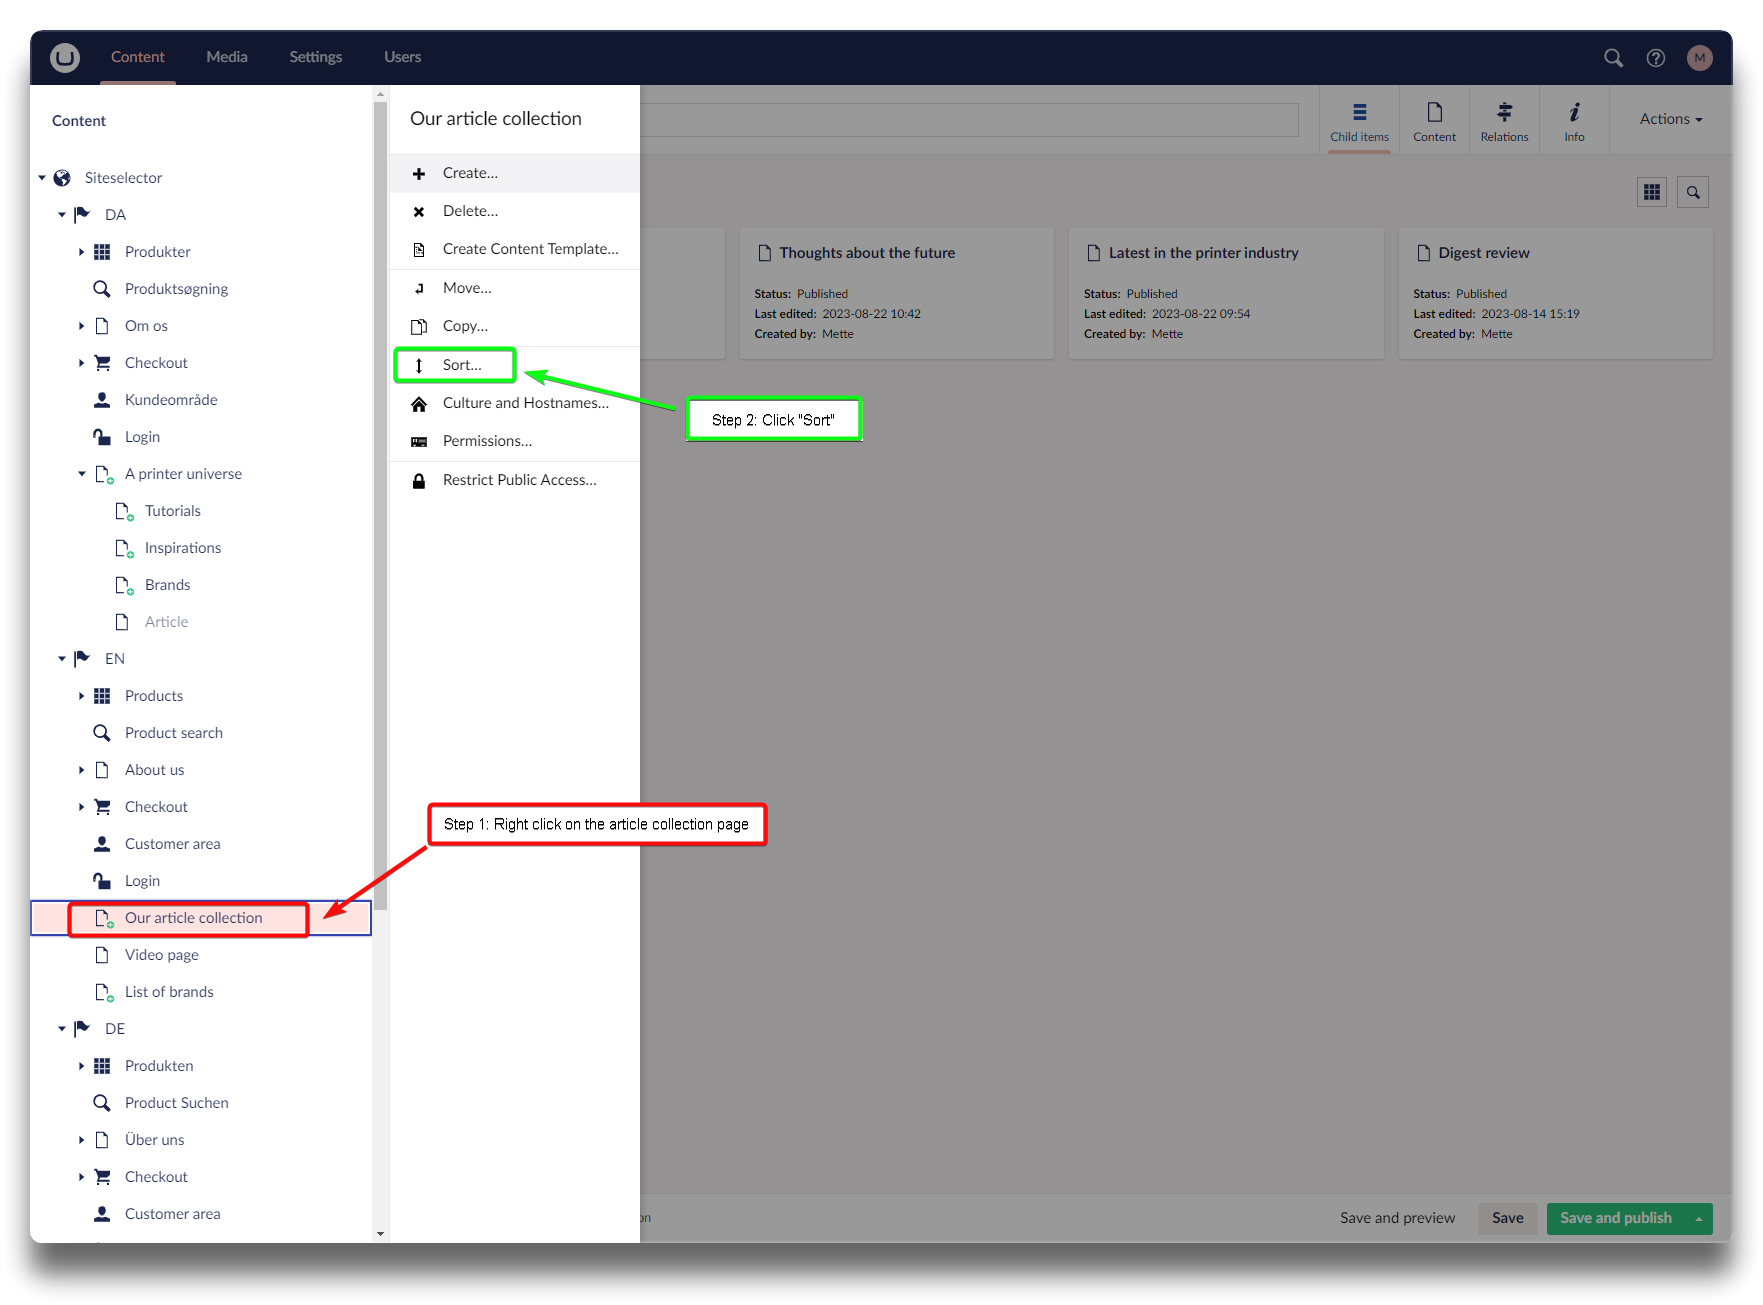
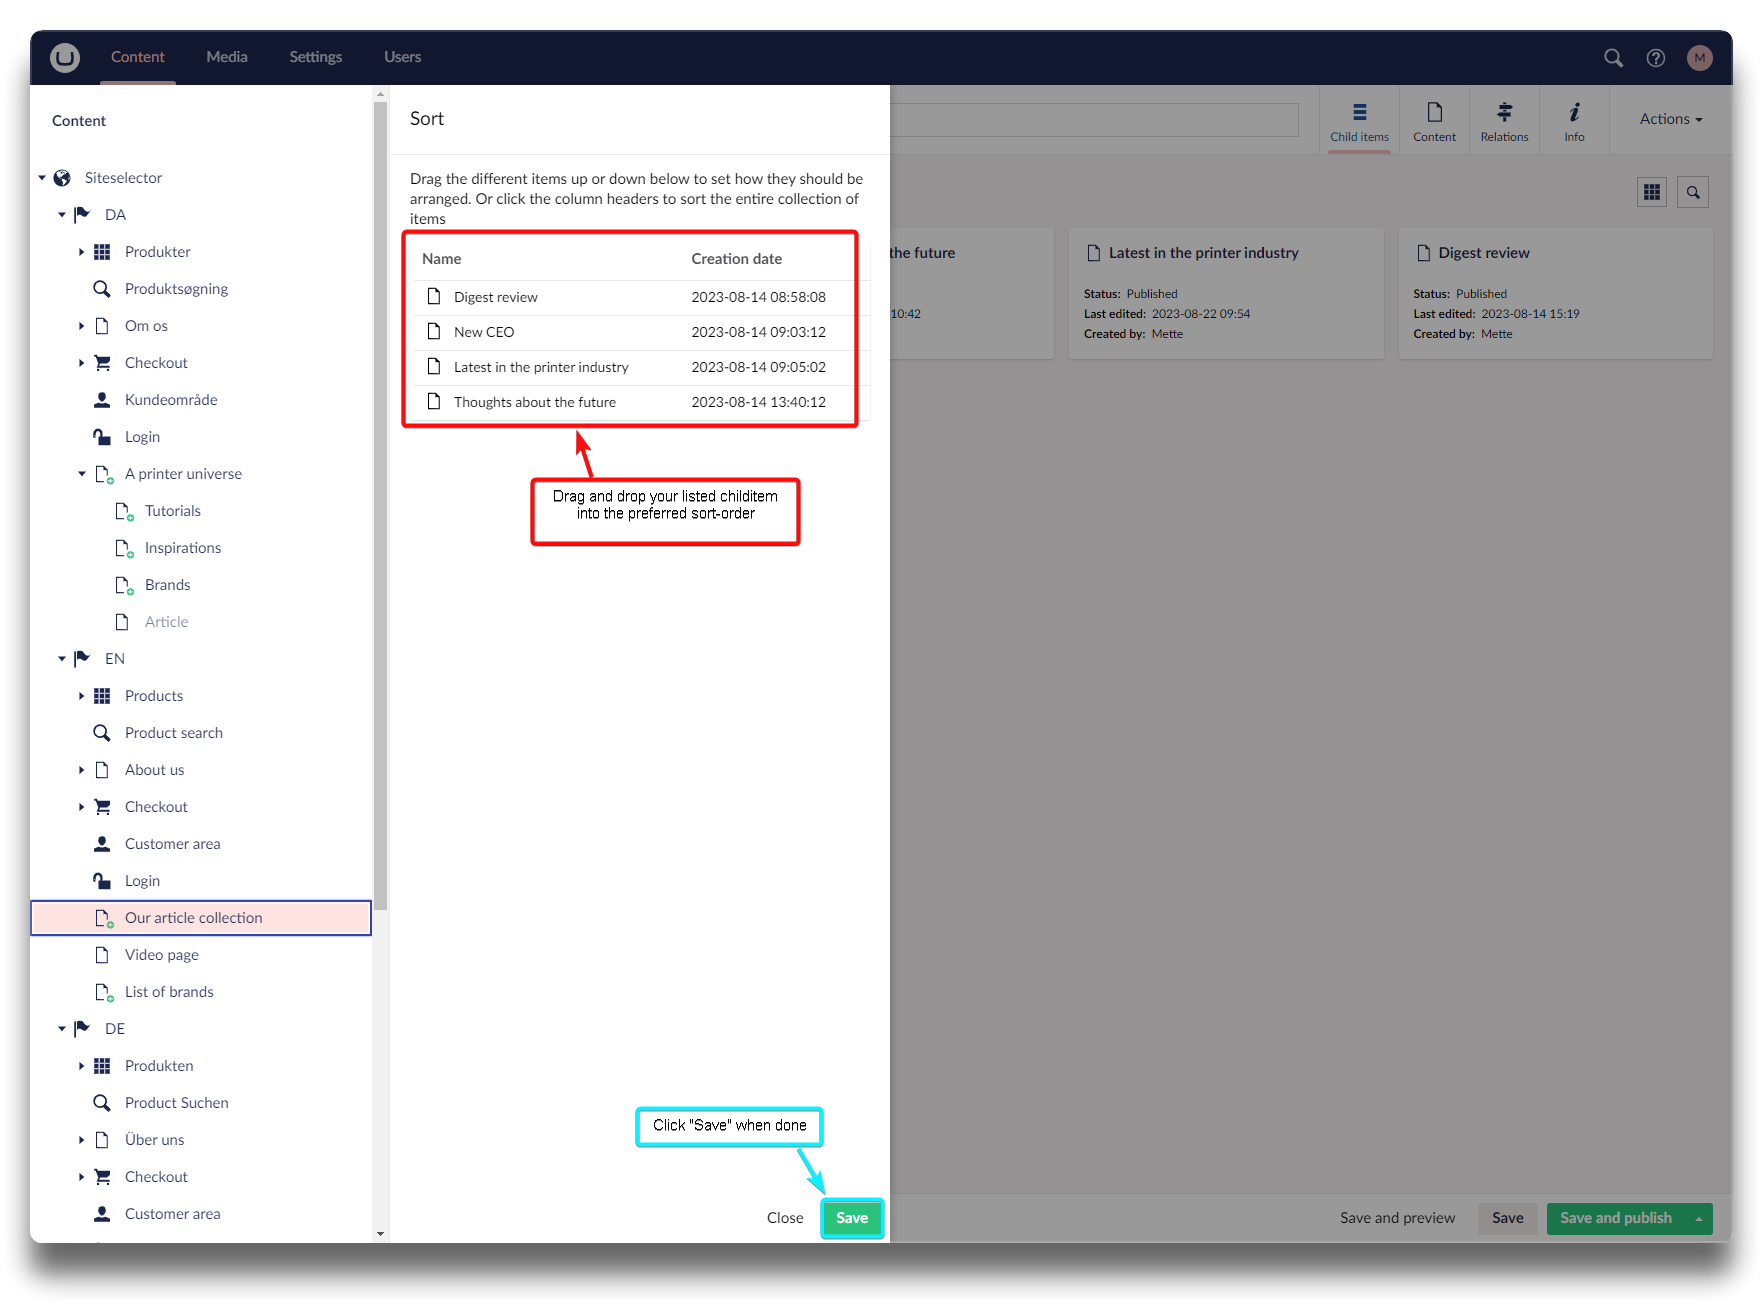
Sorting child items
Right click with your mouse on the article collection page in the tree structure. Then click "Sort". Drag and drop the individual child item listed into the desired sort order, and click "Save".
Navigate to child item sort order
Drag and drug child items to sort
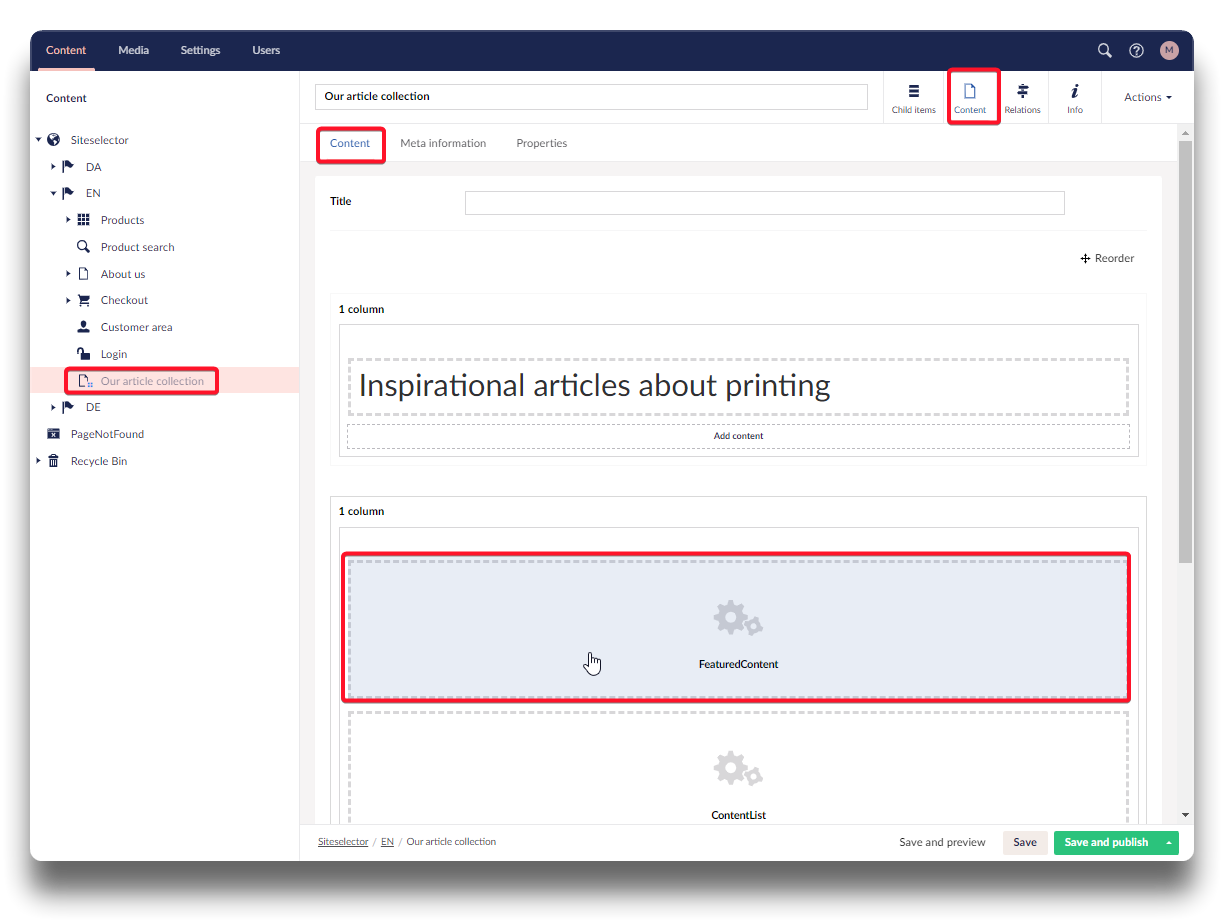
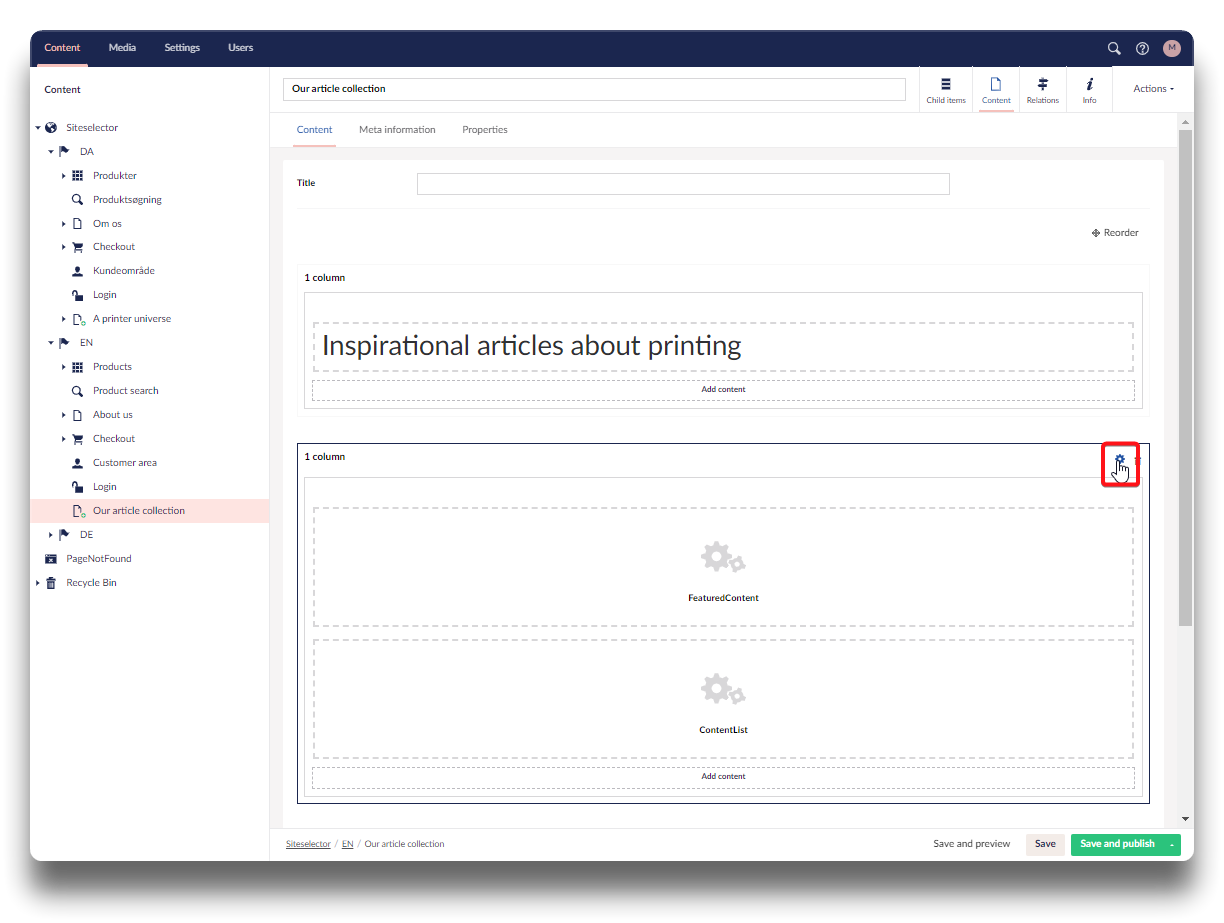
Create featured content
On the article template there is a FeaturedContent element. This is an easy way to single out articles that should be extra exposed.
To make a child featured, go to the child item tab, and click on the child to be featured.
Featured child item - step 1
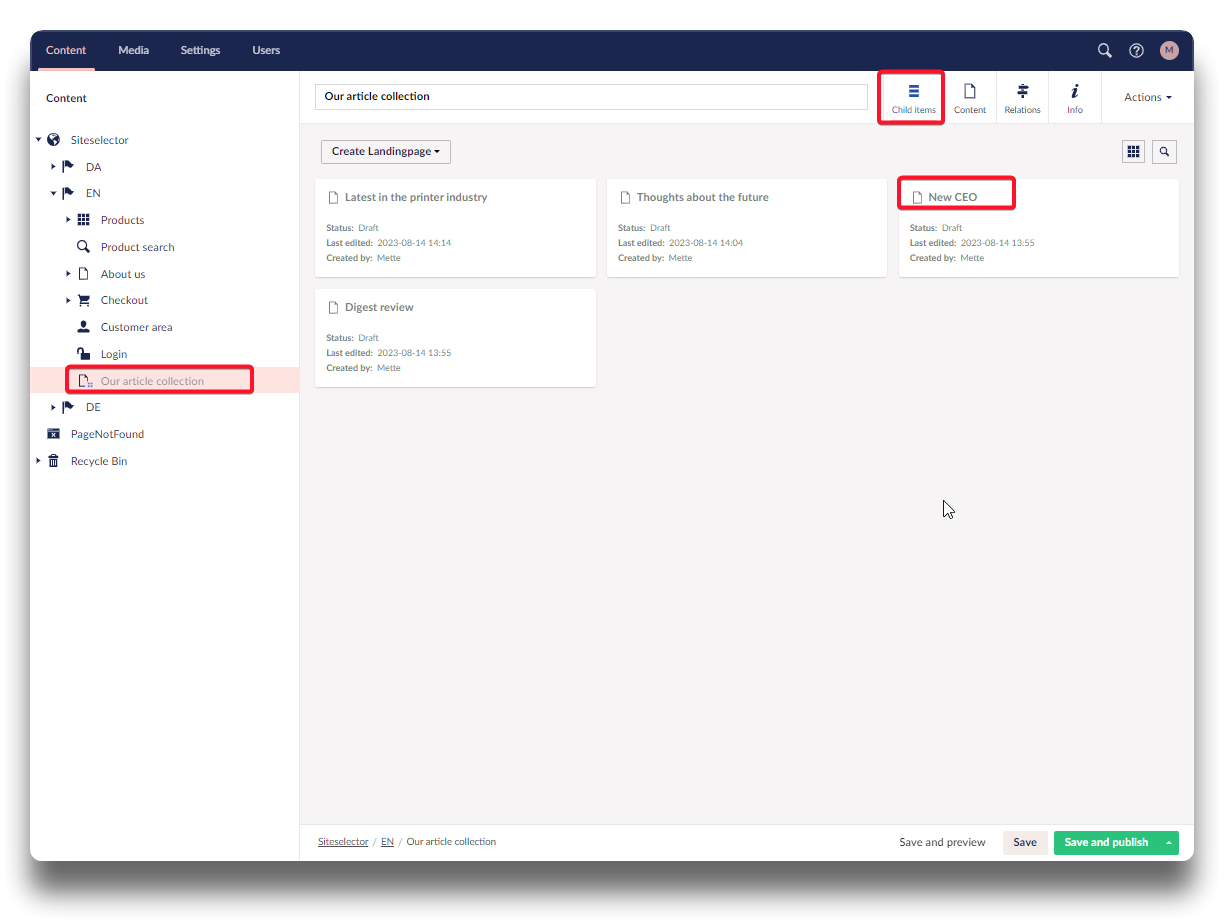
Featured child item - step 2
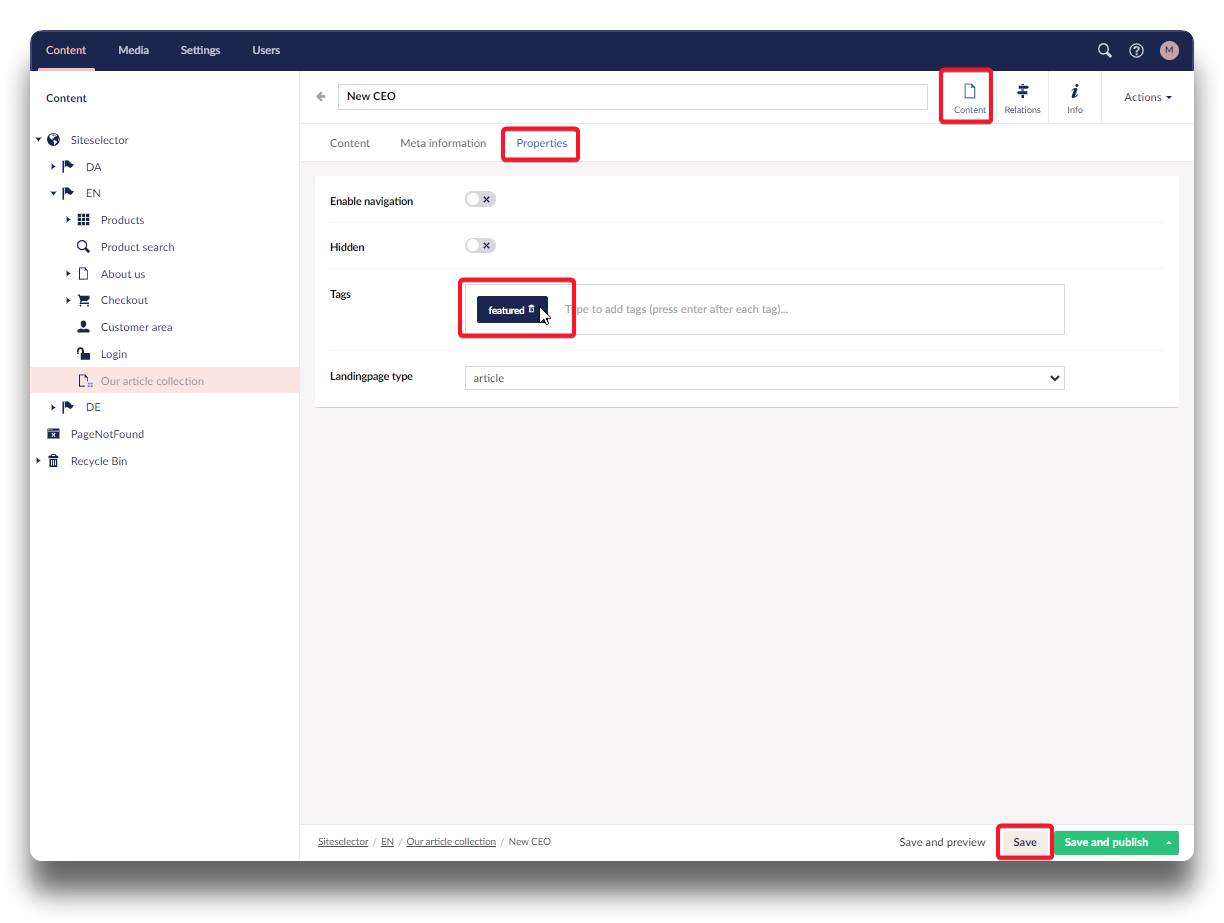
Choose the "Properties" tab and write "featured" and press "Enter". Click "Save"
Go back to the collection page and click "Save and preview" to see result.
Featured child item - step 3
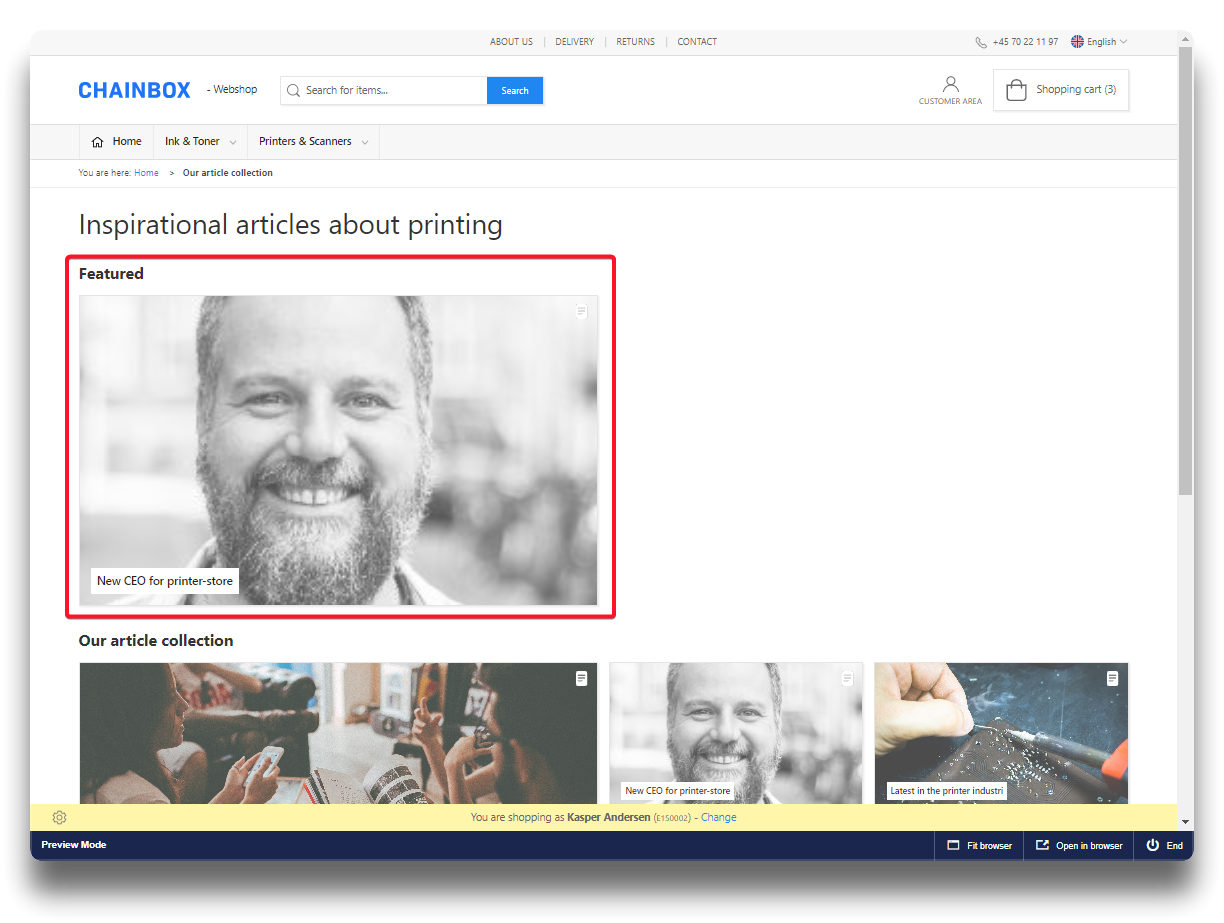
Result
Sorting and highlighting child items featured content
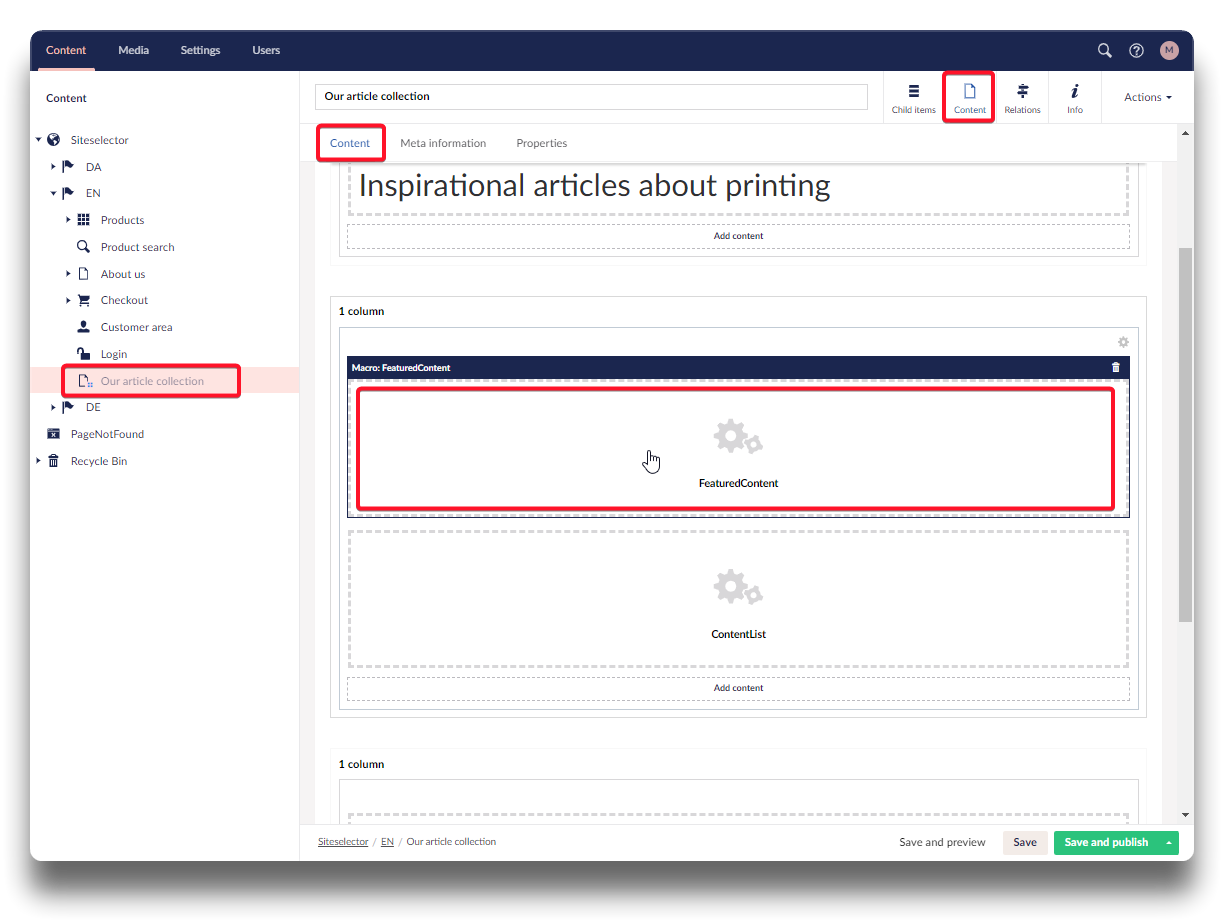
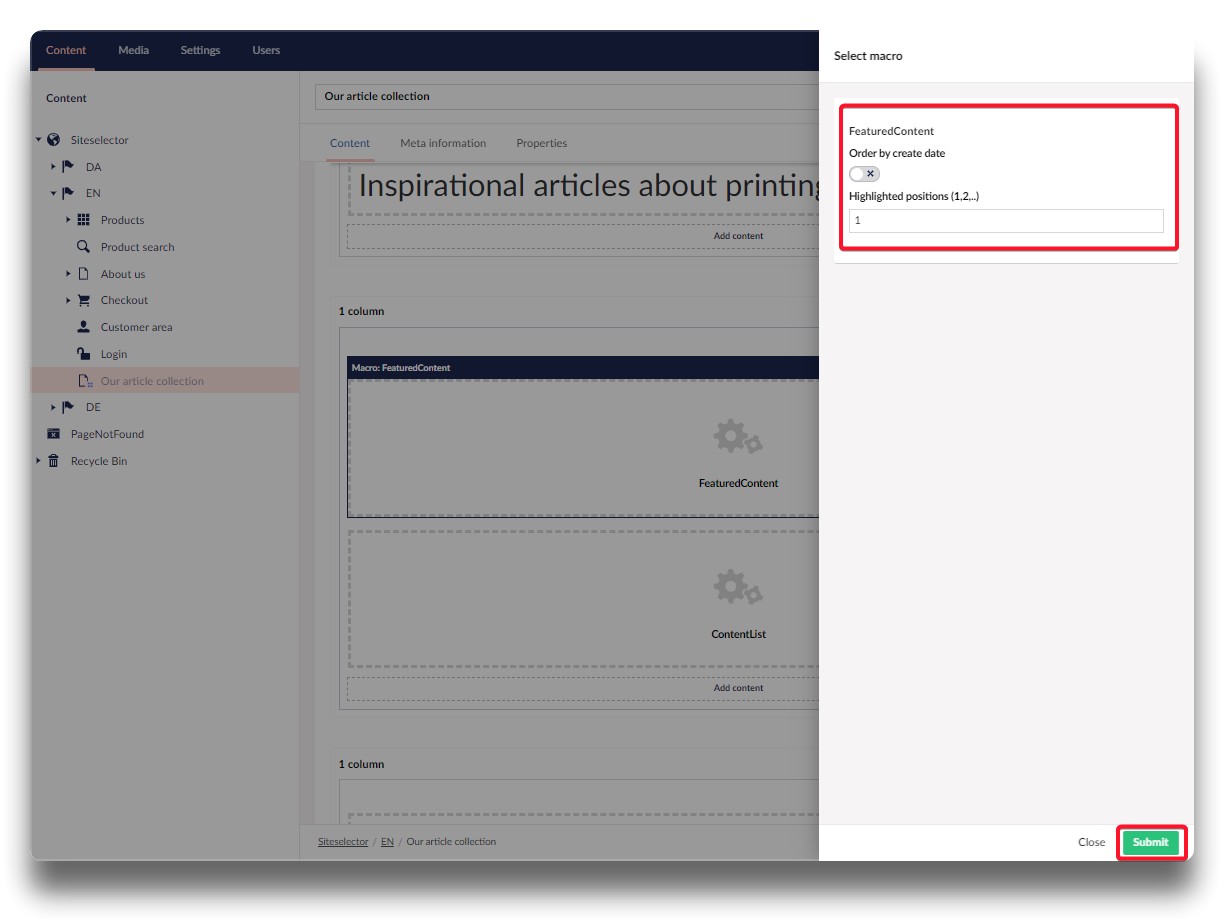
FeaturedContent
By clicking the element "FeaturedContent" on the collection page you have the following options:
- Choose if sorting should be by creation date
- Choose which of the articles should be presented with a larger image. Type 1 for just the first one, 1,2 for the first and the second and so on.
Click "Submit" and "Save" when back on the collection page.
Editing FeaturedContent - step 1
Editing FeaturedContent - step 2
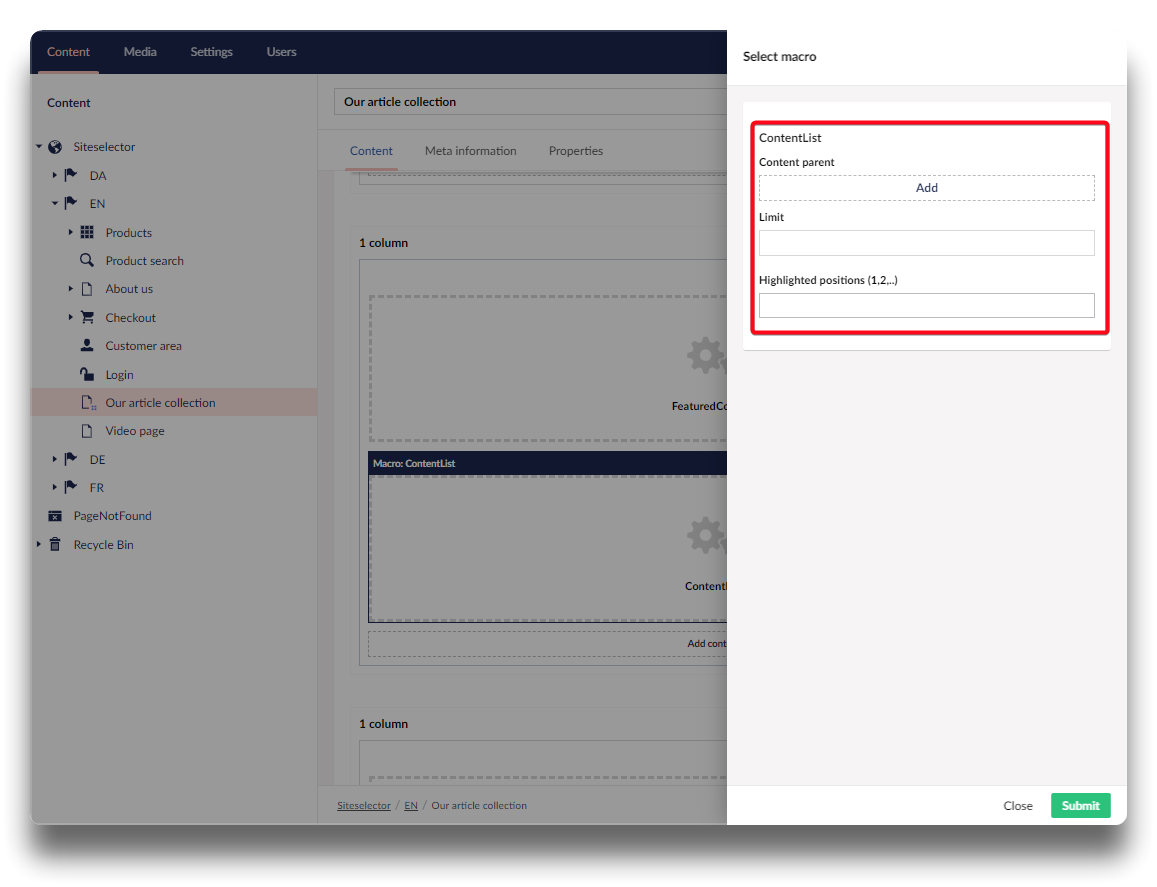
ContentList
When editing the ContentList options are a little different:

Editing ContentList - step 1
Editing ContentList -step 2
Content parent
It is optional to add a parent page on which a limited list of articles are presented. When clicked the customer will be taken to the full collection page. Click "Add" and navigate and choose the selected page.
Limit
If a content parent is chosen, it is relevant how many articles should be shown there. If there is a large number of articles, it is not beneficial to present all on the parent page. Insert the maximum number of articles that the parent page should present.
Highlighted positions
Choose which of the articles should be presented with a larger image. Type 1 for the first, 1,2 for the first and second and so on.
Click "Submit" and then "Save".
Creating relations to child items
For each child item, relations to products, categories, brands or tags can be created.
The template used for the child items offers default a RelatedProducts element and RelatedContent where these relations can be presented.
The relation also affects the related product in the shop, so the relevant article in this example will show on the product detail page for that product.
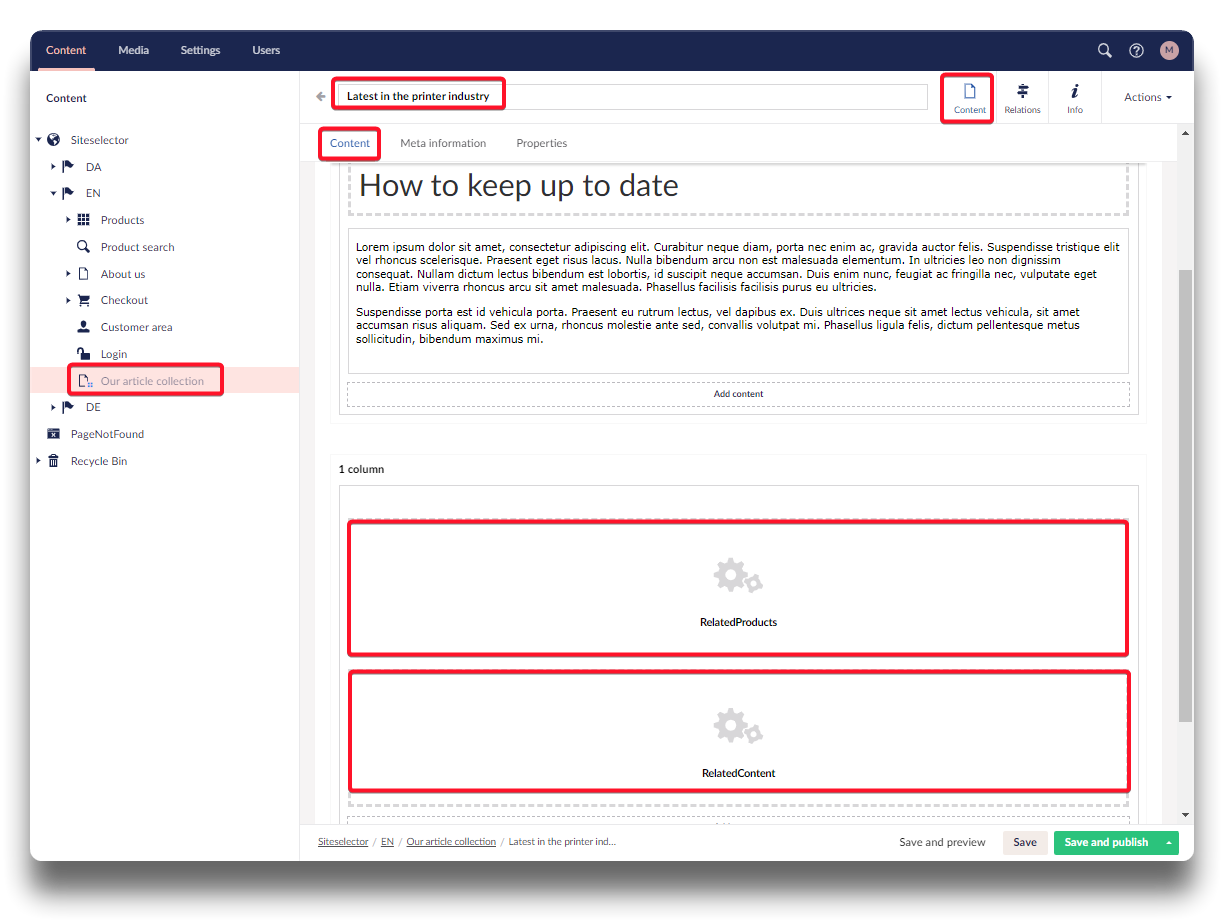
The default template for a child item article

Relations on child items- step 1
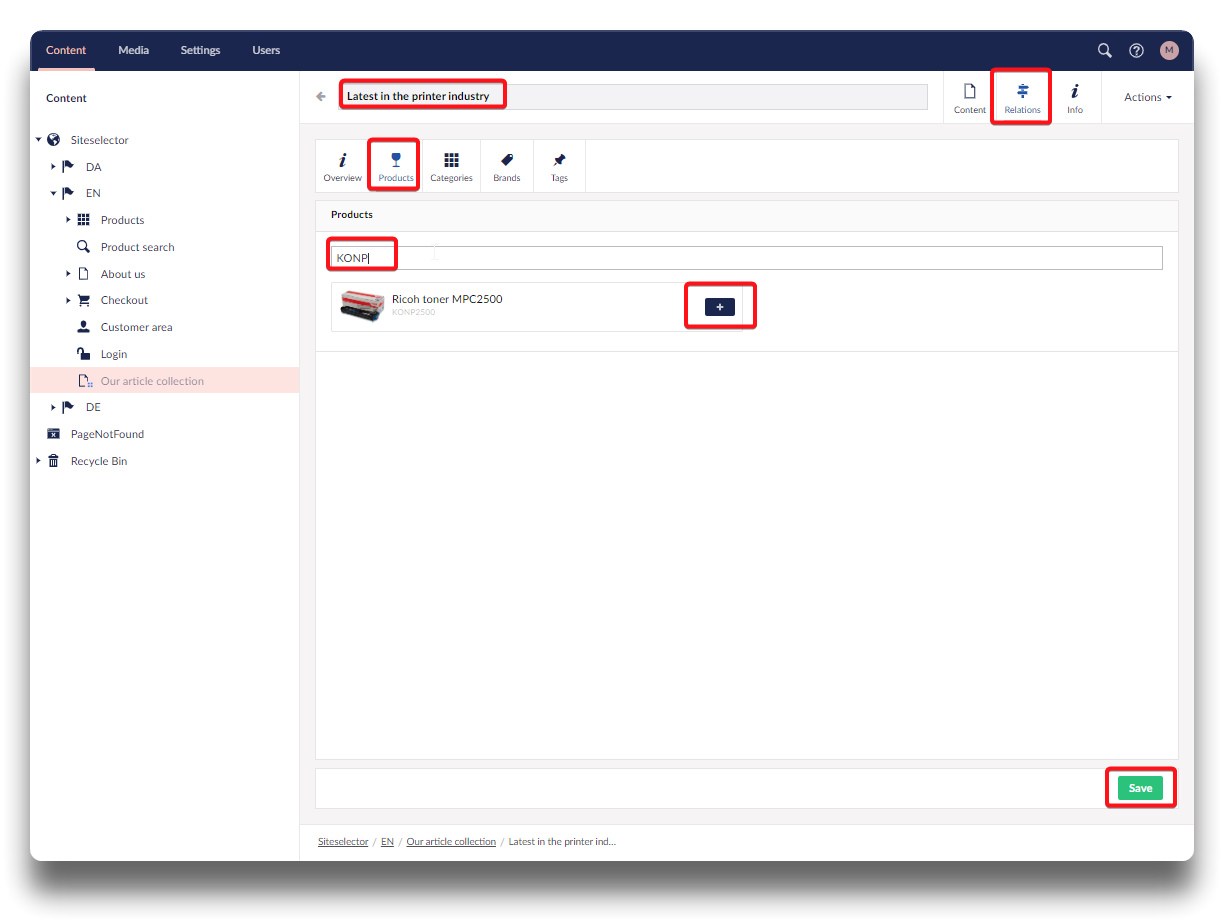
Product relation
Click the Products button under Relations and start typing the product ID to be related in the field. A selection of products will appear while typing. Click the "+" on the product/products that should be added.
Click "Save" when done, and "Save" again on the child item page. Choose "Save and preview" to see result.
Relations on child items - step 2
Result
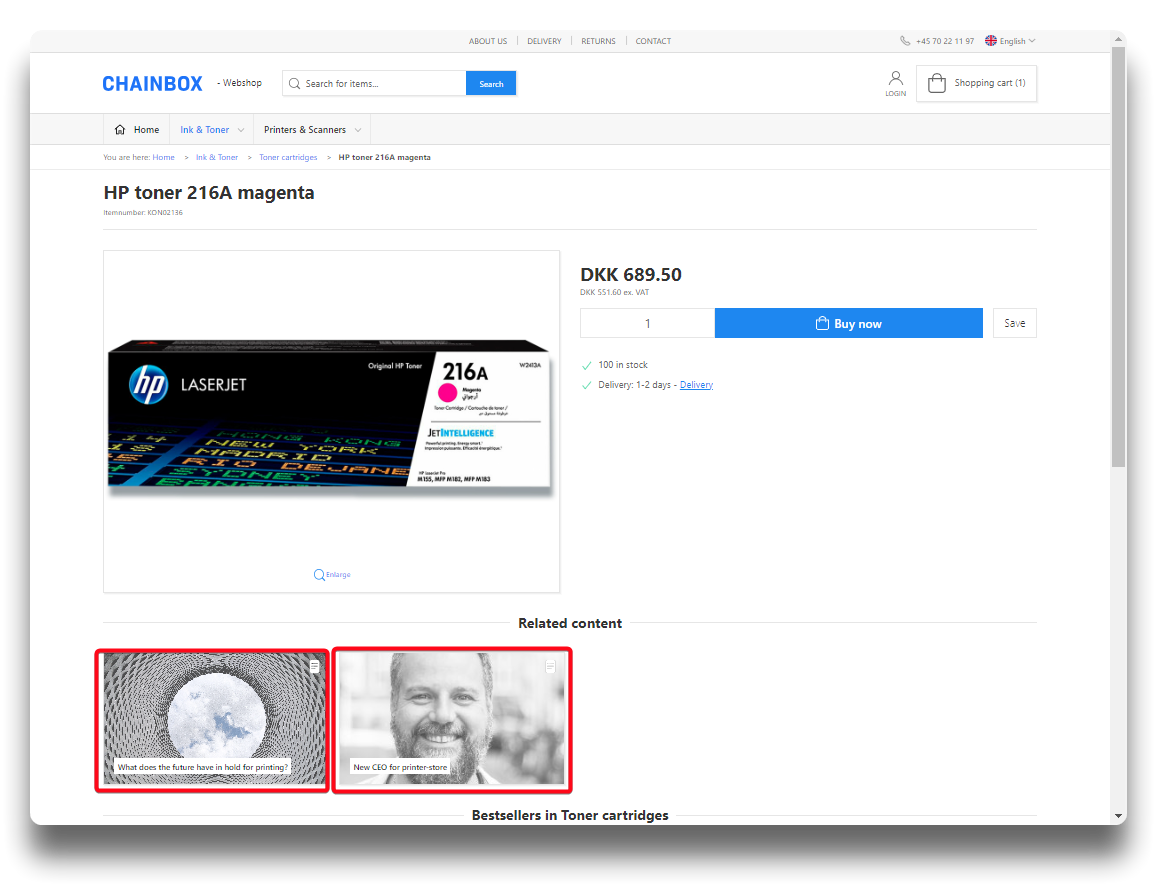
Once the article collection page and the children are published, the relation will also appear on the product detail page of the product under related content.

Related content on product detail page
Category relations
Info
Relations will only show up on a categories products, and not as RelatedContent on the category page itself.
Content pages relating to categories also wont link to said category pages from RelatedContent, unlike with products, which will show up under RelatedProducts.
A relation can also be done by category. Click the Category tab, search out the relevant category and click "+". Click "Save". Click on the Content header tab, and click "Save".
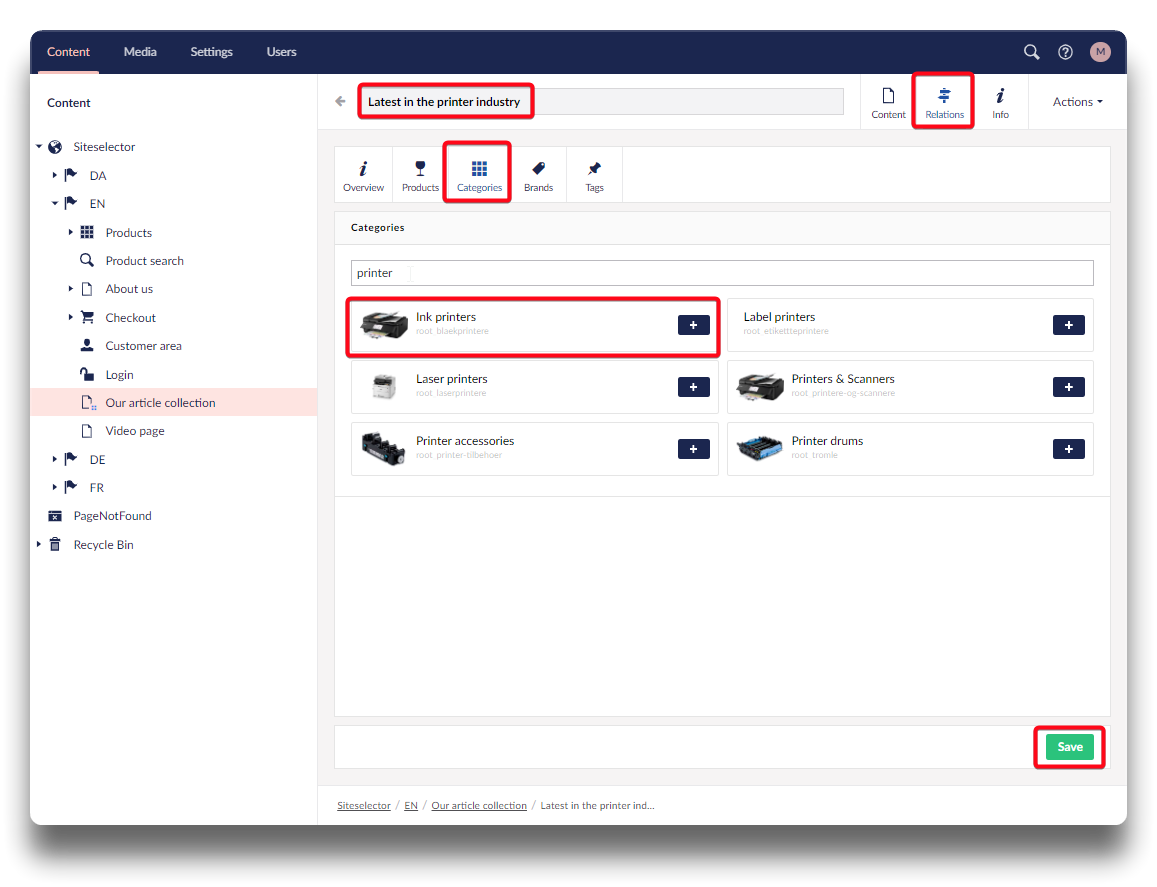
Add category relations - step 1
Add category relations - step 2
The categories chosen here, are the categories existing in PIM. To see what products are in each category, either view from Category:
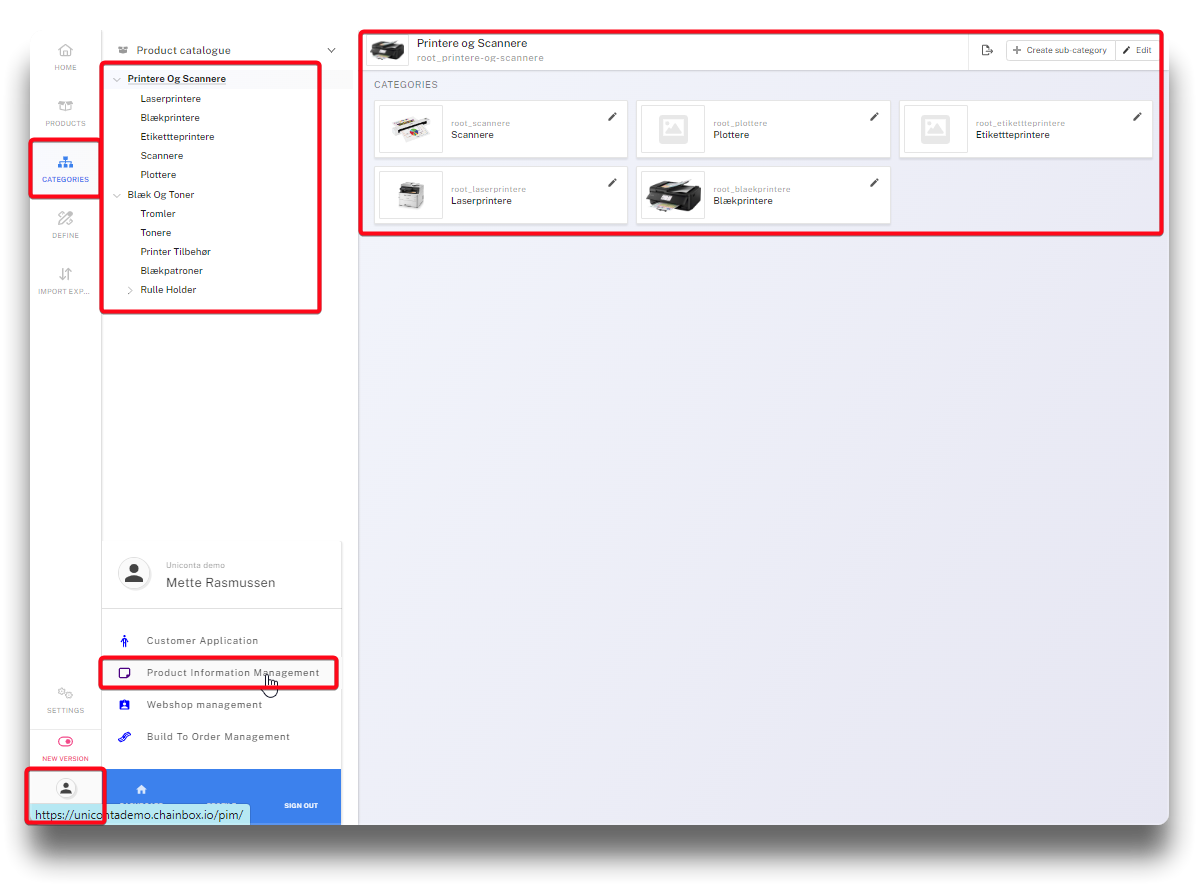
Find category in PIM
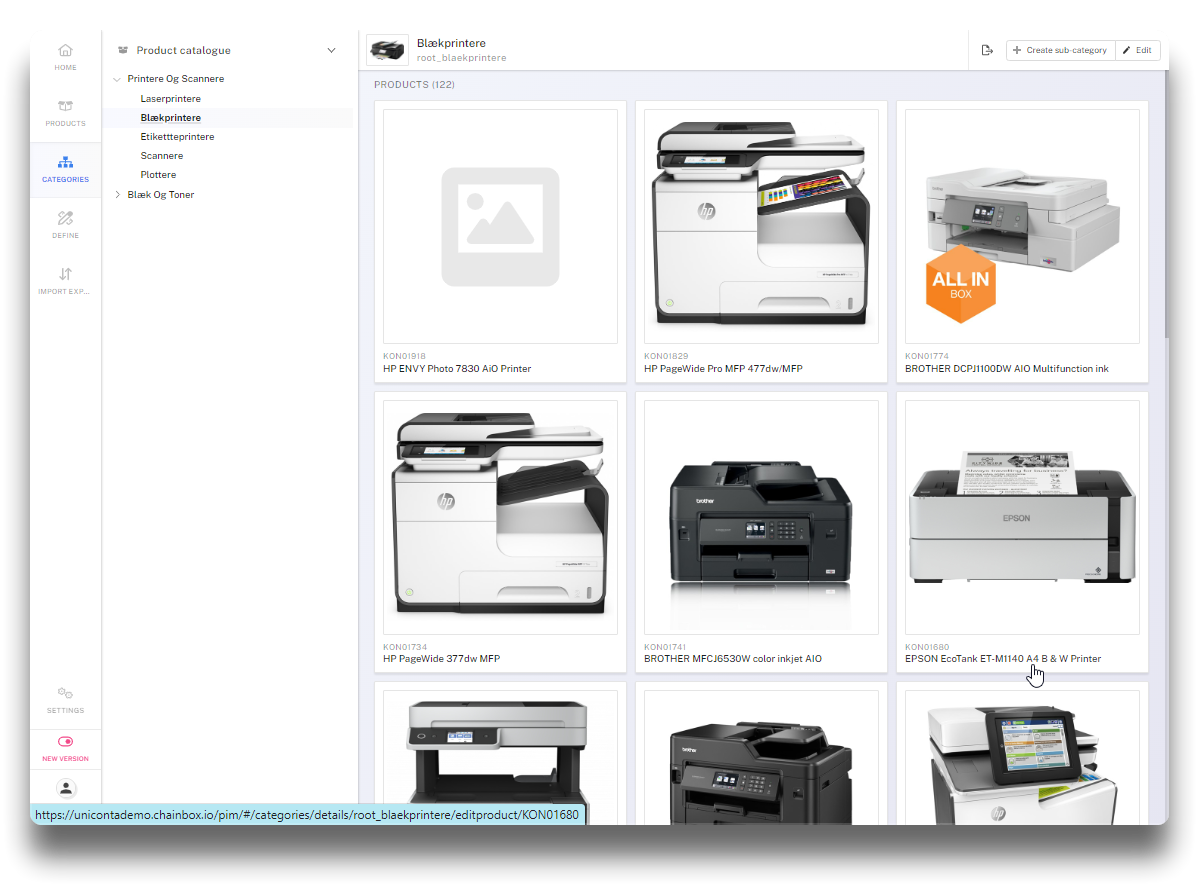
Find products in category in PIM from "Categories"
Or choose a product view and sort on the category to the left.
All products within this category will now have the article related on their product detail page:
.png)
Find products in category in PIM from "View"
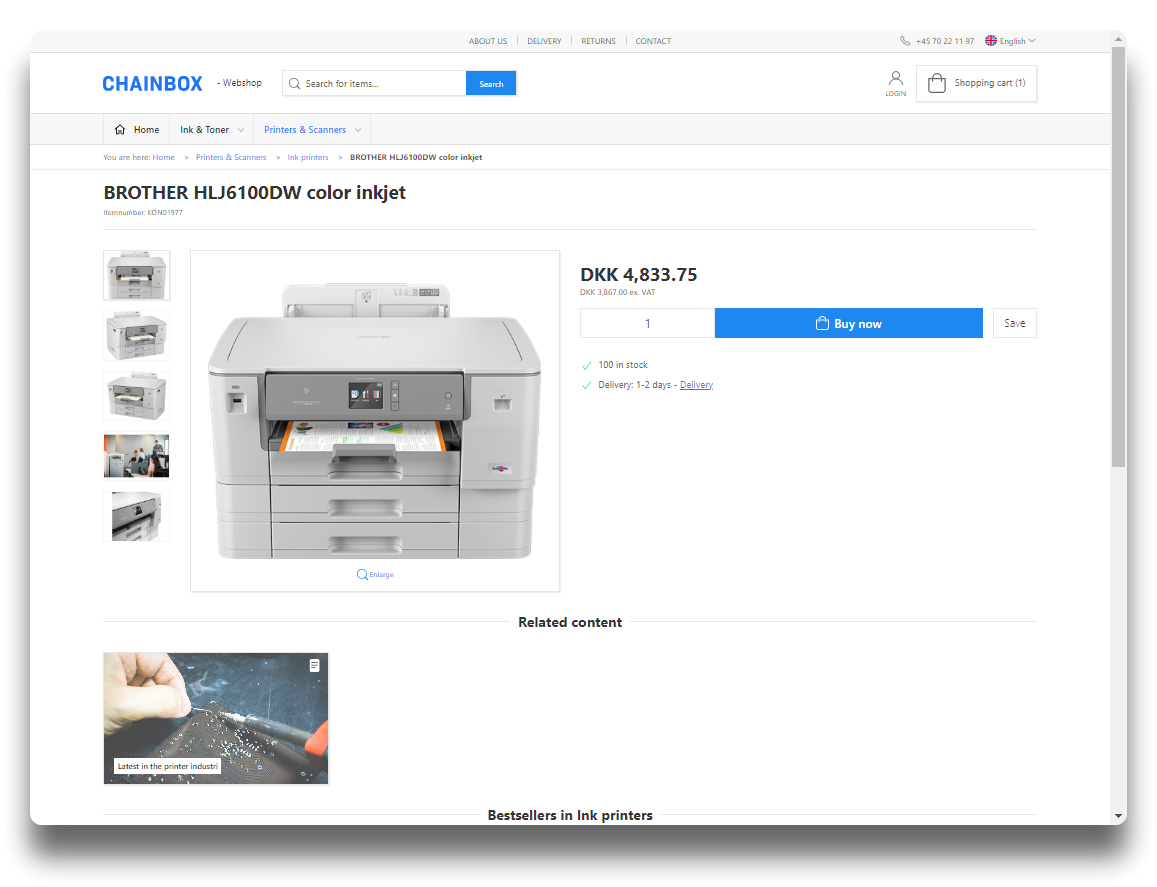
Result in webshop
Brand relations
To create a brand relation, click the Brand tab, search for Brand and click "+" and "Save".
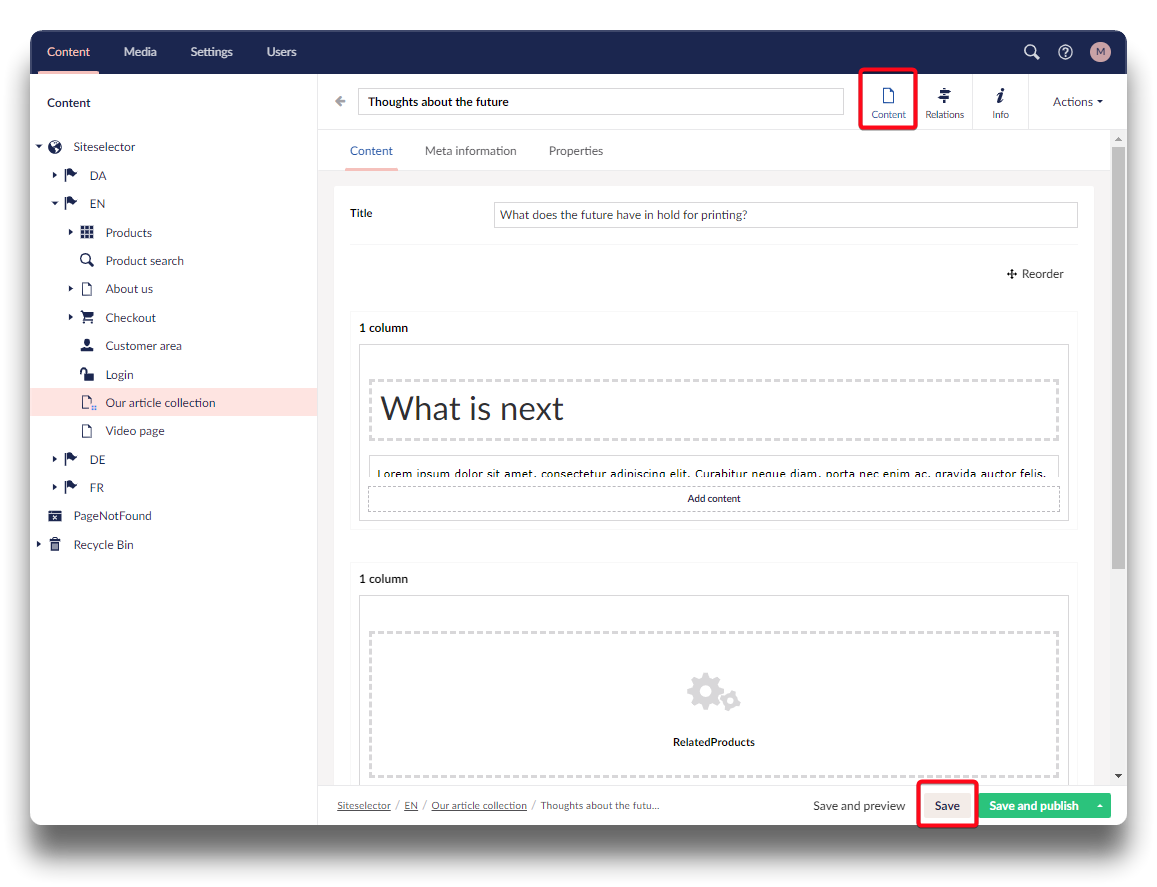
Click "Content" and "Save"
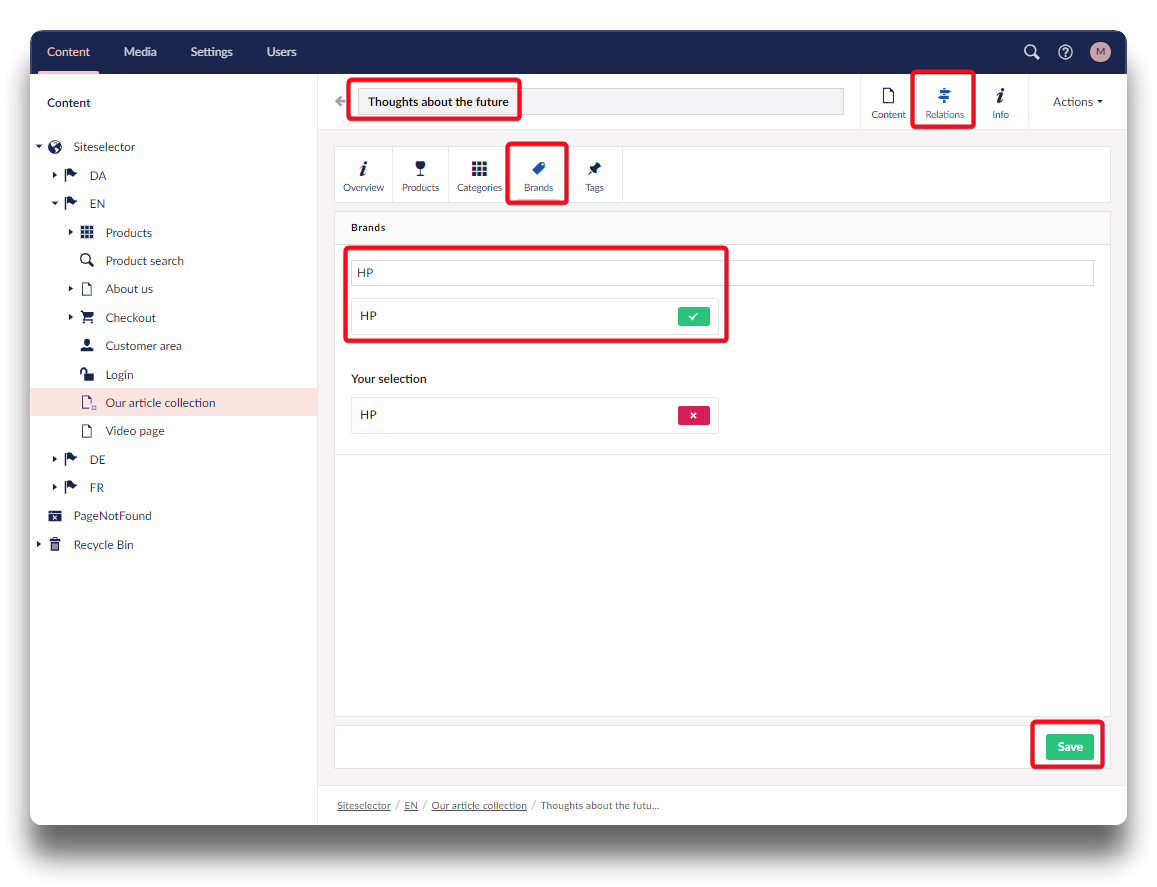
Add brand relation - step 1
Add brand relation - step 2
The selection of brand to choose from in Umbraco stems from the Brands existing in PIM on products in attribute "Brand".
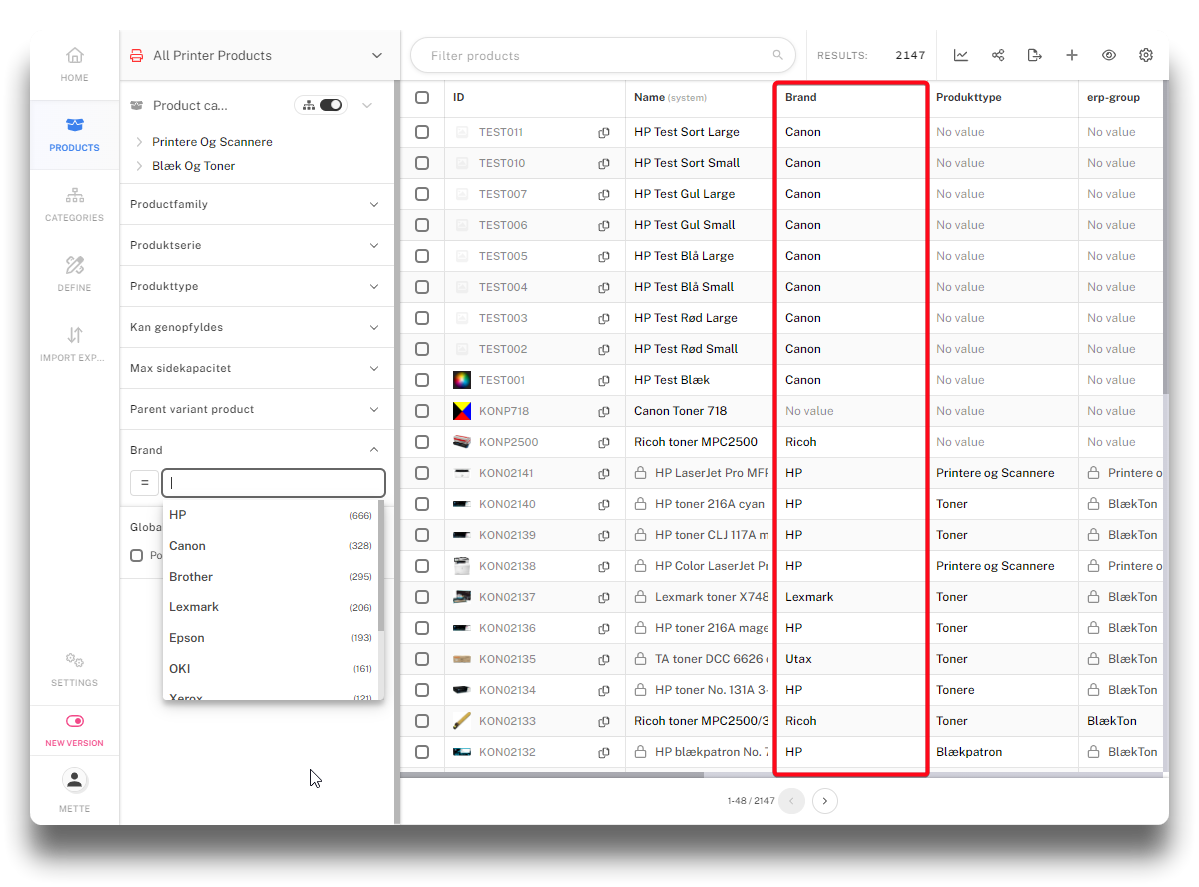
Existing Brands in PIM
Now the article related to the brand, will be visible on the product detail page of all products of that brand.
.png)
Brand on product detail view in PIM
.png)
Result in webshop
Tag relations
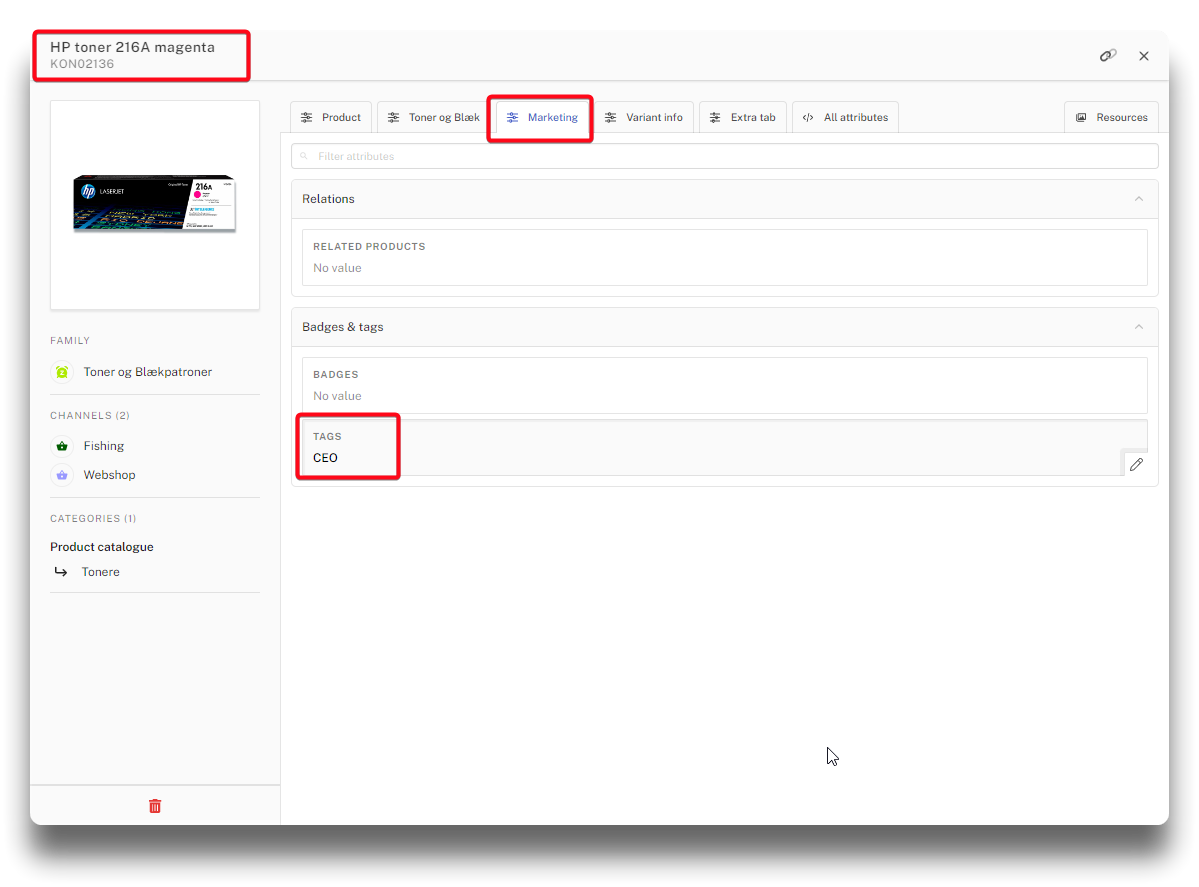
To make a relation to a tag, the tag needs to exist in PIM. So start by finding the products in PIM that should be tagged to relate to a certain article.
Now the tag can be related to an article in Umbraco. Search the tag and click "+", click "Save".
Create tag on product/products in PIM
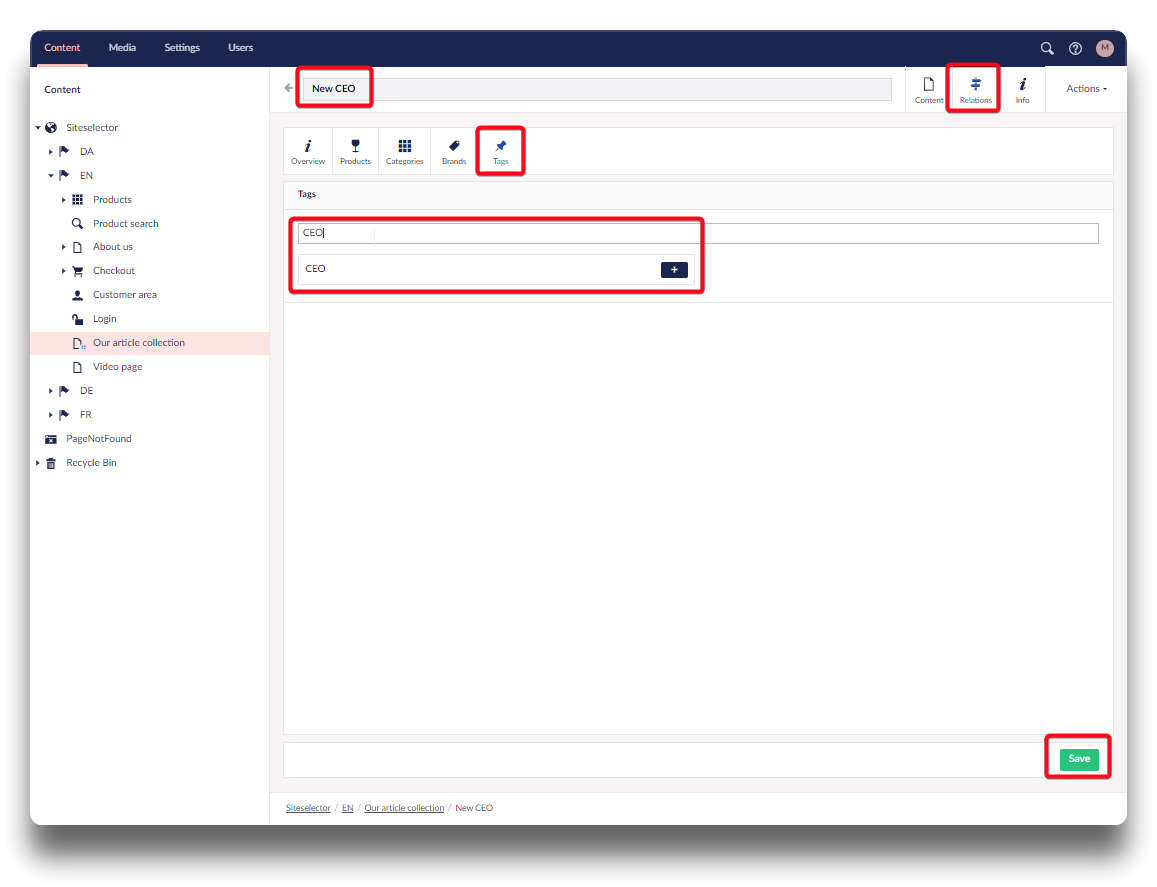
Relate article to tag
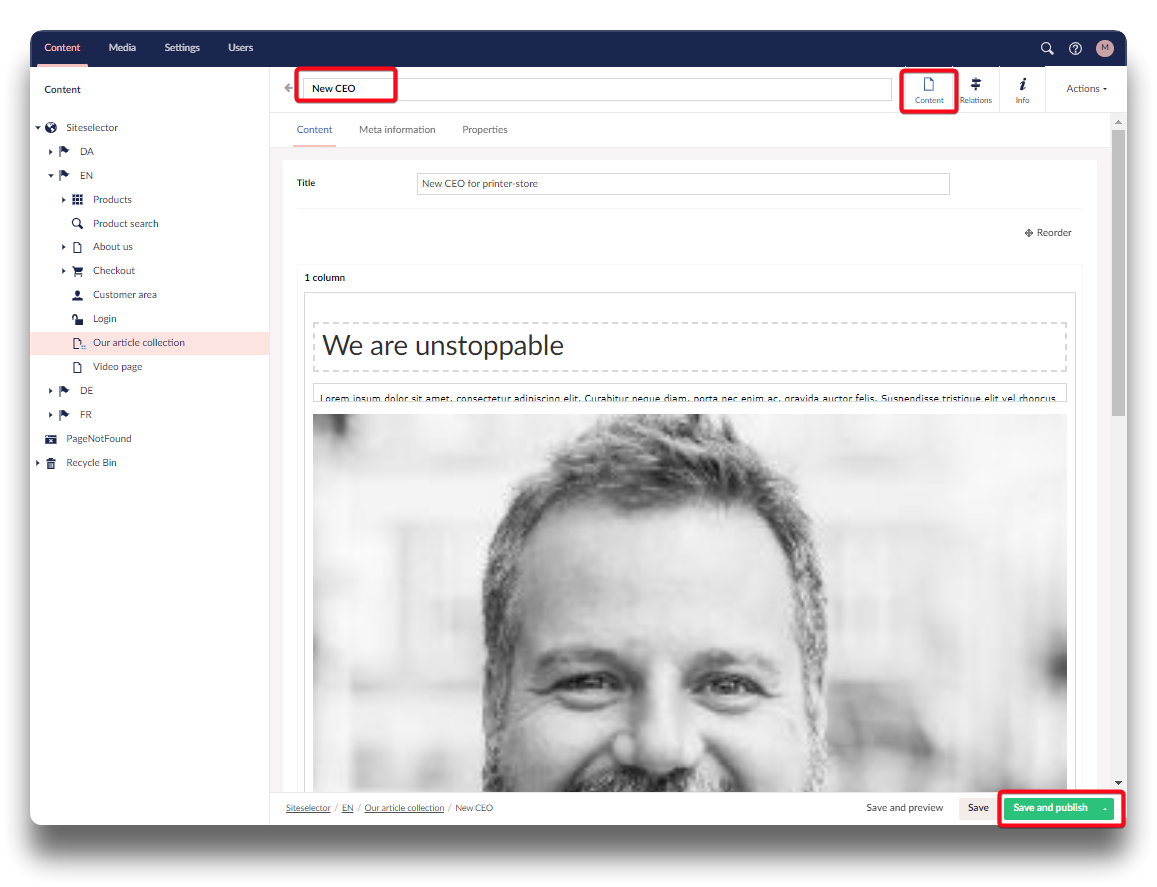
Click the Content tab still on the article and click "Save and publish". The product tagged "CEO" is now related to the article with the same tag. It is also related to the article we earlier related to the brand HP.
Save on content tab
Result in webshop
Control visibility of columns
On each column both on collection page and child items, it can be determined if login is required to see content.
Restrictions on column - step 1
.png)
Restrictions on column - step 2