Example landingpage
In this example we create a landing page with the video template.
Click the 3 dots on the language node you wish to create the landingpage under. Choose landing page, and template "Video"
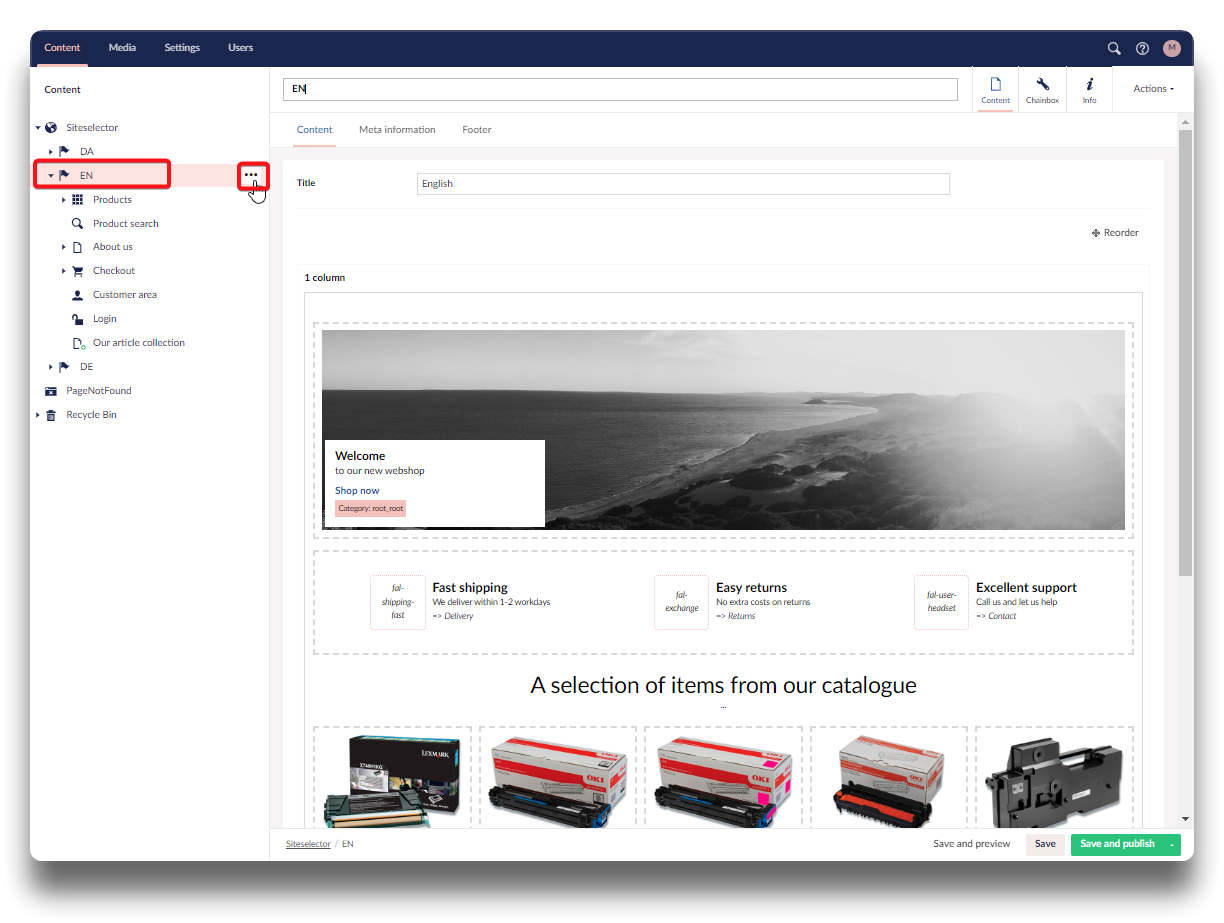
Create landingpage - step 1
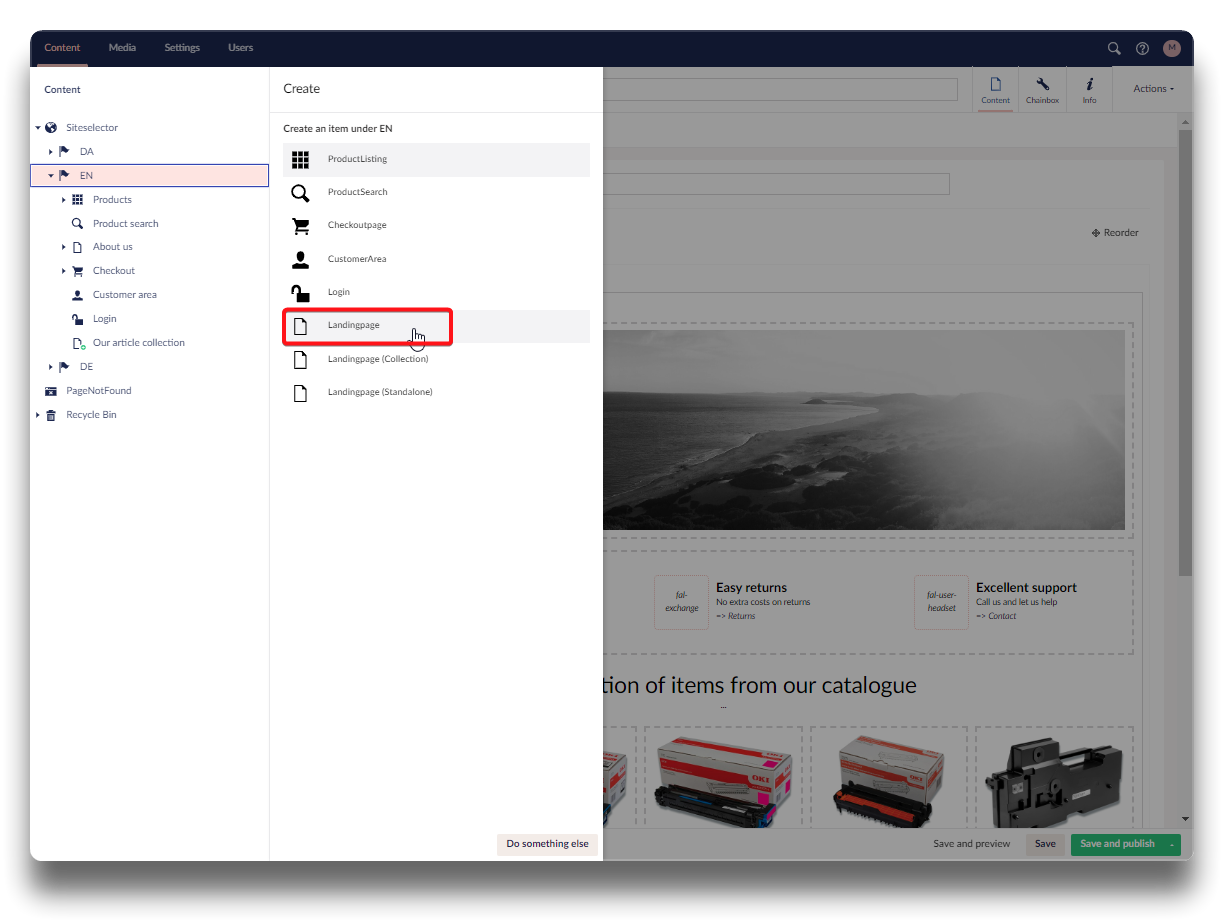
Create landingpage - step 2
Type the page name and title, and start setting up the various elements. Remember there is full freedom to removed the template elements and create others.
Click "Save" and not "Save and publish" to avoid customers viewing a page not complete.
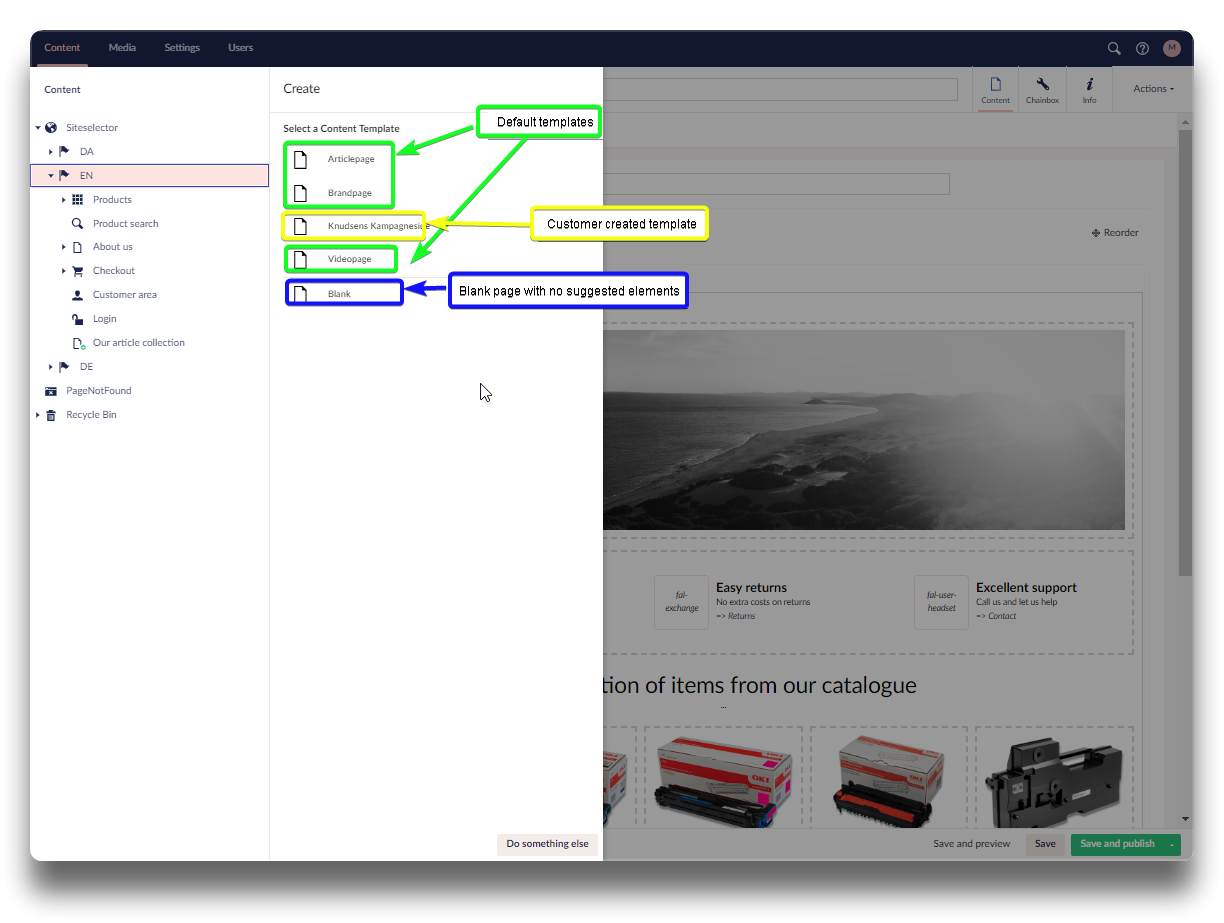
Create landingpage - step 3
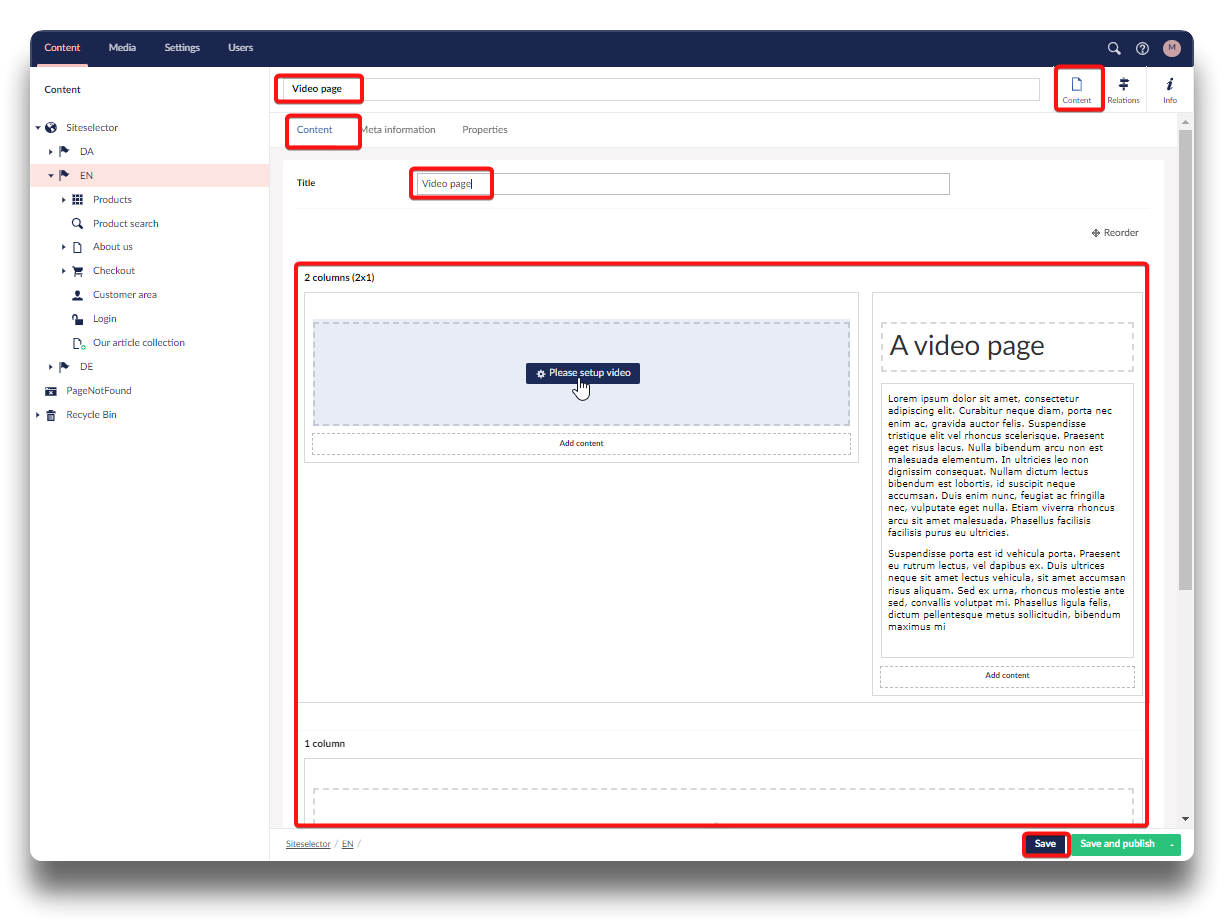
Create landingpage - step 4
Setting up video
Click "Please set up video" and choose provider, insert video id, and choose how the video should be presented. Click "Submit" and "Save" or "Save and publish" on content page.
.png)
Setting up a video
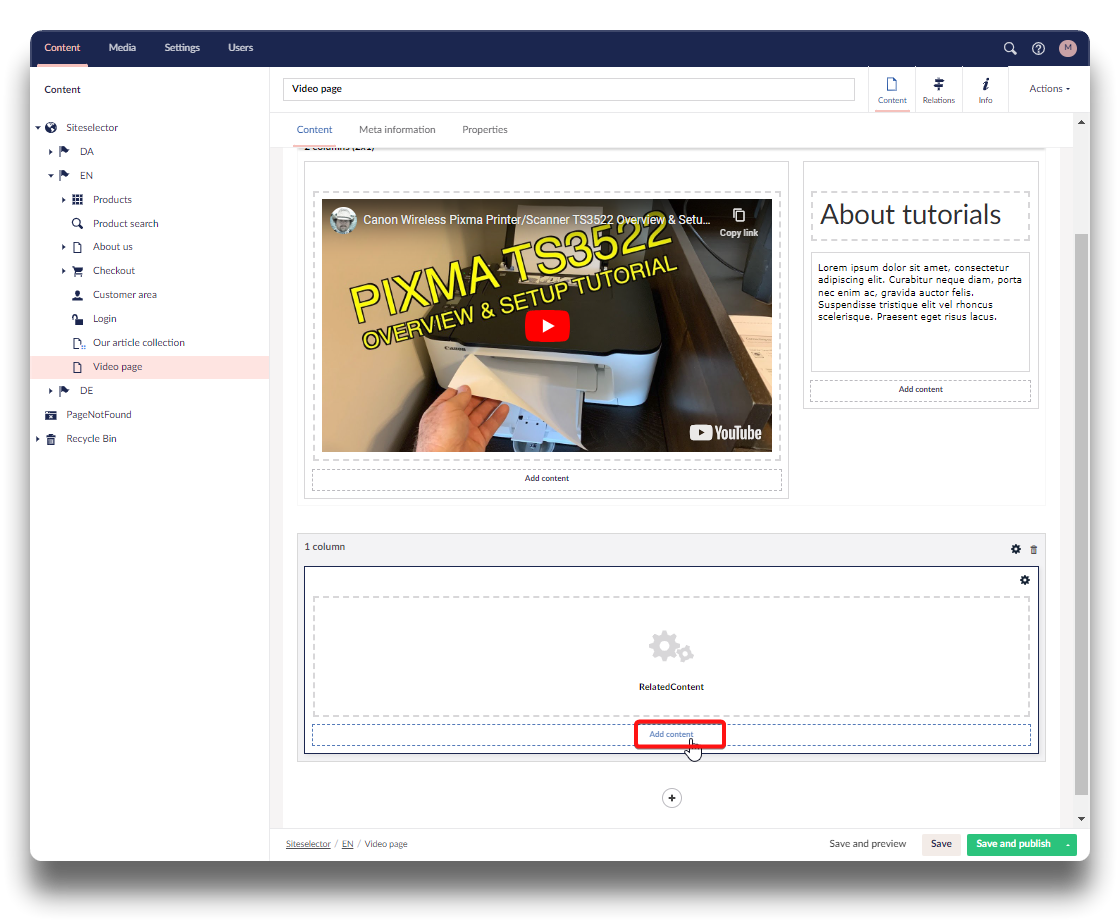
Adding product list based on query
In this case instead of RelatedProducts we set up a product list based on a query.
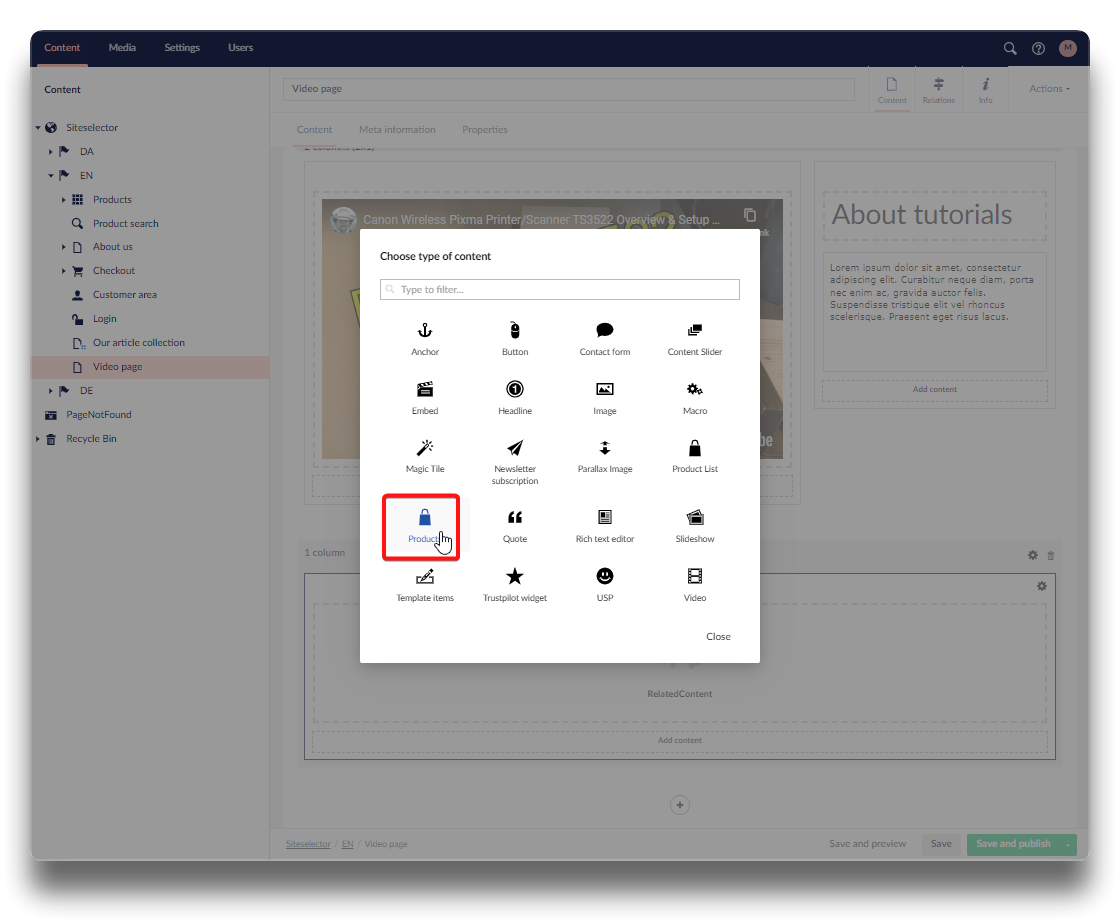
Click "Add" and choose "Product"
Setup product list - step 1
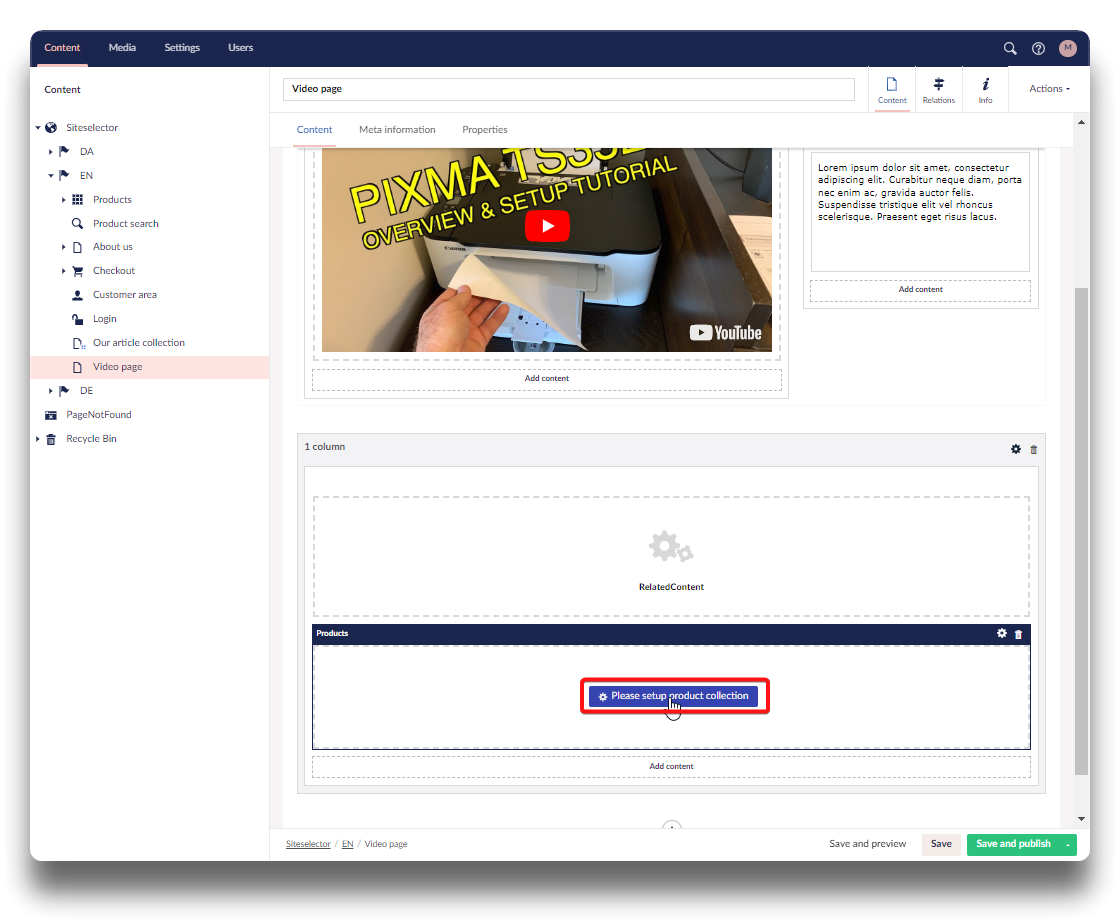
Setup product list - step 2
Click "Please setup product collection", and choose your selection. In this case Brand = Canon is chosen within the categories "Ink printers" and "Laser printers". Sorting is by popularity, and max products on list = 20.
Click "Save" and "Save" or "Save and publish" on the content page.
Setup product list - step 3

Setup product list - step 4
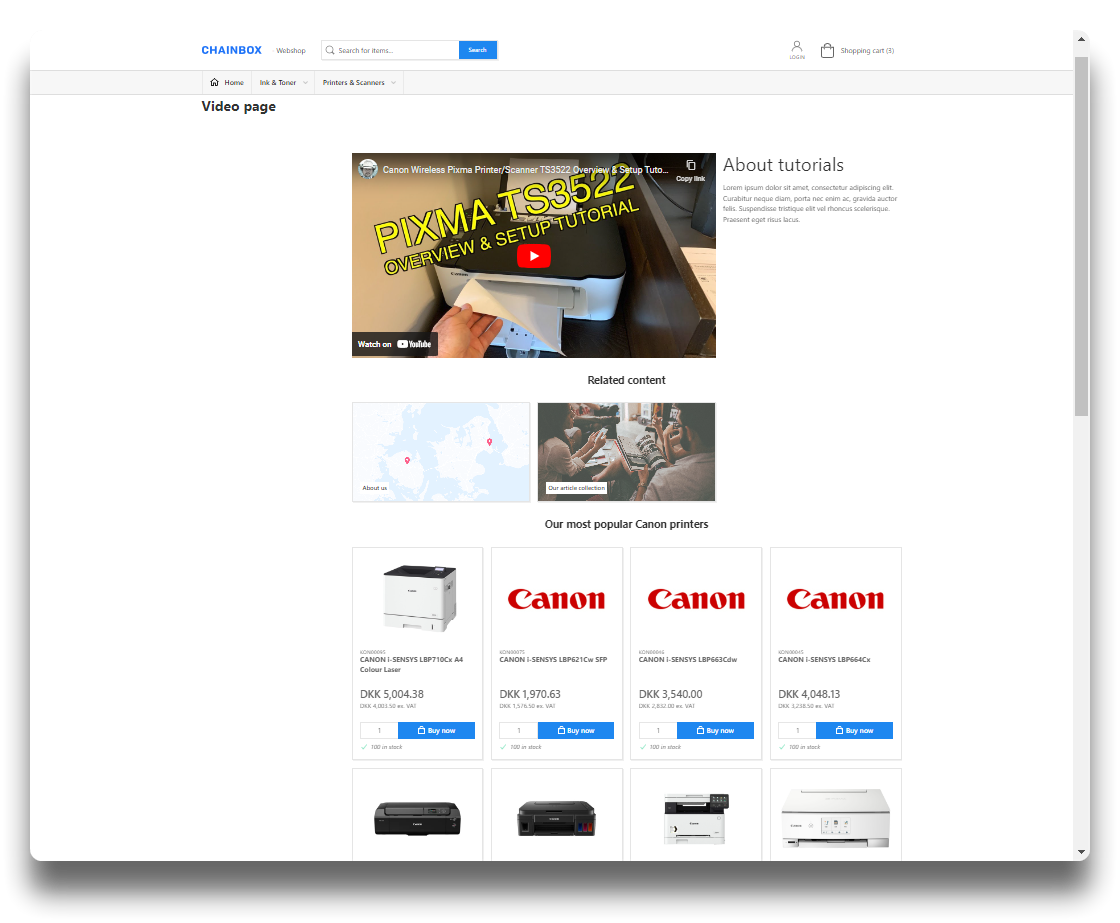
Result
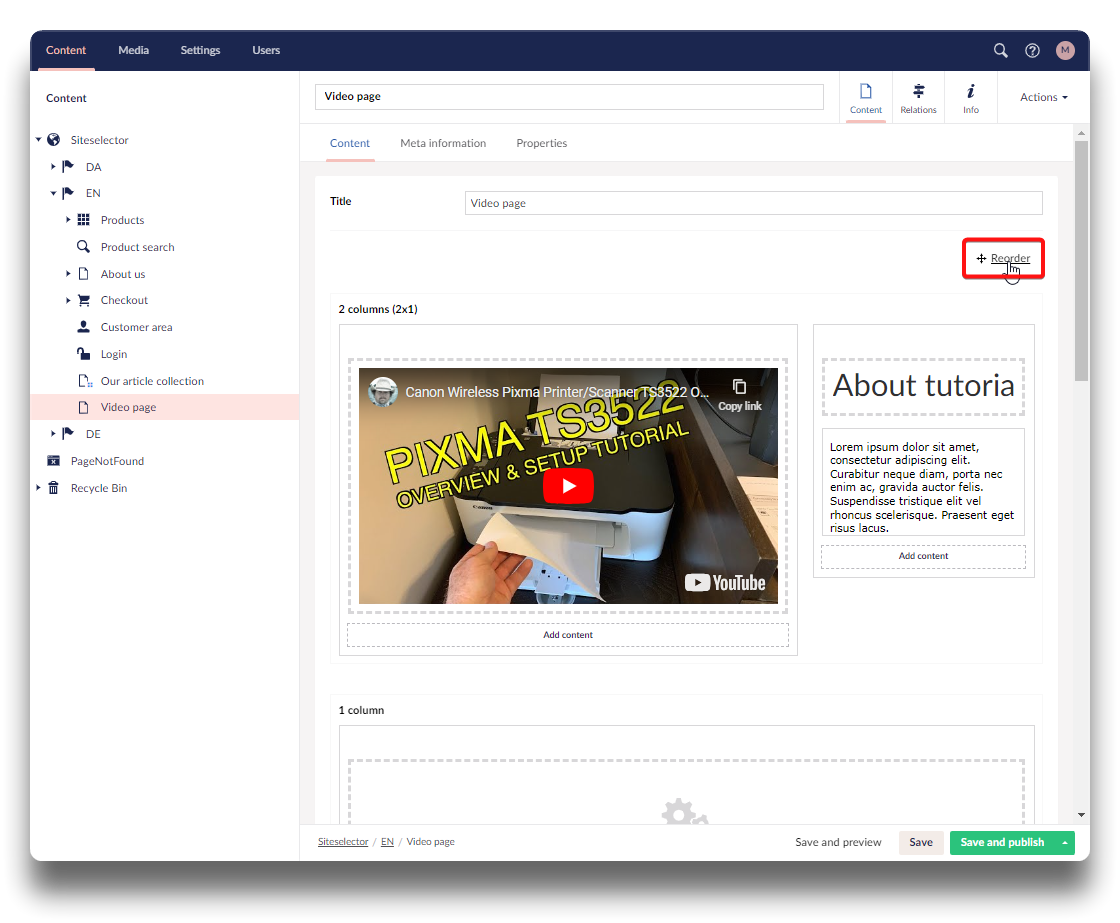
Reorder
By using the reorder button, it is swift to rearrange columns and rows within columns:
Reordering page
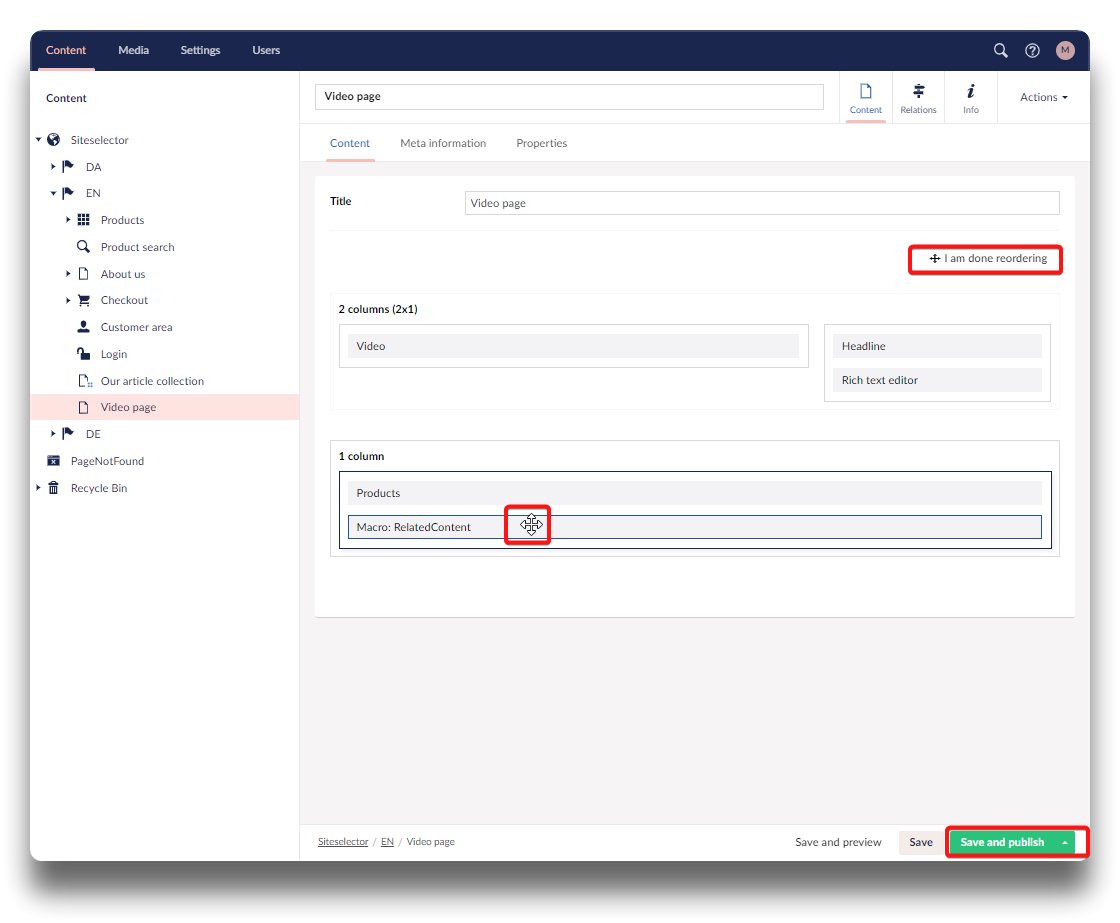
Reorder mode
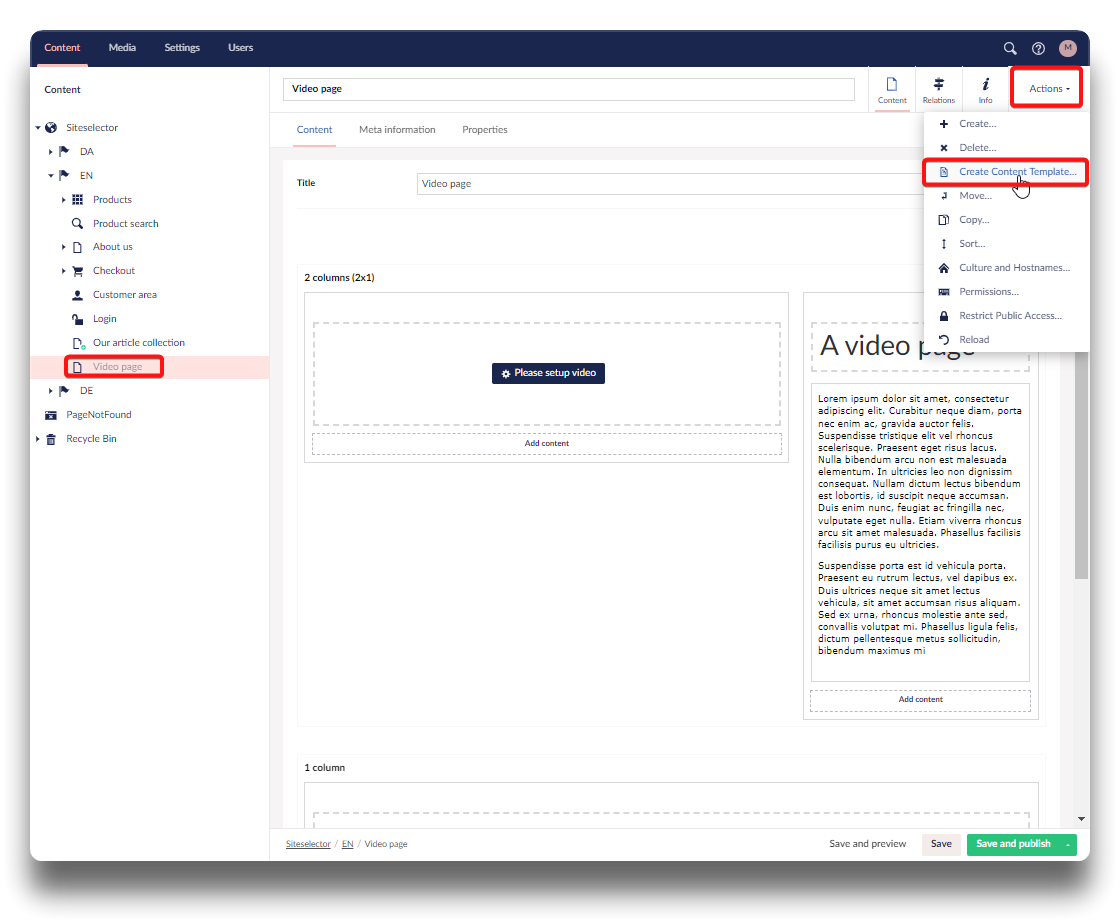
Saving changed layout as template
Once the perfect layout is create for a specific use, it is an option to save this layout as a template for future use, just as the default templates.
When on the page click "Action" and "Create Content Template".
Name the template and click "Create".
Save layout as content template - step 1

Save layout as content template - step 2
Creating link to content pages from homepage
There are numerous ways content pages could be presented on the homepage.
For this example is used "Magic tile".
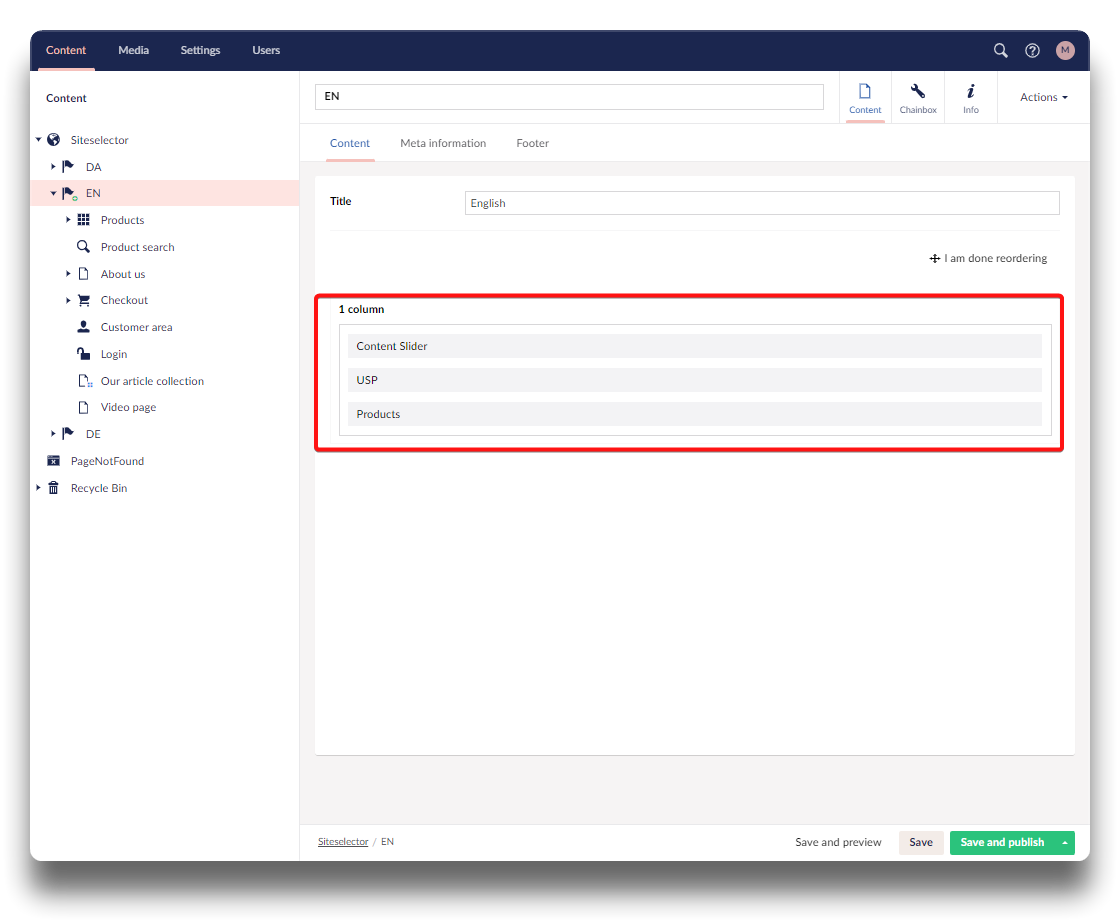
The homepage consists of 1 column with 3 rows.
In order to insert 2 columns in between USP and Products, the page needs to be rearranged a bit. Products where moved to a column of its own, for the 2-column row to come in between.
Reordering homepage
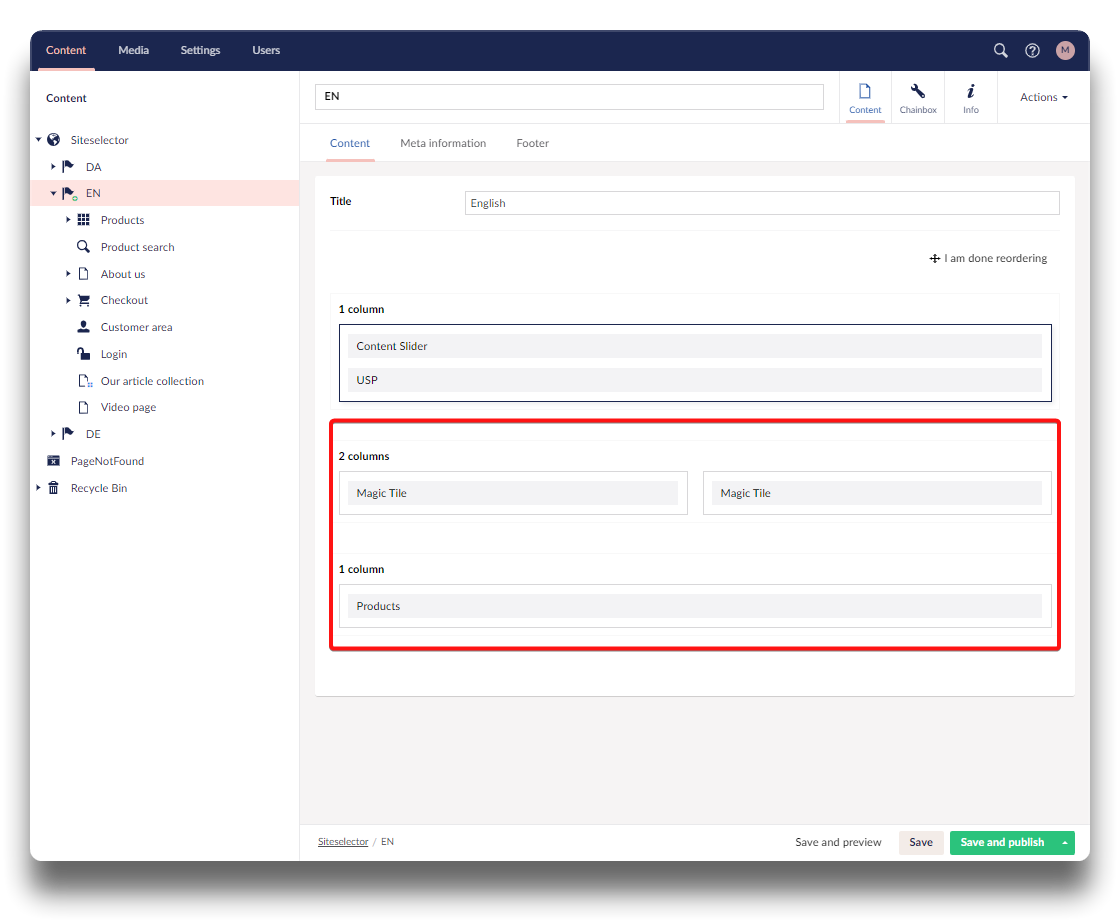
Reordering homepage
Magic tiles
Click "Add" into a row and choose "Magic Tile". Click "Please select a preset".
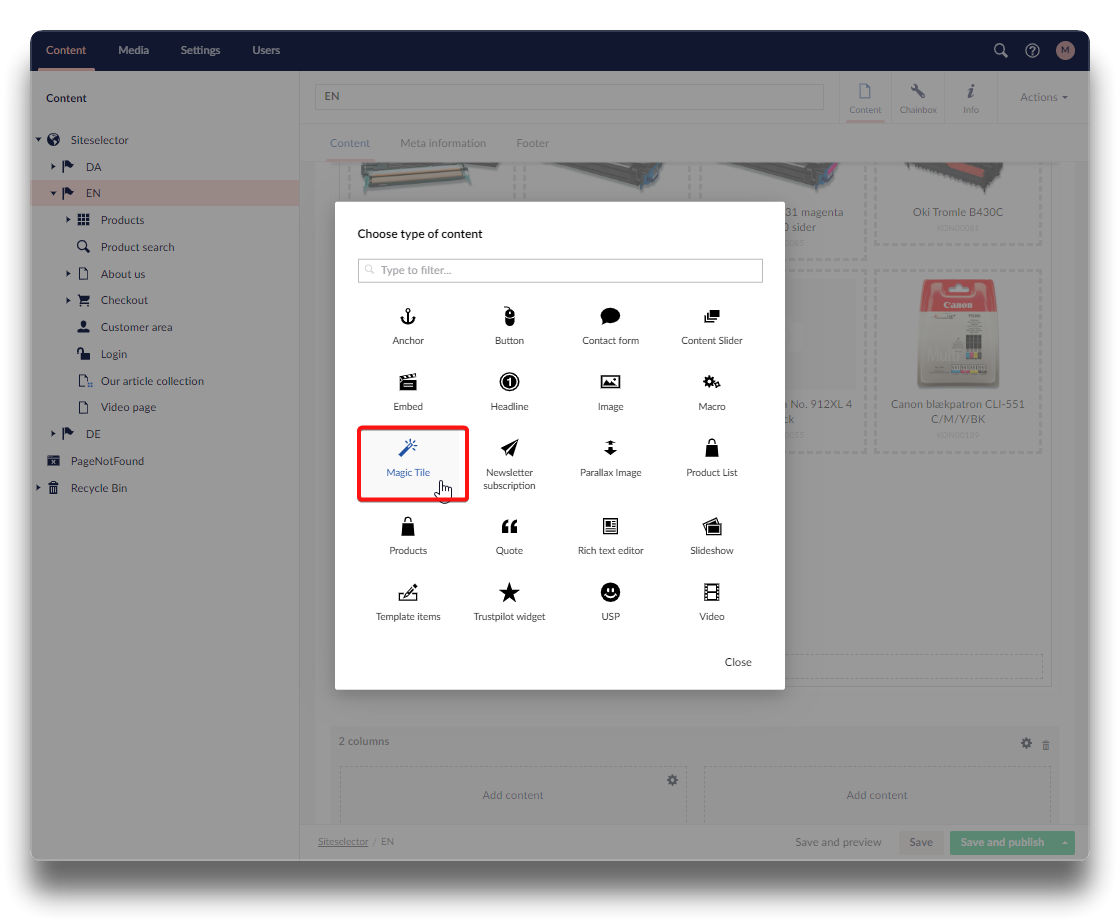
Add magic tile - step 1
Add magic tile - step 2
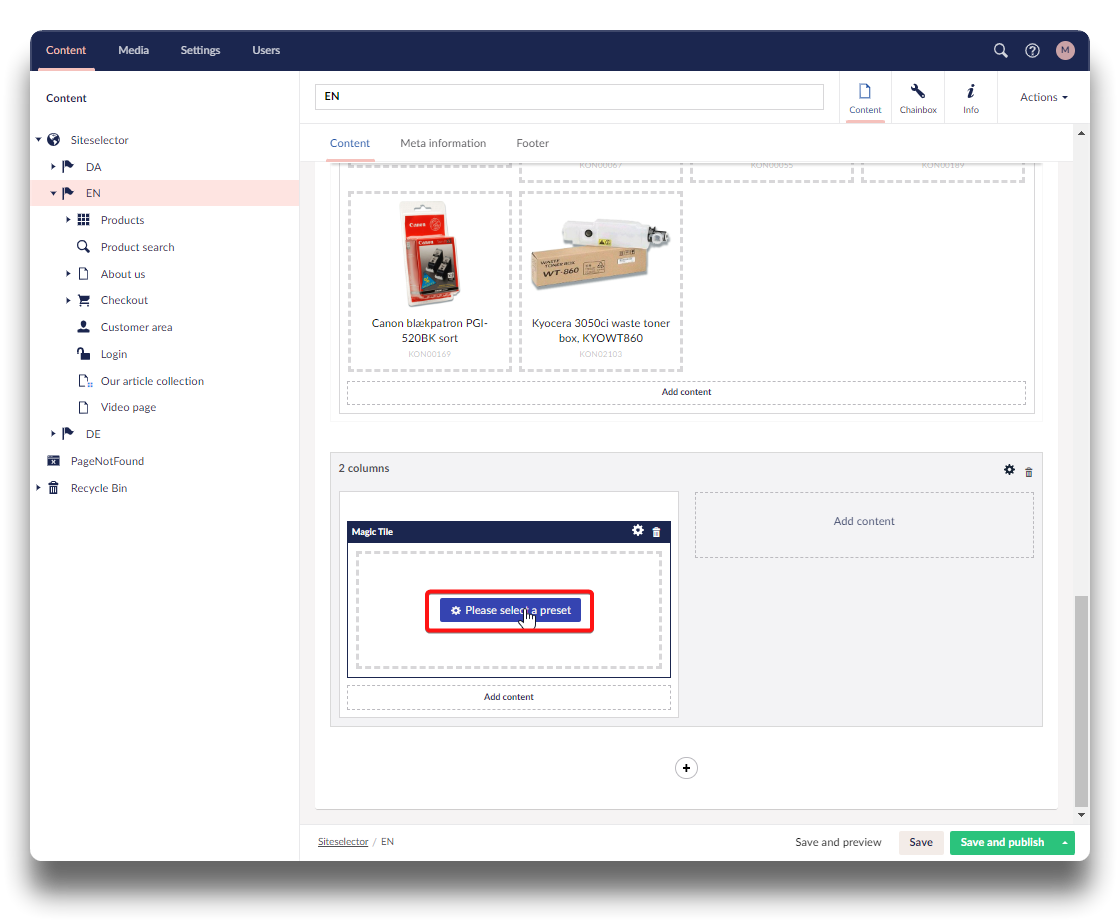
Choose a layout among the presents. Here we choose the preset marked in green. Click "Submit".
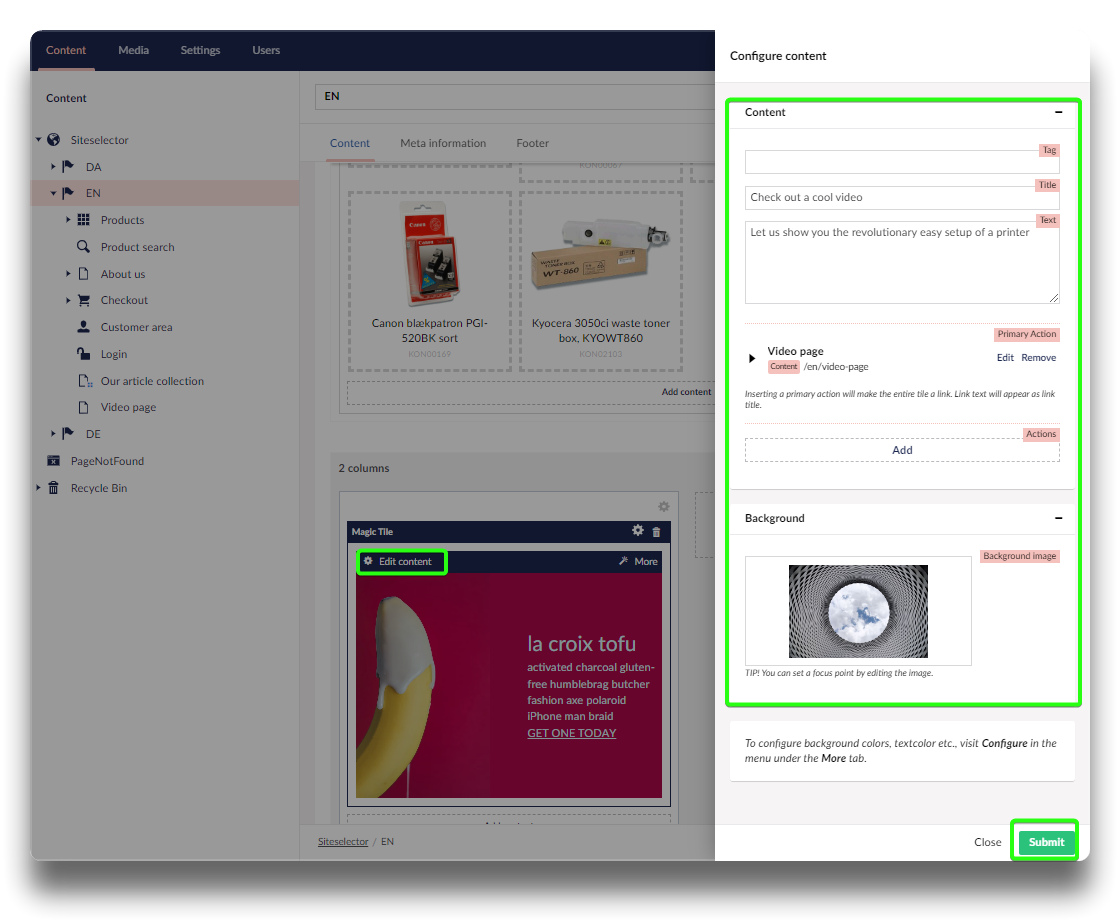
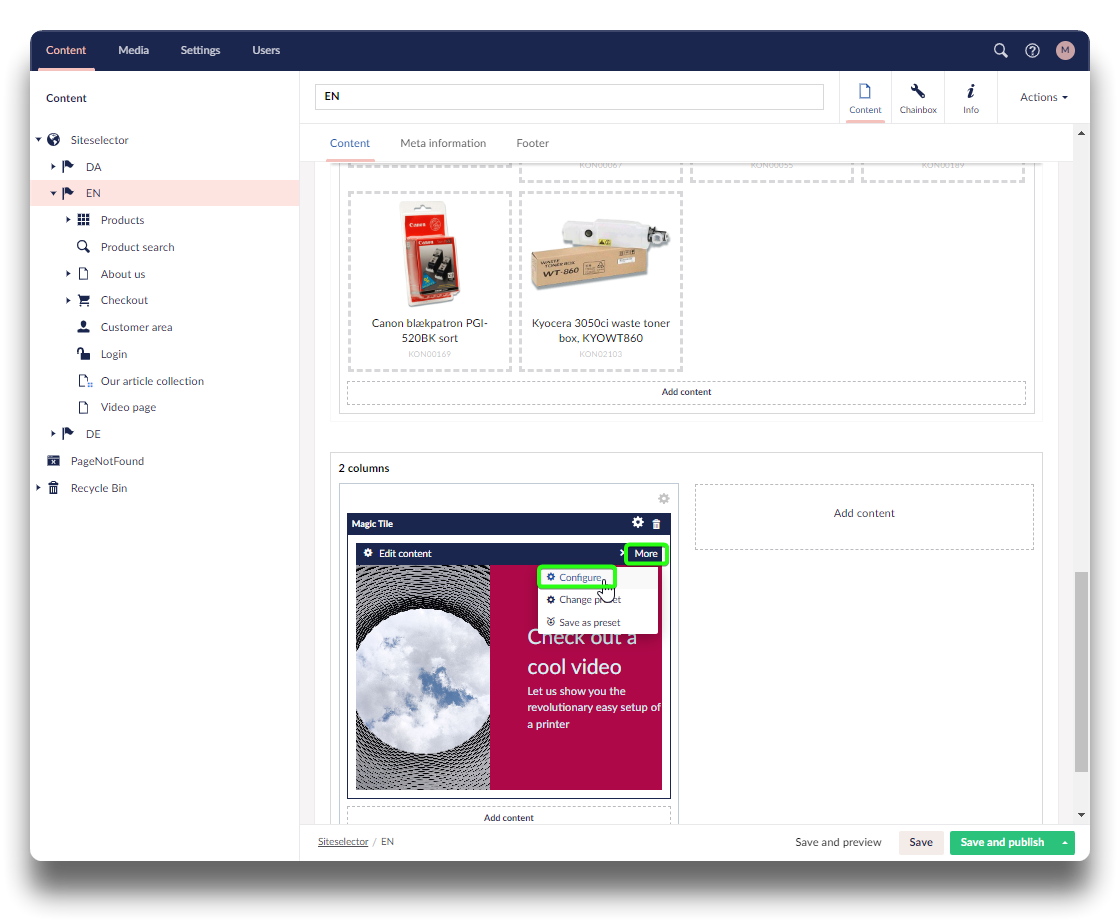
Click "Edit content" and change headline, text, and image. For this example the content page has been added under "Primary action" in stead of "Action". This will cause the whole picture to work as a link when clicked.
Click "Submit" and then "Save" or "Save and publish"
.png)
Add magic tile - step 3
Add magic tile - step 4
Click "More" and "Configure" to change background color, text etc.
Click "Submit" and then "Save" or "Save and publish"
Add magic tile - step 5

Add magic tile - step 6
Result on homepage. Link to our video page, and an article collection page:

Result on homepage