Creating a new language node
Expanding the webshop with another language node, is easiest done by copying an existing, and do the changes that differ.
Copy existing language node
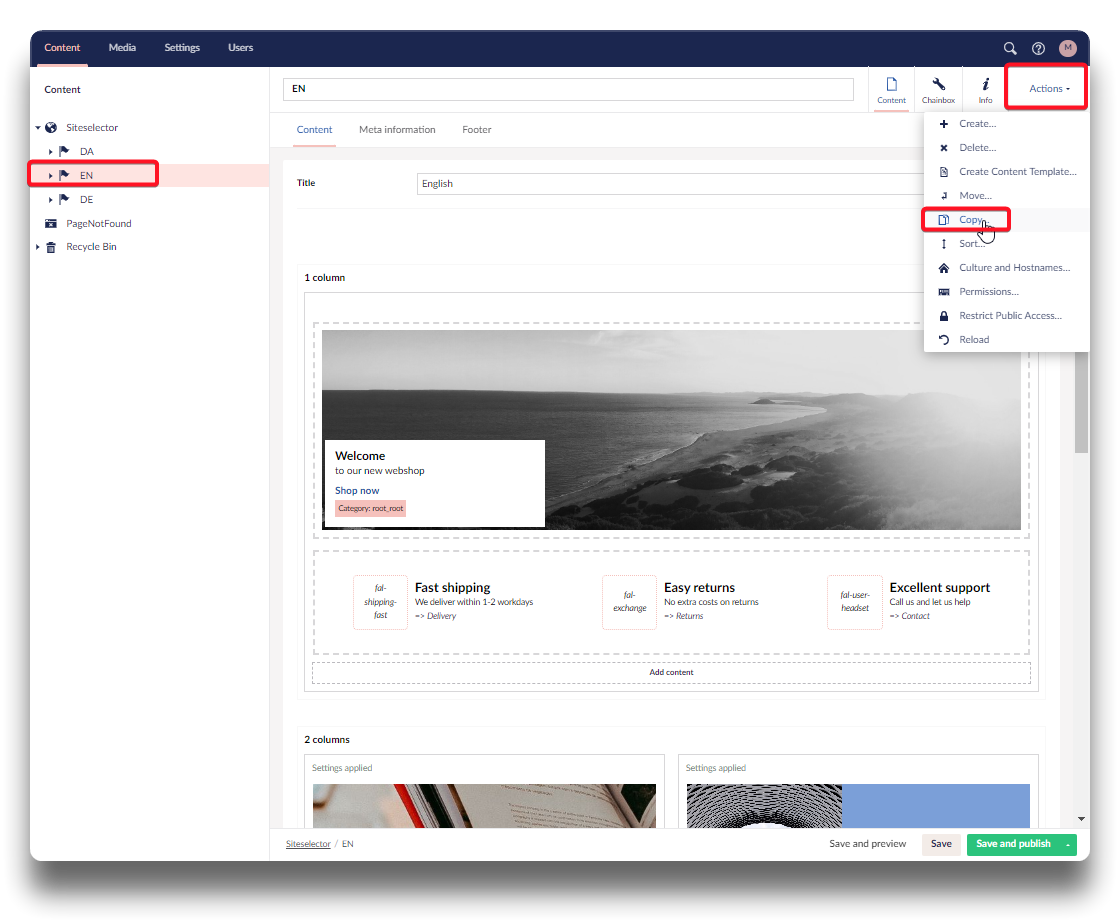
Click on the language note to copy, click "Action" and choose "Copy".
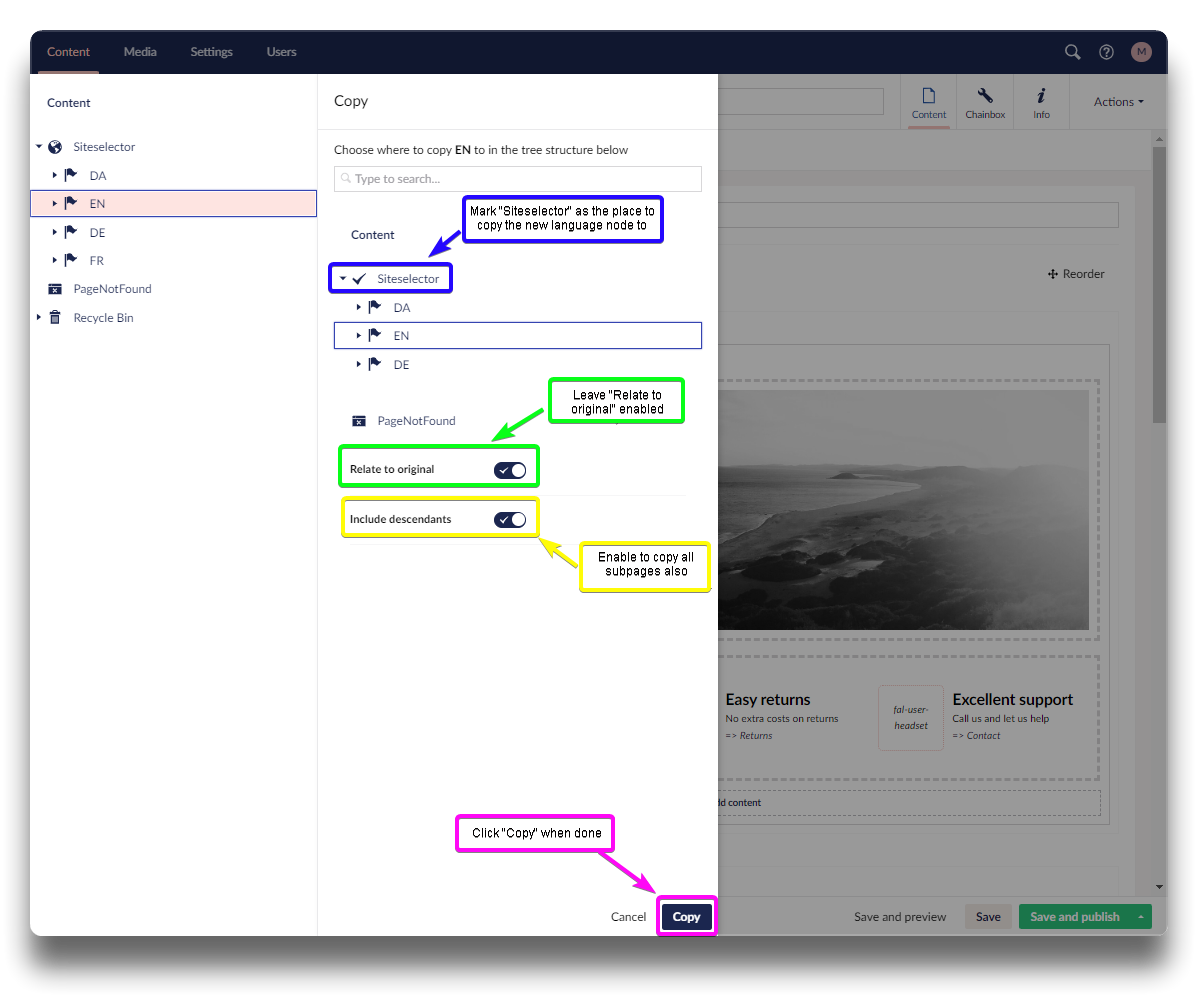
Click "Siteselector" to make under what page the copied node should lie.
Relate to original is enabled by default, and is the recommended setting. It will not cause any unwanted content updates across related nodes.
If "Include descendants" is enabled, all subpages (product lists, product details, checkout pages etc) will also be copied.
End by clicking "Copy"
Copy language node - step 1
Copy language node - step 2
Click "Ok" to close page
.png)
Copy language node - step 3
Setting up the new node
Info
The new node is grey in the tree structure indicating it is unpublished. Note option to publish all subpages with the language note in one go. See below.
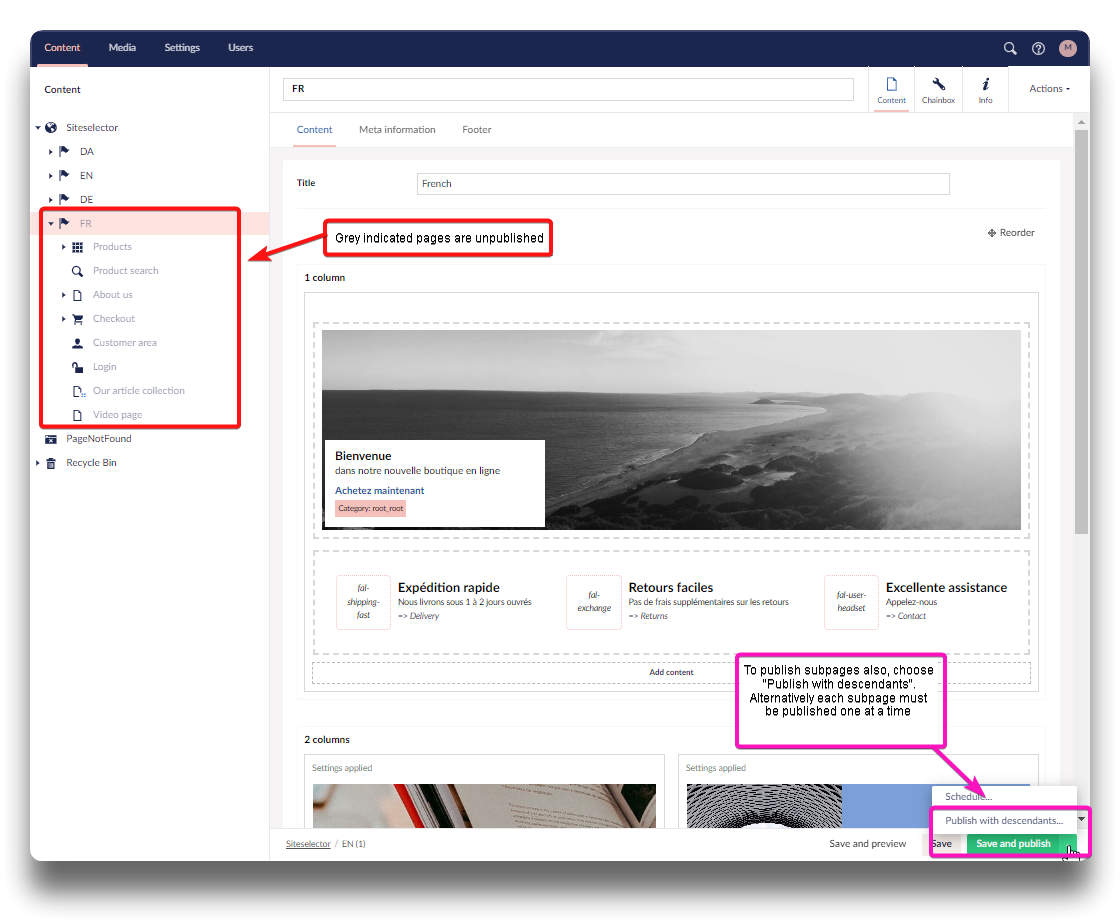
Option to publish the whole language note in one go
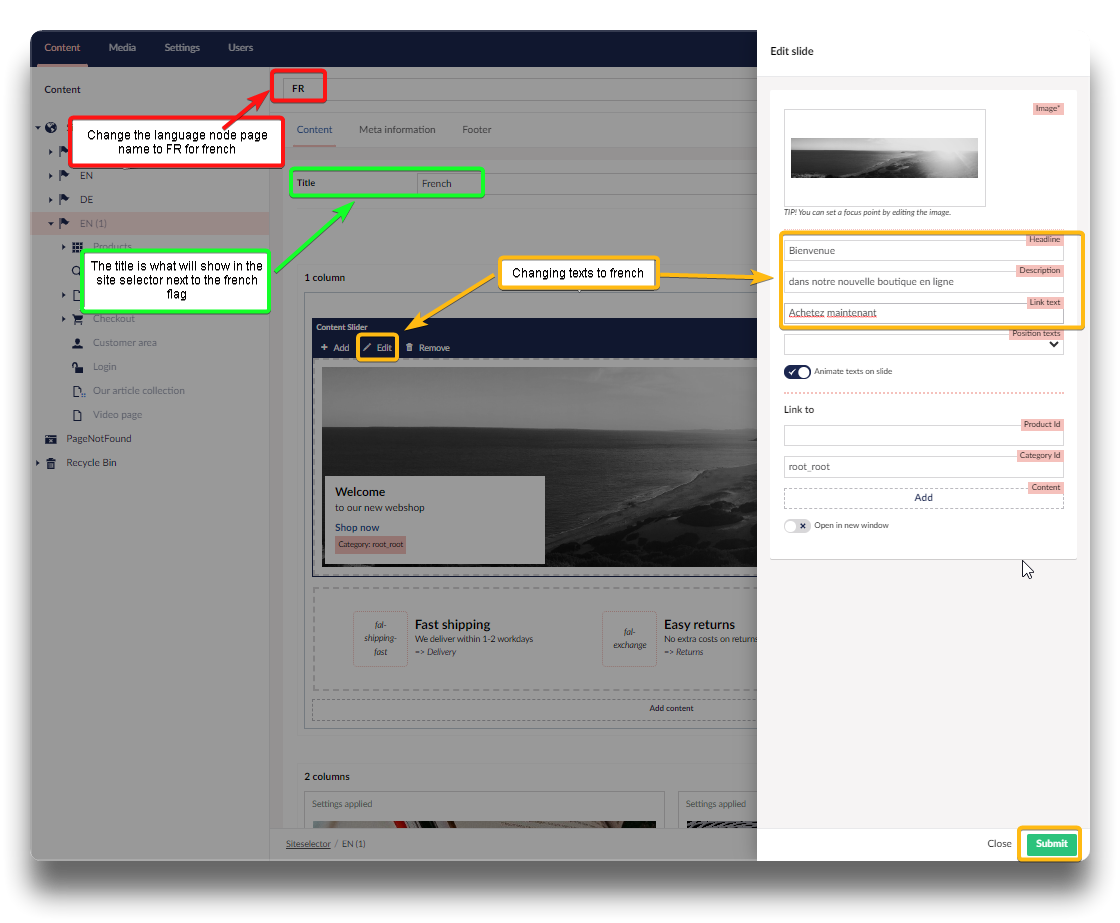
Change the language node title.
If the language node title reflects the ISO 639-1 language code for the specific language (here FR for french, the flag showing in the webshop site selector will automatically appear IF one of the following: DA, DE, EN, EU, FR, NO or SE. For additional flags, please contact Chainbox for assistance.
Second translate texts on elements if needed, this goes for subpages as well.
Translate as needed
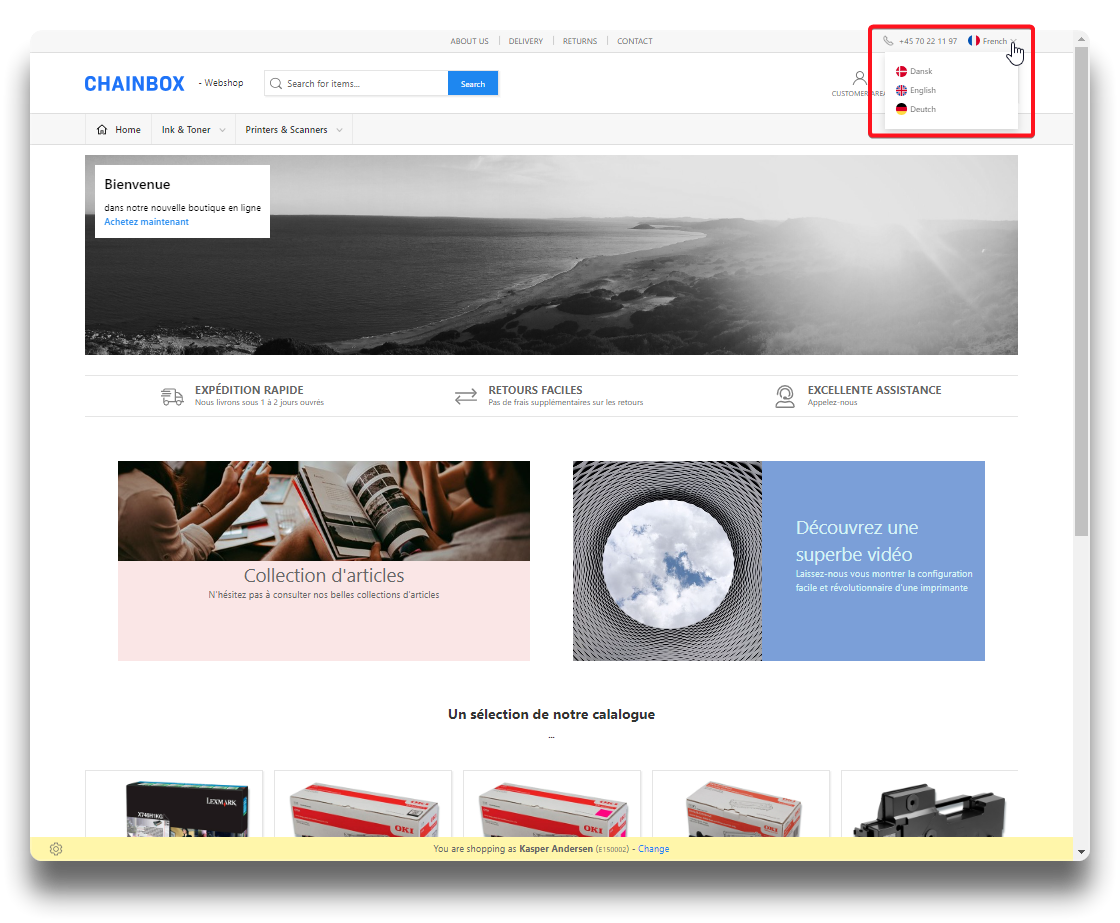
French flag in site selector
Below are other places in Umbraco that may or may not require attention on the new node:
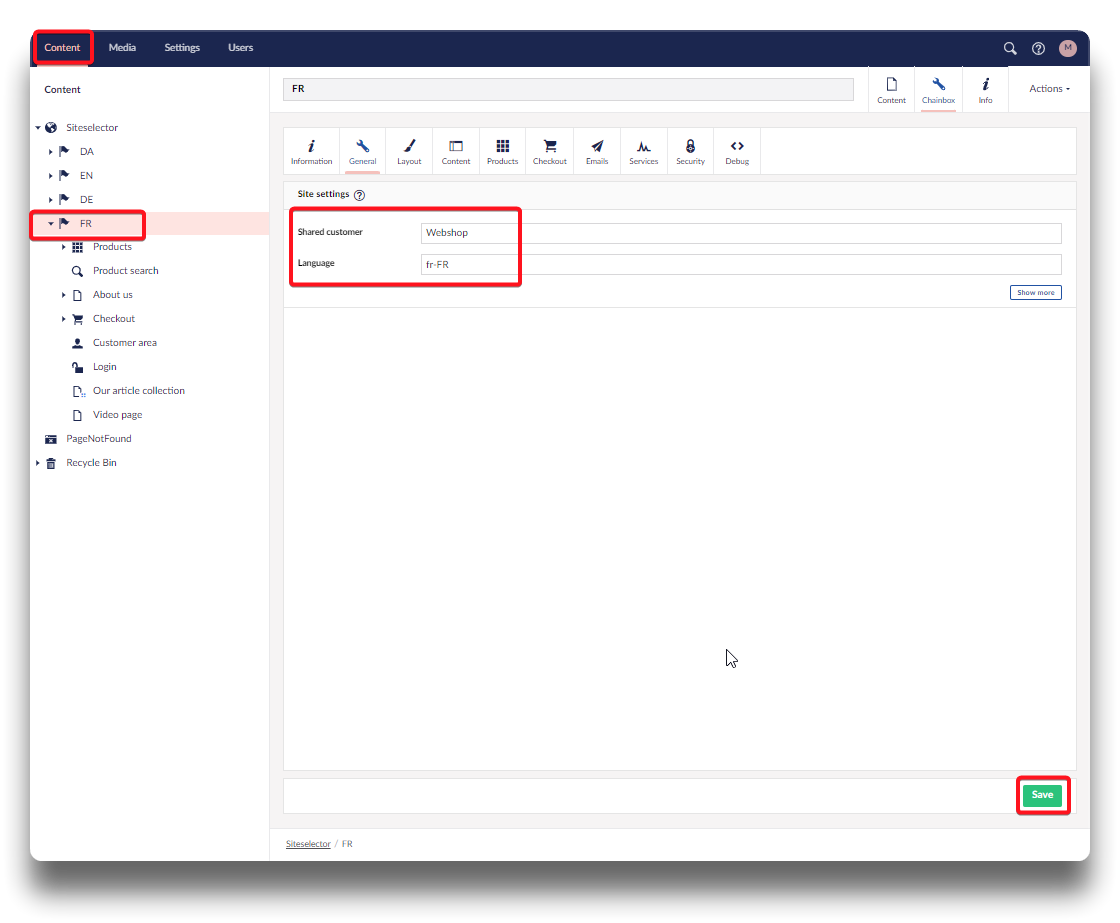
Shared customer/language
Consider if the shared customer should change with the new language node. Perhaps to a customer with a different currency?
Change language according to rules as described in below link:
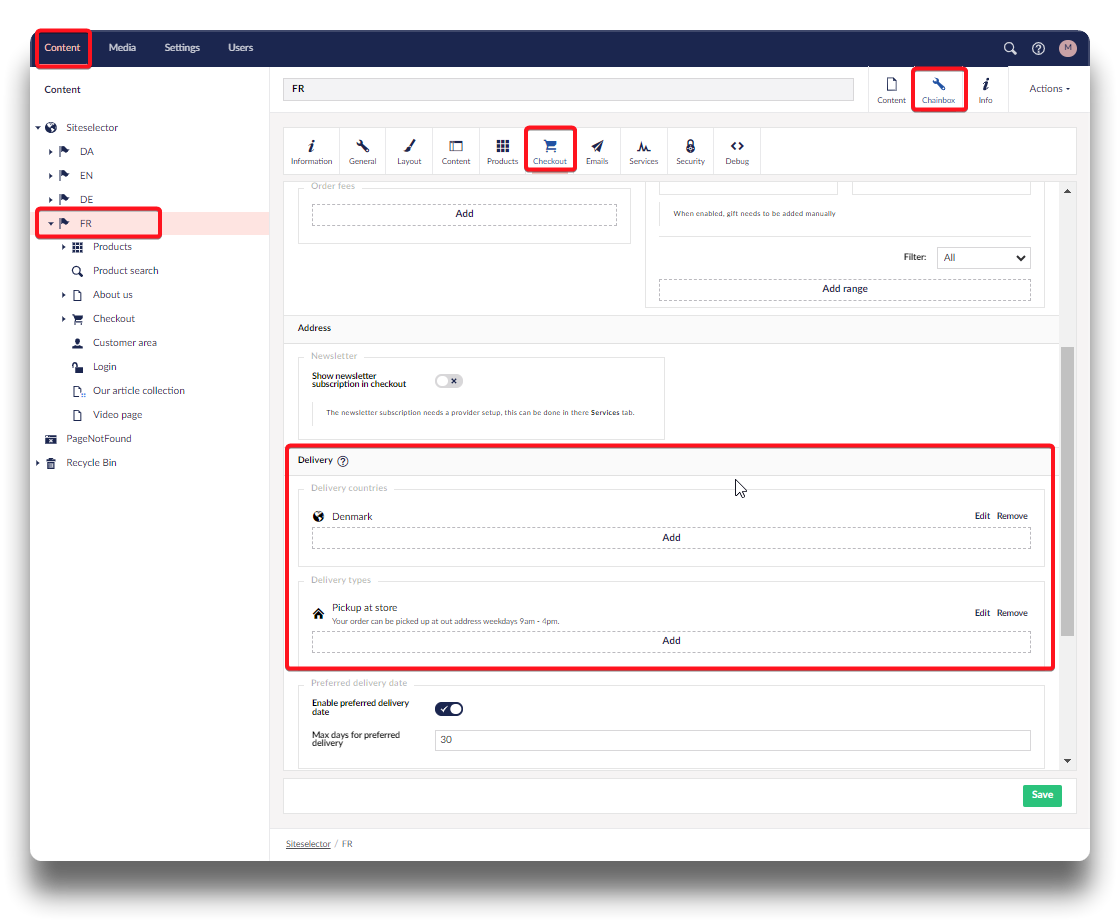
Delivery countries/Delivery types
With a new language, it might be relevant to change delivery countries and types. If so it is done here:
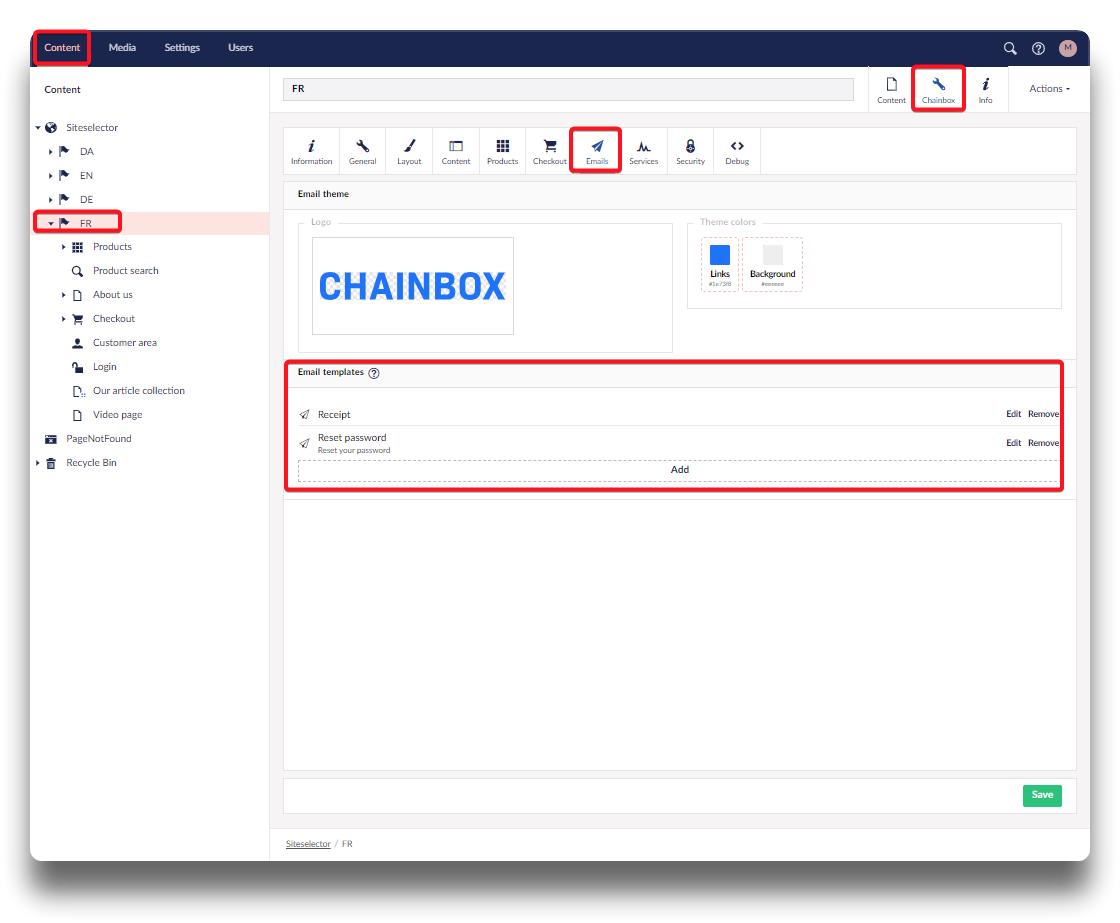
Email templates
Please also consider if email templates needs translations_
Creating the new language in PIM
Creating the new language in PIM serves two purposes:
- It enables localizable fields in PIM to also carry translations in the new language
- It enables the option to translate labels into the new language
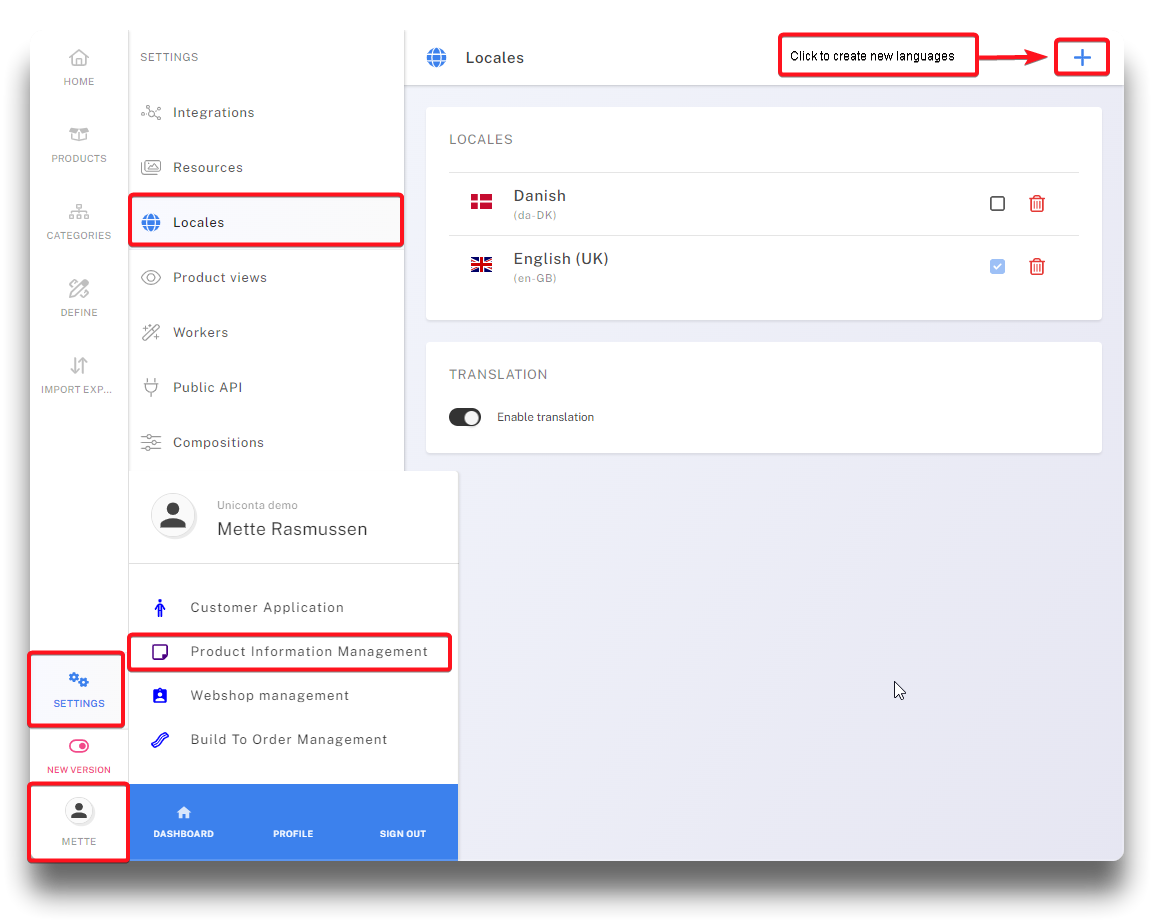
Go to PIM - settings - locales, and click "+" to create new languages.
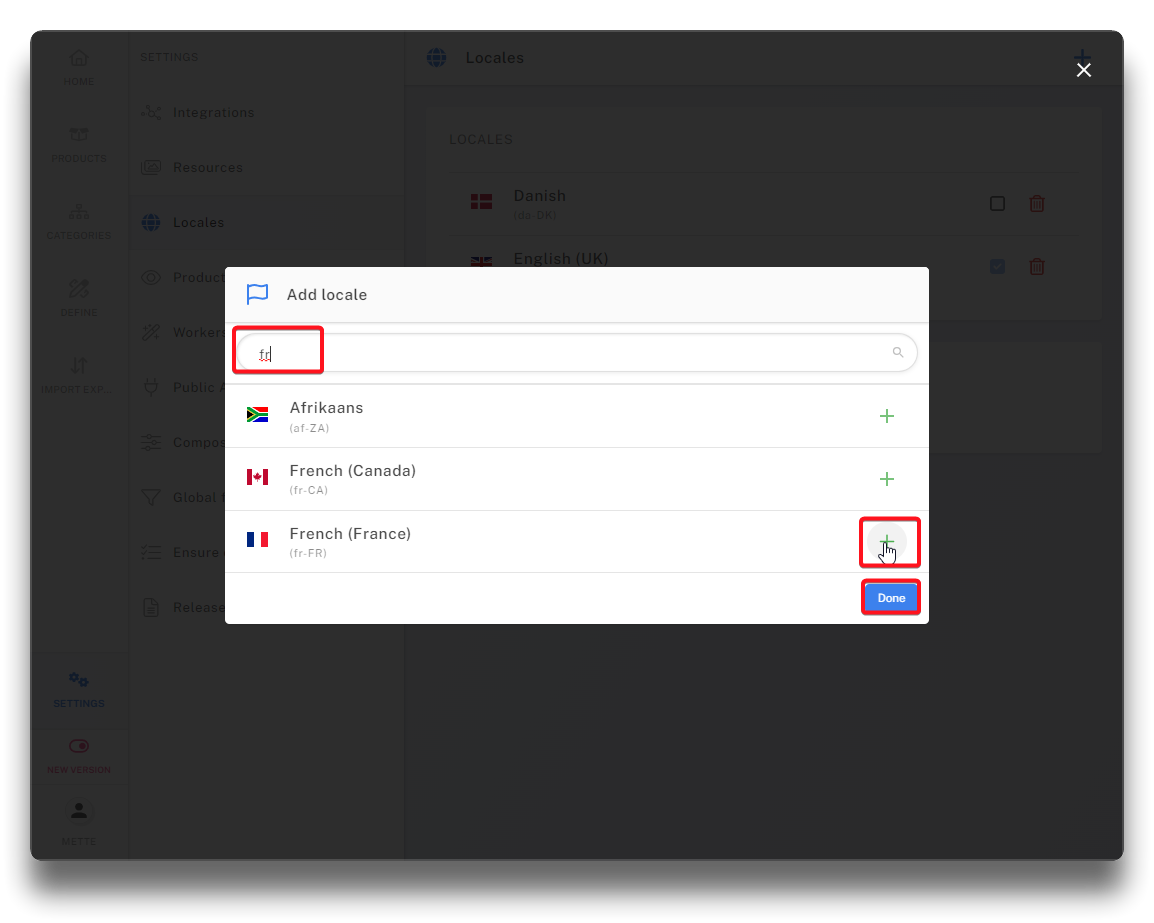
Brows or search for language and click "+" to add. Click "Done"
Add new language in PIM - step 1
Add new languages in PIM - step 2
The new language is now in the list, and localizable fields have option for translations.
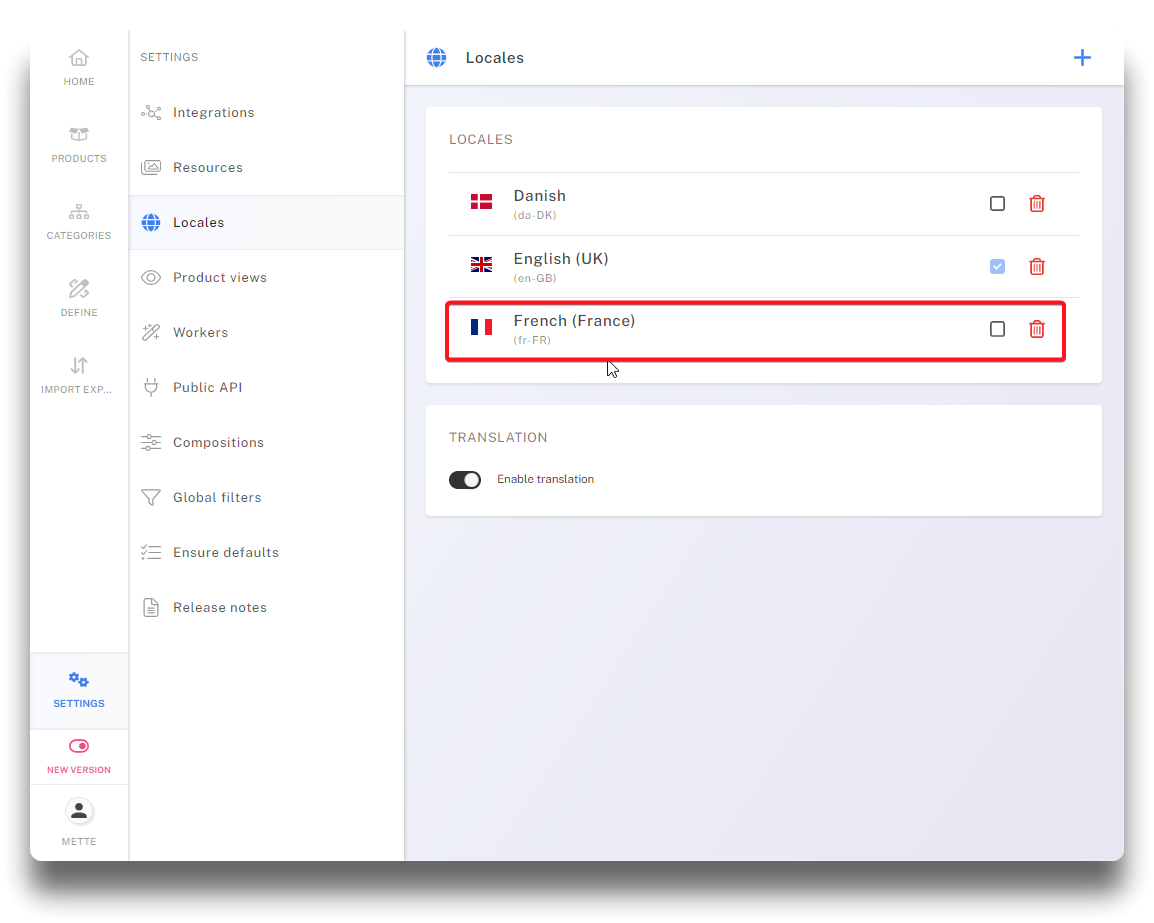
French language added
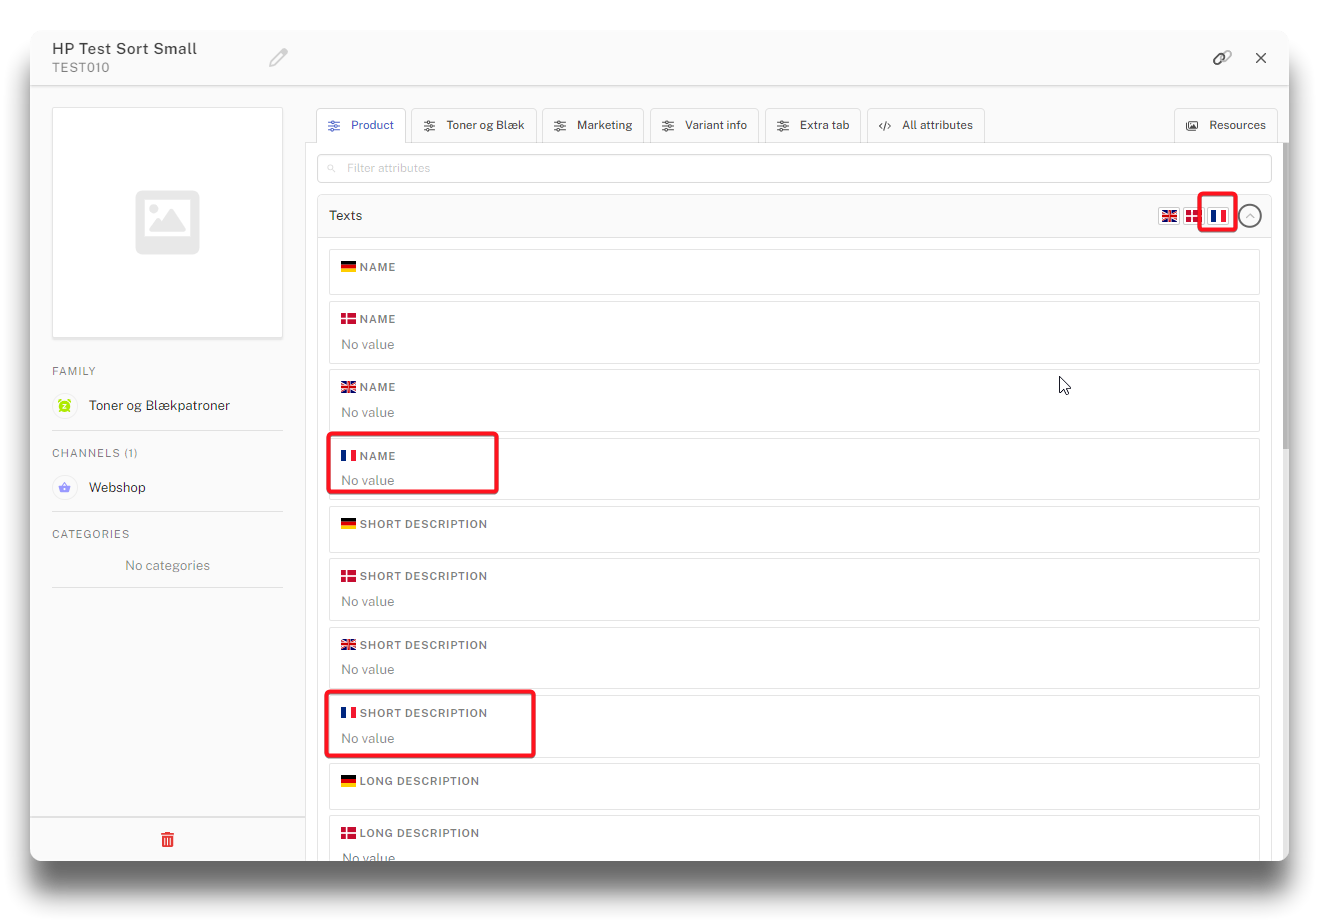
Option french translations on product detail
Translating labels
As opposed to all other changes for a new language node, translating labels can only be done once the language node have been published.
Label translation are for all guide texts in the webshop, not deriving from products or content. Such as "Continue", "Search", "Go back", "Add to cart" etc.
Notable here is, these labels will not be available for translation until they have been activated on the actual language node in the webshop. This means: Do a grand tour of the new language node. Pretend to be a customer and open all pages.
Ensure you are logged into the webshop as a supervisor. Click the setting icon and choose "Labels". Now translations will be an option.
Use the filters in the top to find fields that needs translations.

Navigation to label translations

Filter to find translations